


If you're in the US, your iPhone lets you set default apps for emailing, messaging, calling, web browsing, and even contactless payments and access. With iOS 18.4 and iPadOS 18.4, Apple also lets you pick a new default translation app.
Out of the box, your iPhone or iPad is preconfigured to use Apple's Translate app to translate text and speech into different languages. But you will be able to change it to a third-party option like Google Translate, Microsoft Translator, iTranslate, and Translate Now.
Since iOS 18.4 and iPadOS 18.4 were just released on March 31, not all translation apps will immediately be available as a default option. Developers must update their apps to support this feature by adding specific system permissions and integration features. If your preferred app doesn't show up, it hasn't been updated with the correct entitlement, access key, app extension, and UI. Keep an eye out for app updates that may add this capability.
Changing your default translation app
Picking a new default translator on your iPhone or iPad is simple. First, ensure you're running iOS 18.4 or iPadOS 18.4 or later. Then, choose your default translate app from the Default Apps menu or a translation app's settings.
From the Default Apps menu
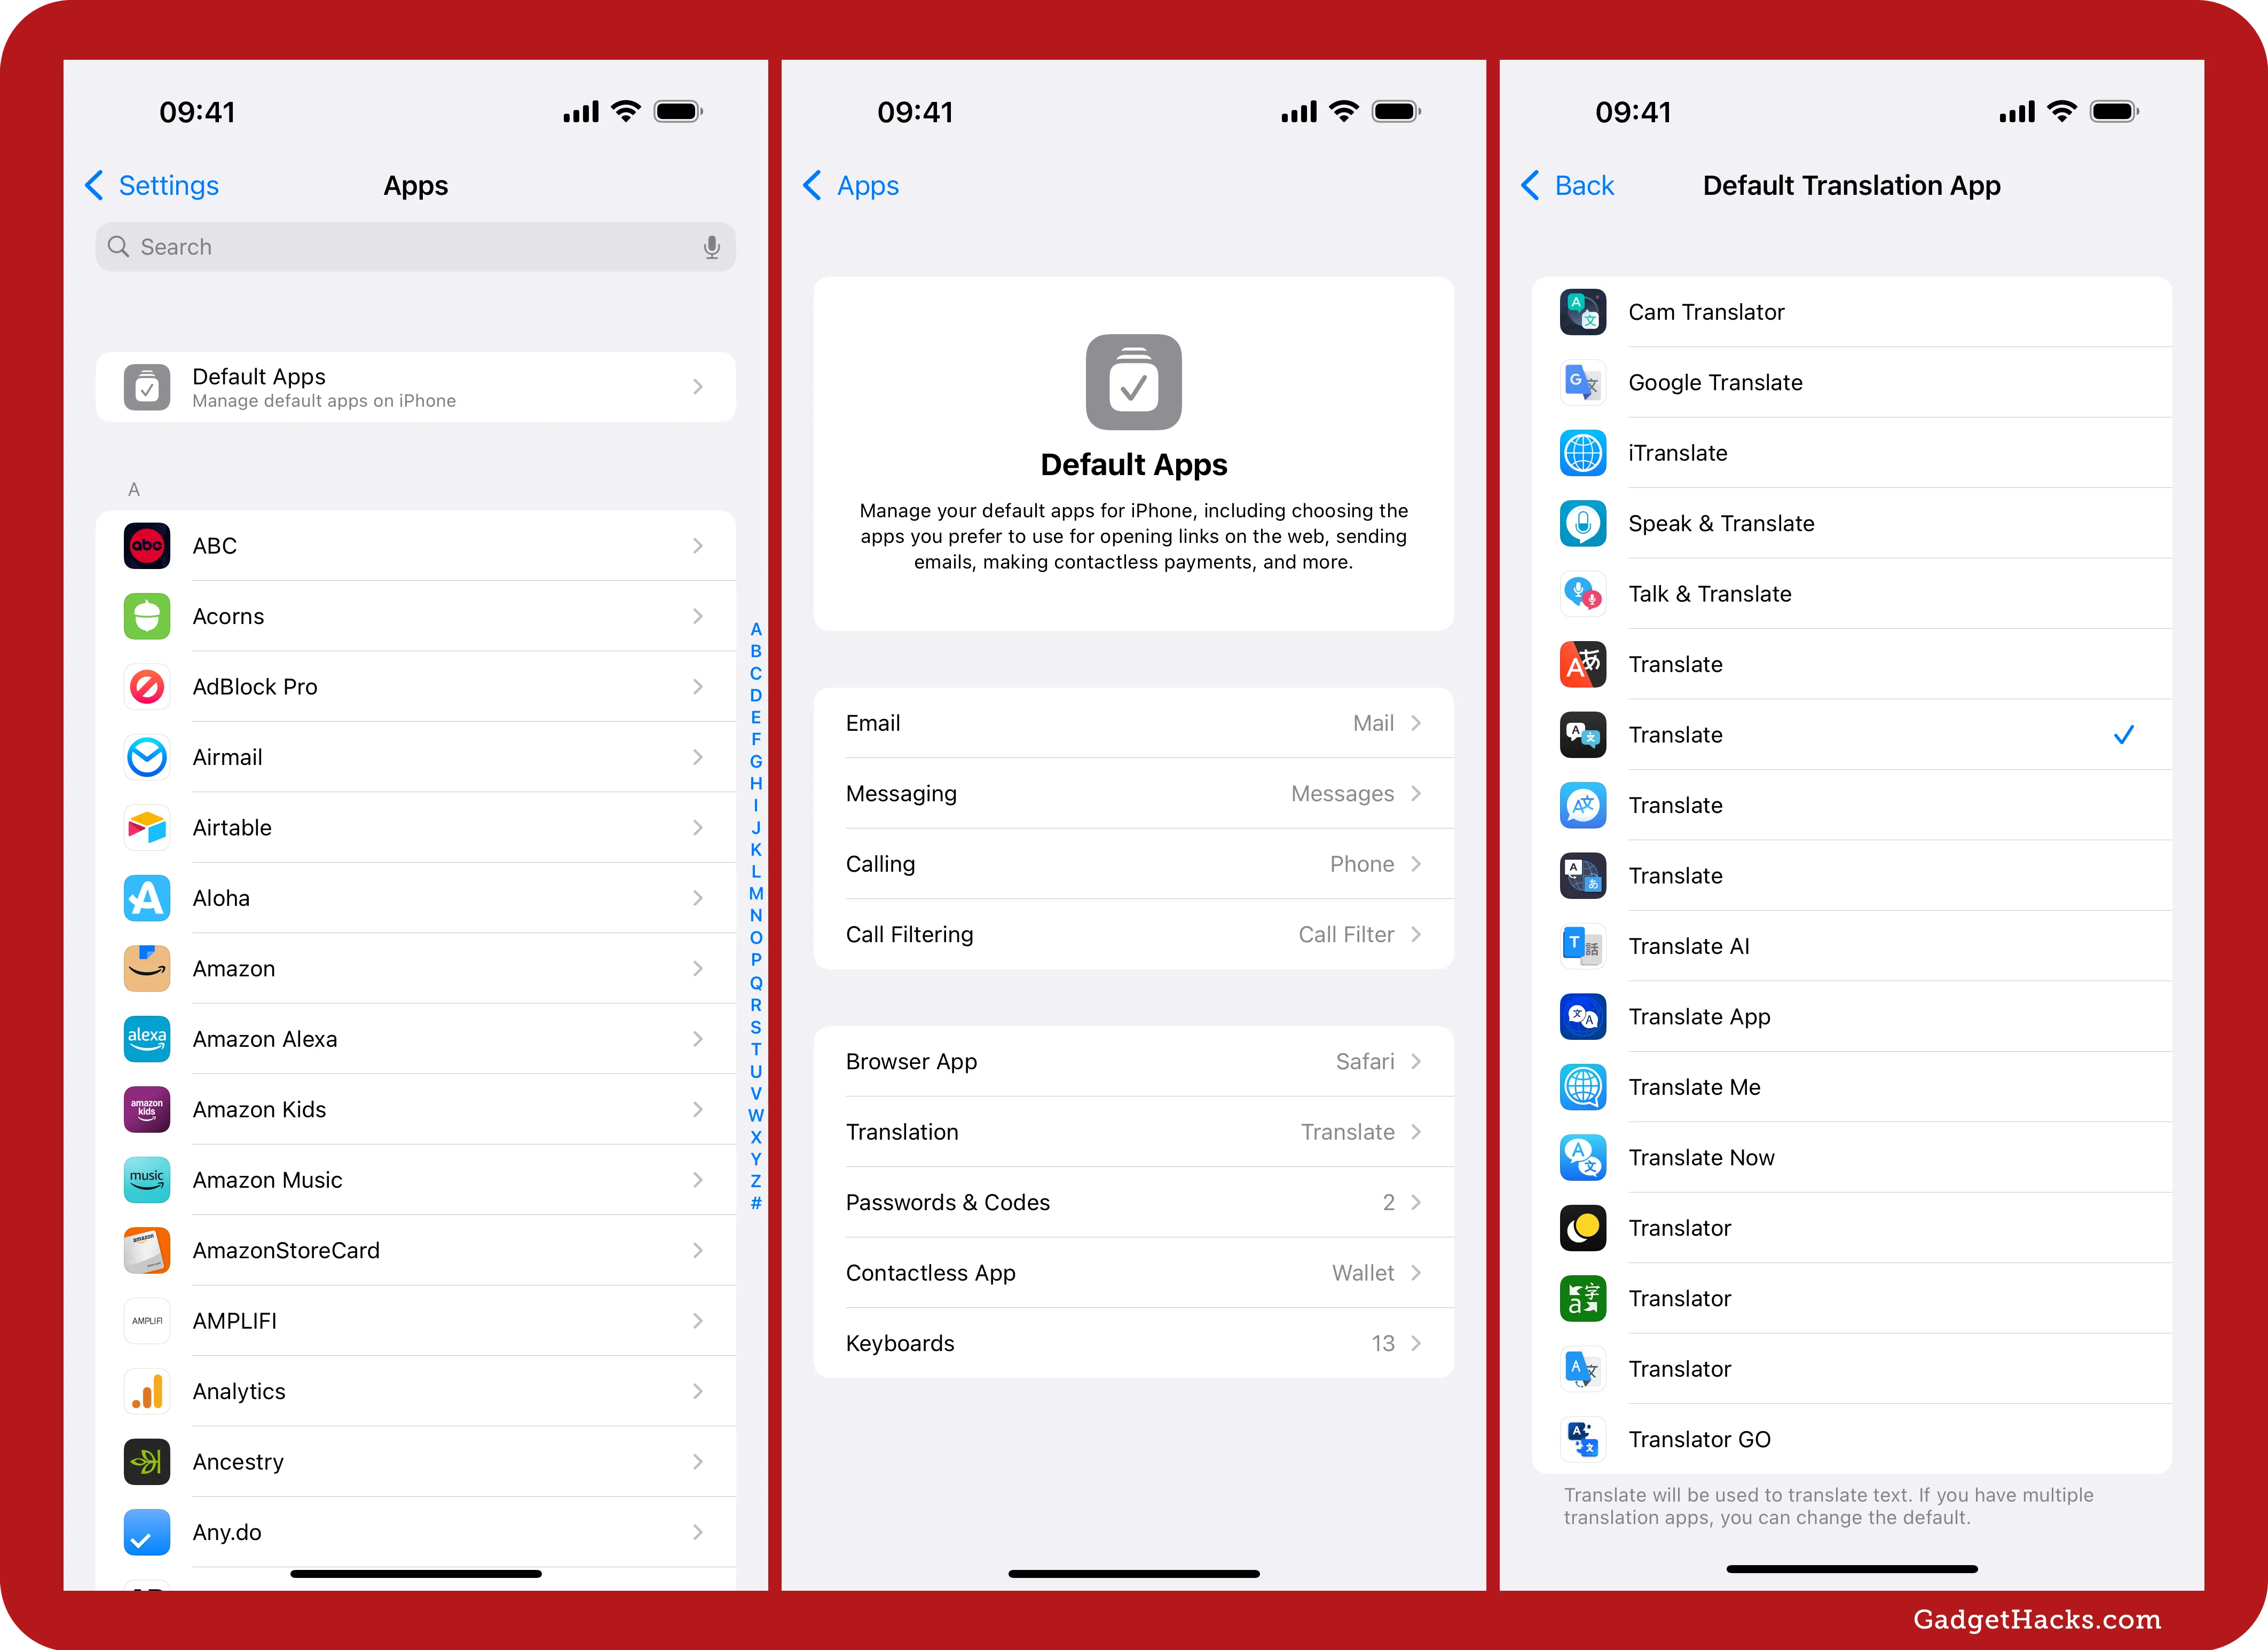
Open Settings on your iPhone or iPad.
Tap Apps at the bottom.
Select Default Apps at the top.
Tap Translation.
Choose from the available translation apps installed on your device.
From a translate app's settings
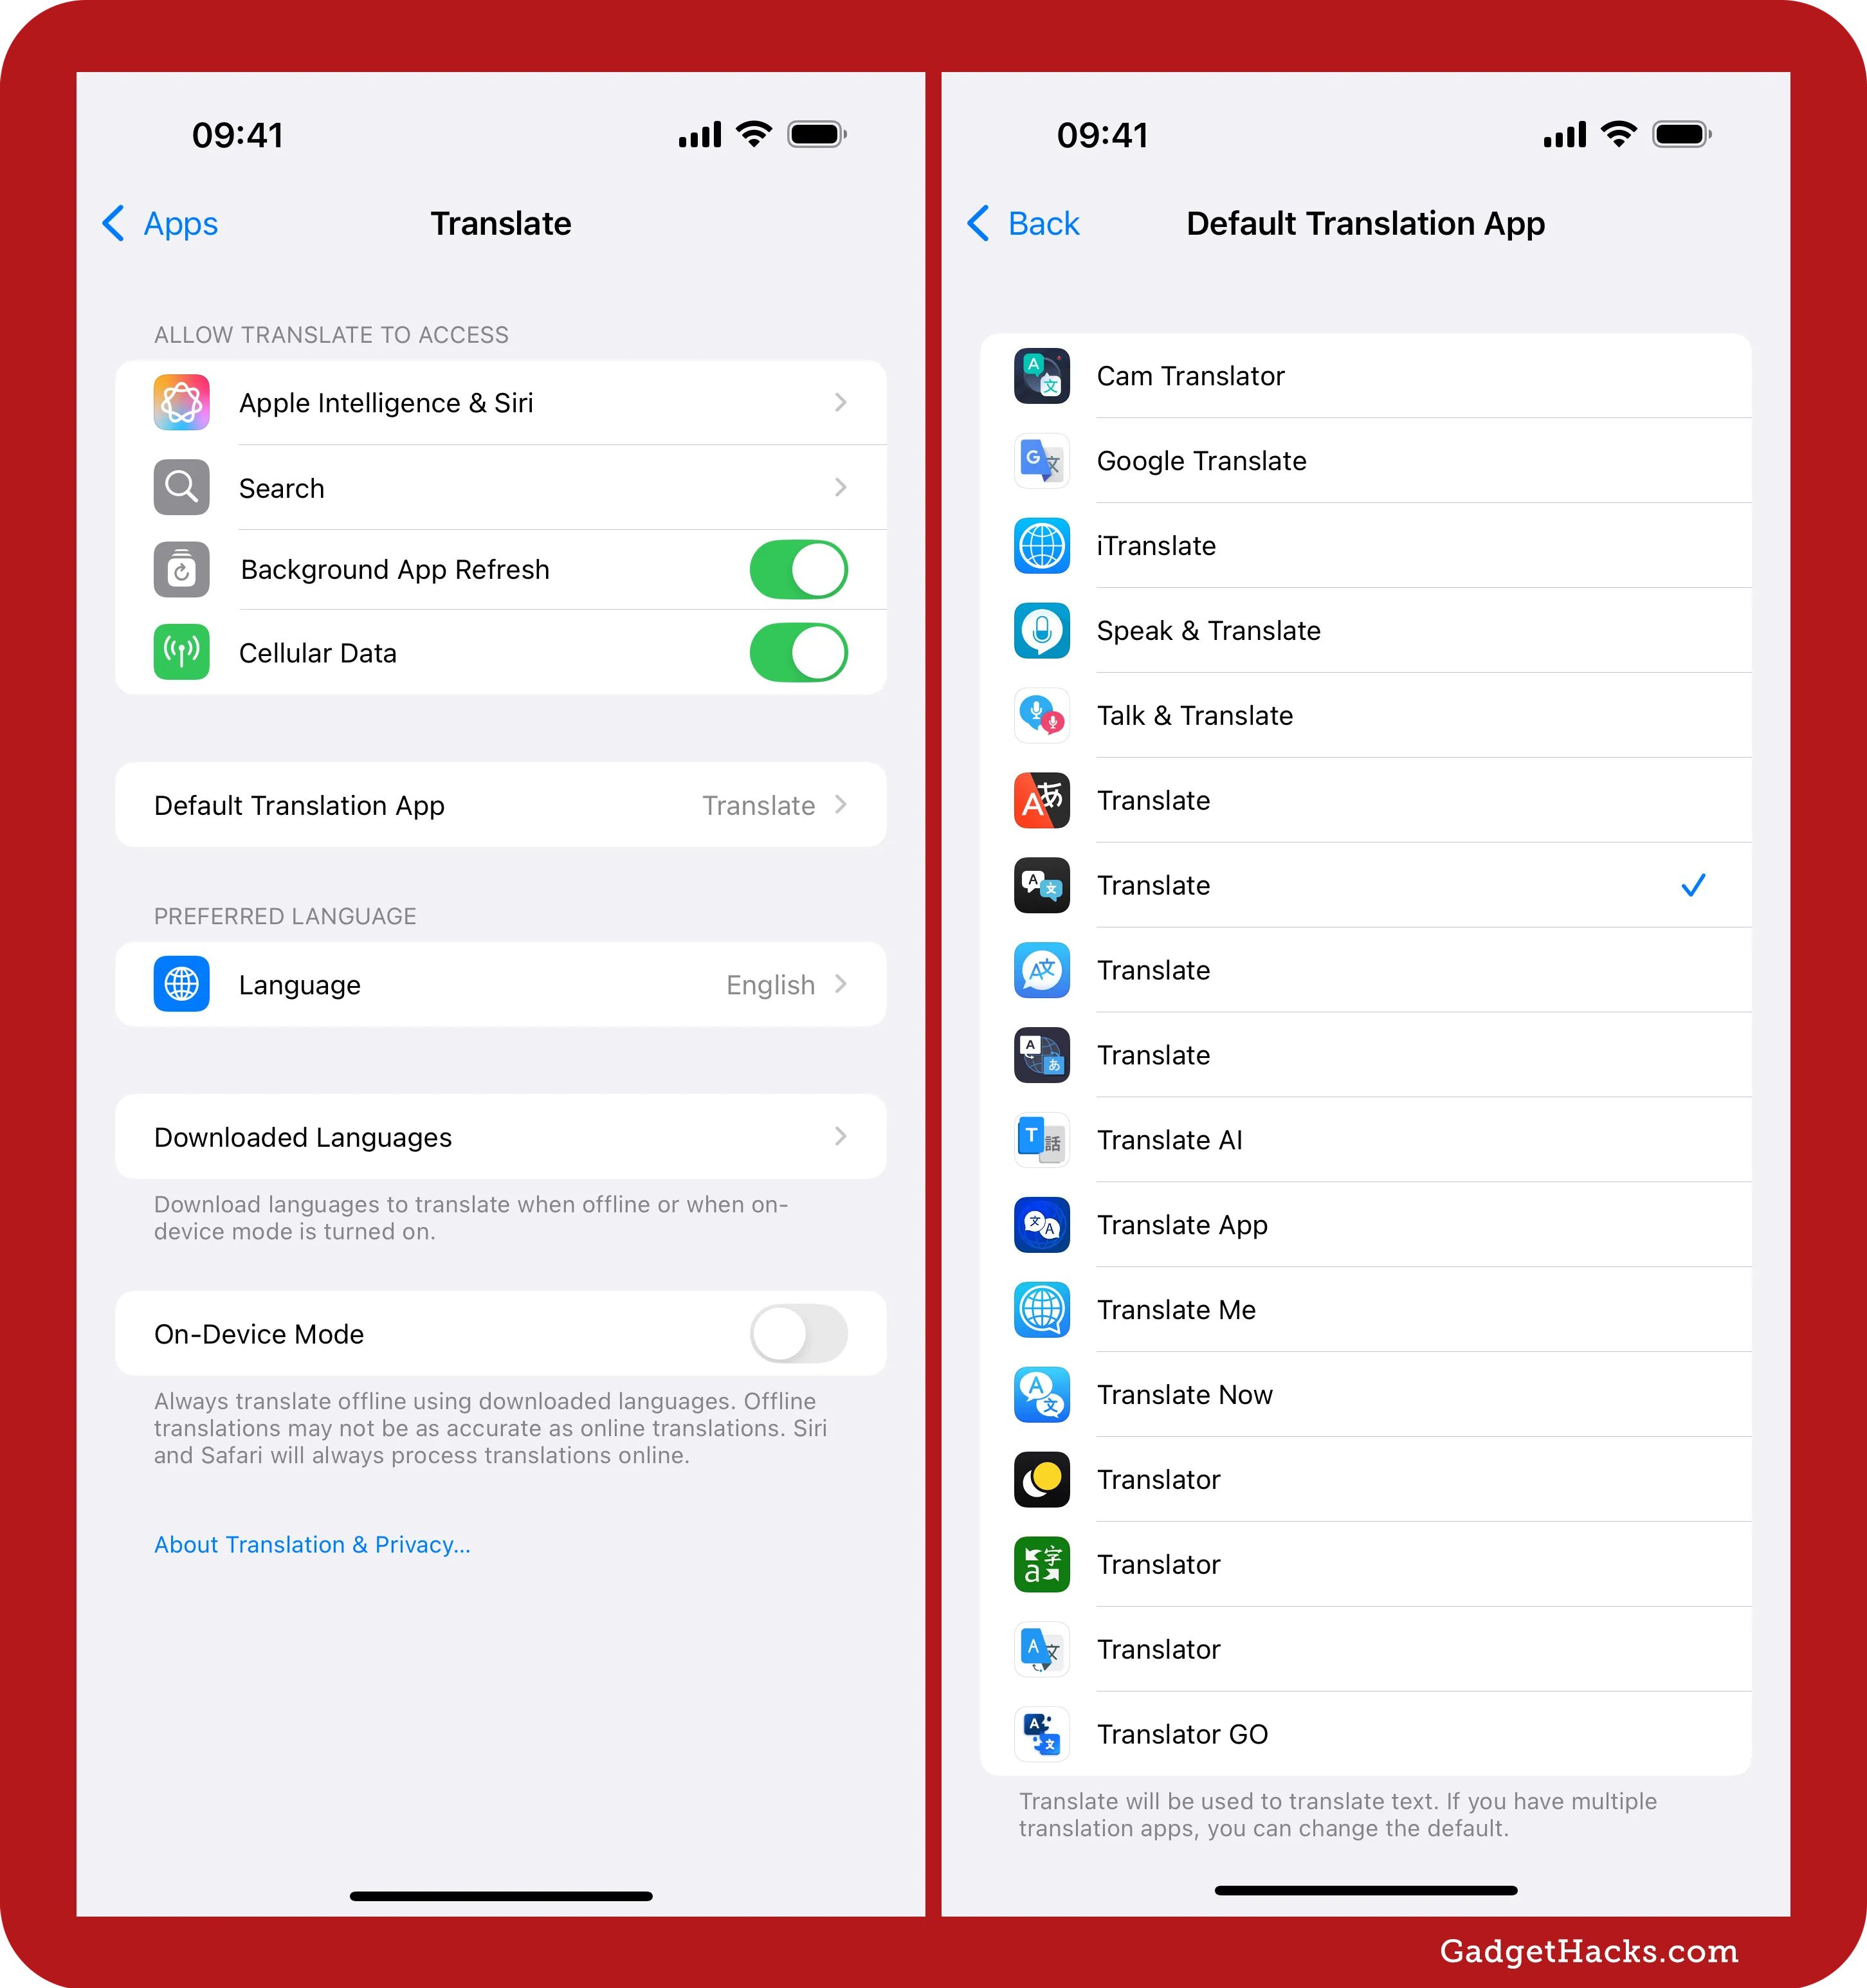
Open Settings on your iPhone or iPad.
Tap Apps at the bottom.
Select a compatible translation app from the list.
Tap Default Translation App.
Choose from the available translation apps installed on your device.
Once set, your device will use the selected app whenever you request a translation. Since there are not third-party apps that support being a default translation app yet, it's unclear exactly how and where your new translations will integrate with iOS and iPadOS. It may work through Siri, system-wide translation, or selected text (such as when using the Translate option in the contextual menu).
Don't Miss: iOS 18.4 Has 60+ New Features and Changes for iPhone You Won't Want to Miss
Cover photo and screenshots by Gadget Hacks.


Comments
Be the first, drop a comment!