


With iOS 18, you get better note-taking capabilities in the revamped Notes app, advanced features like conversions and results history in the more powerful Calculator, and interactive Math Notes, a feature in both apps that's a game changer for students and professionals dealing with complex equations. But Apple didn't forget about Reminders, which has become more than a simple to-do-list app.
Reminders has new features as well, from the long-overdue integration with Calendar to interface changes on the Home Screen, that make it easier to organize and complete tasks. These updates come with iOS 18, released on Sept. 16, and most of these features and changes also work on iPadOS 18 for iPad, as well as on macOS Sequoia 15.
1. Lock the Reminders App
Like many other apps on iOS 18 and iPadOS 18, you can now lock all your reminders behind Face ID, Touch ID, or passcode protection. By doing so, you'll also have to authenticate yourself to access your reminders from within other apps, like Calendar and even Settings.
Until now, you had to use a workaround if you wanted biometric or passcode protection for apps, but now you can secure the Reminders app from its app icon's quick actions. If you lock Reminders behind Face ID or Touch ID, you can still use your device passcode to get in when biometric authentication fails.
- Complete Instructions: How to Lock and Hide Apps on Your iPhone or iPad — The Official Way
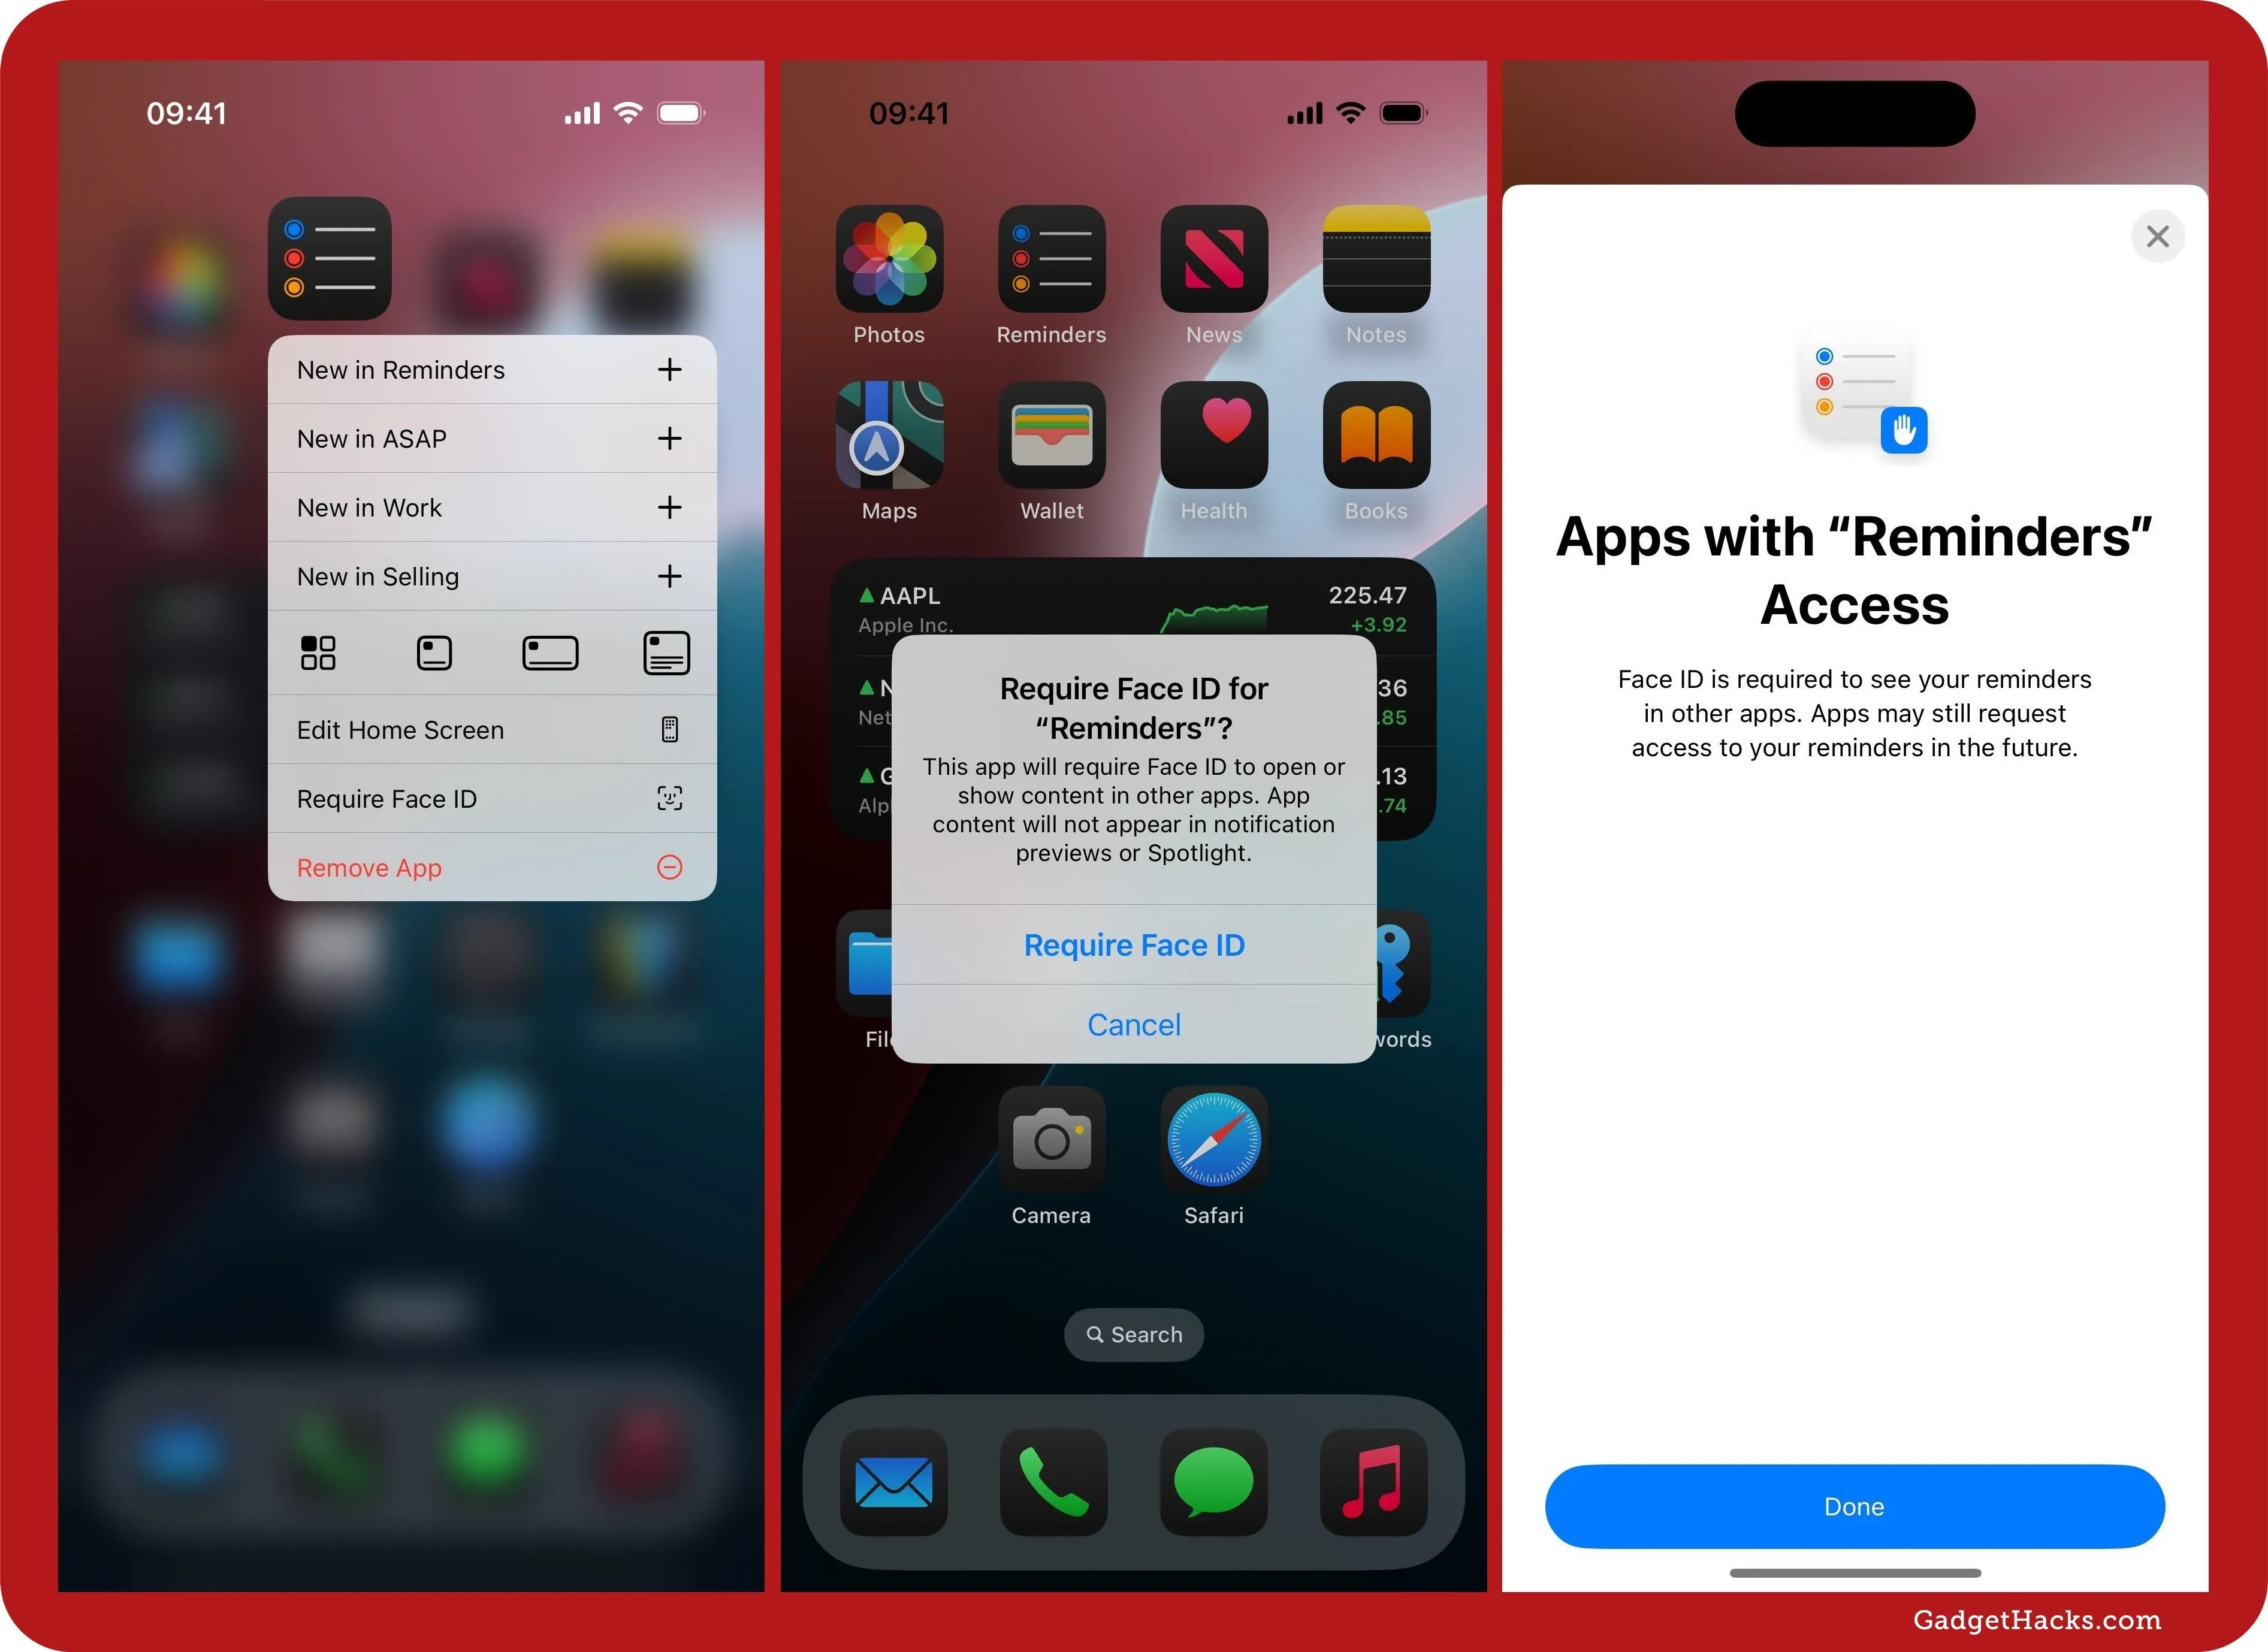
While it's possible to both lock and hide third-party apps from the Home Screen, App Library, Spotlight Search, and Siri, Reminders and other stock Apple apps can only be hidden.
2. View and Manage Reminders in Calendar
One of the most significant updates in iOS 18, iPadOS 18, and macOS 15 is the seamless integration of your reminders with the Calendar app. Now, any reminder with a date and time automatically appears in Calendar, helping you keep track of all your tasks and appointments in one place. You can even mark a reminder as complete from Calendar.
- Complete Guide: How to Create and Manage Reminders Without Ever Leaving the Calendar App on Your iPhone, iPad, or Mac
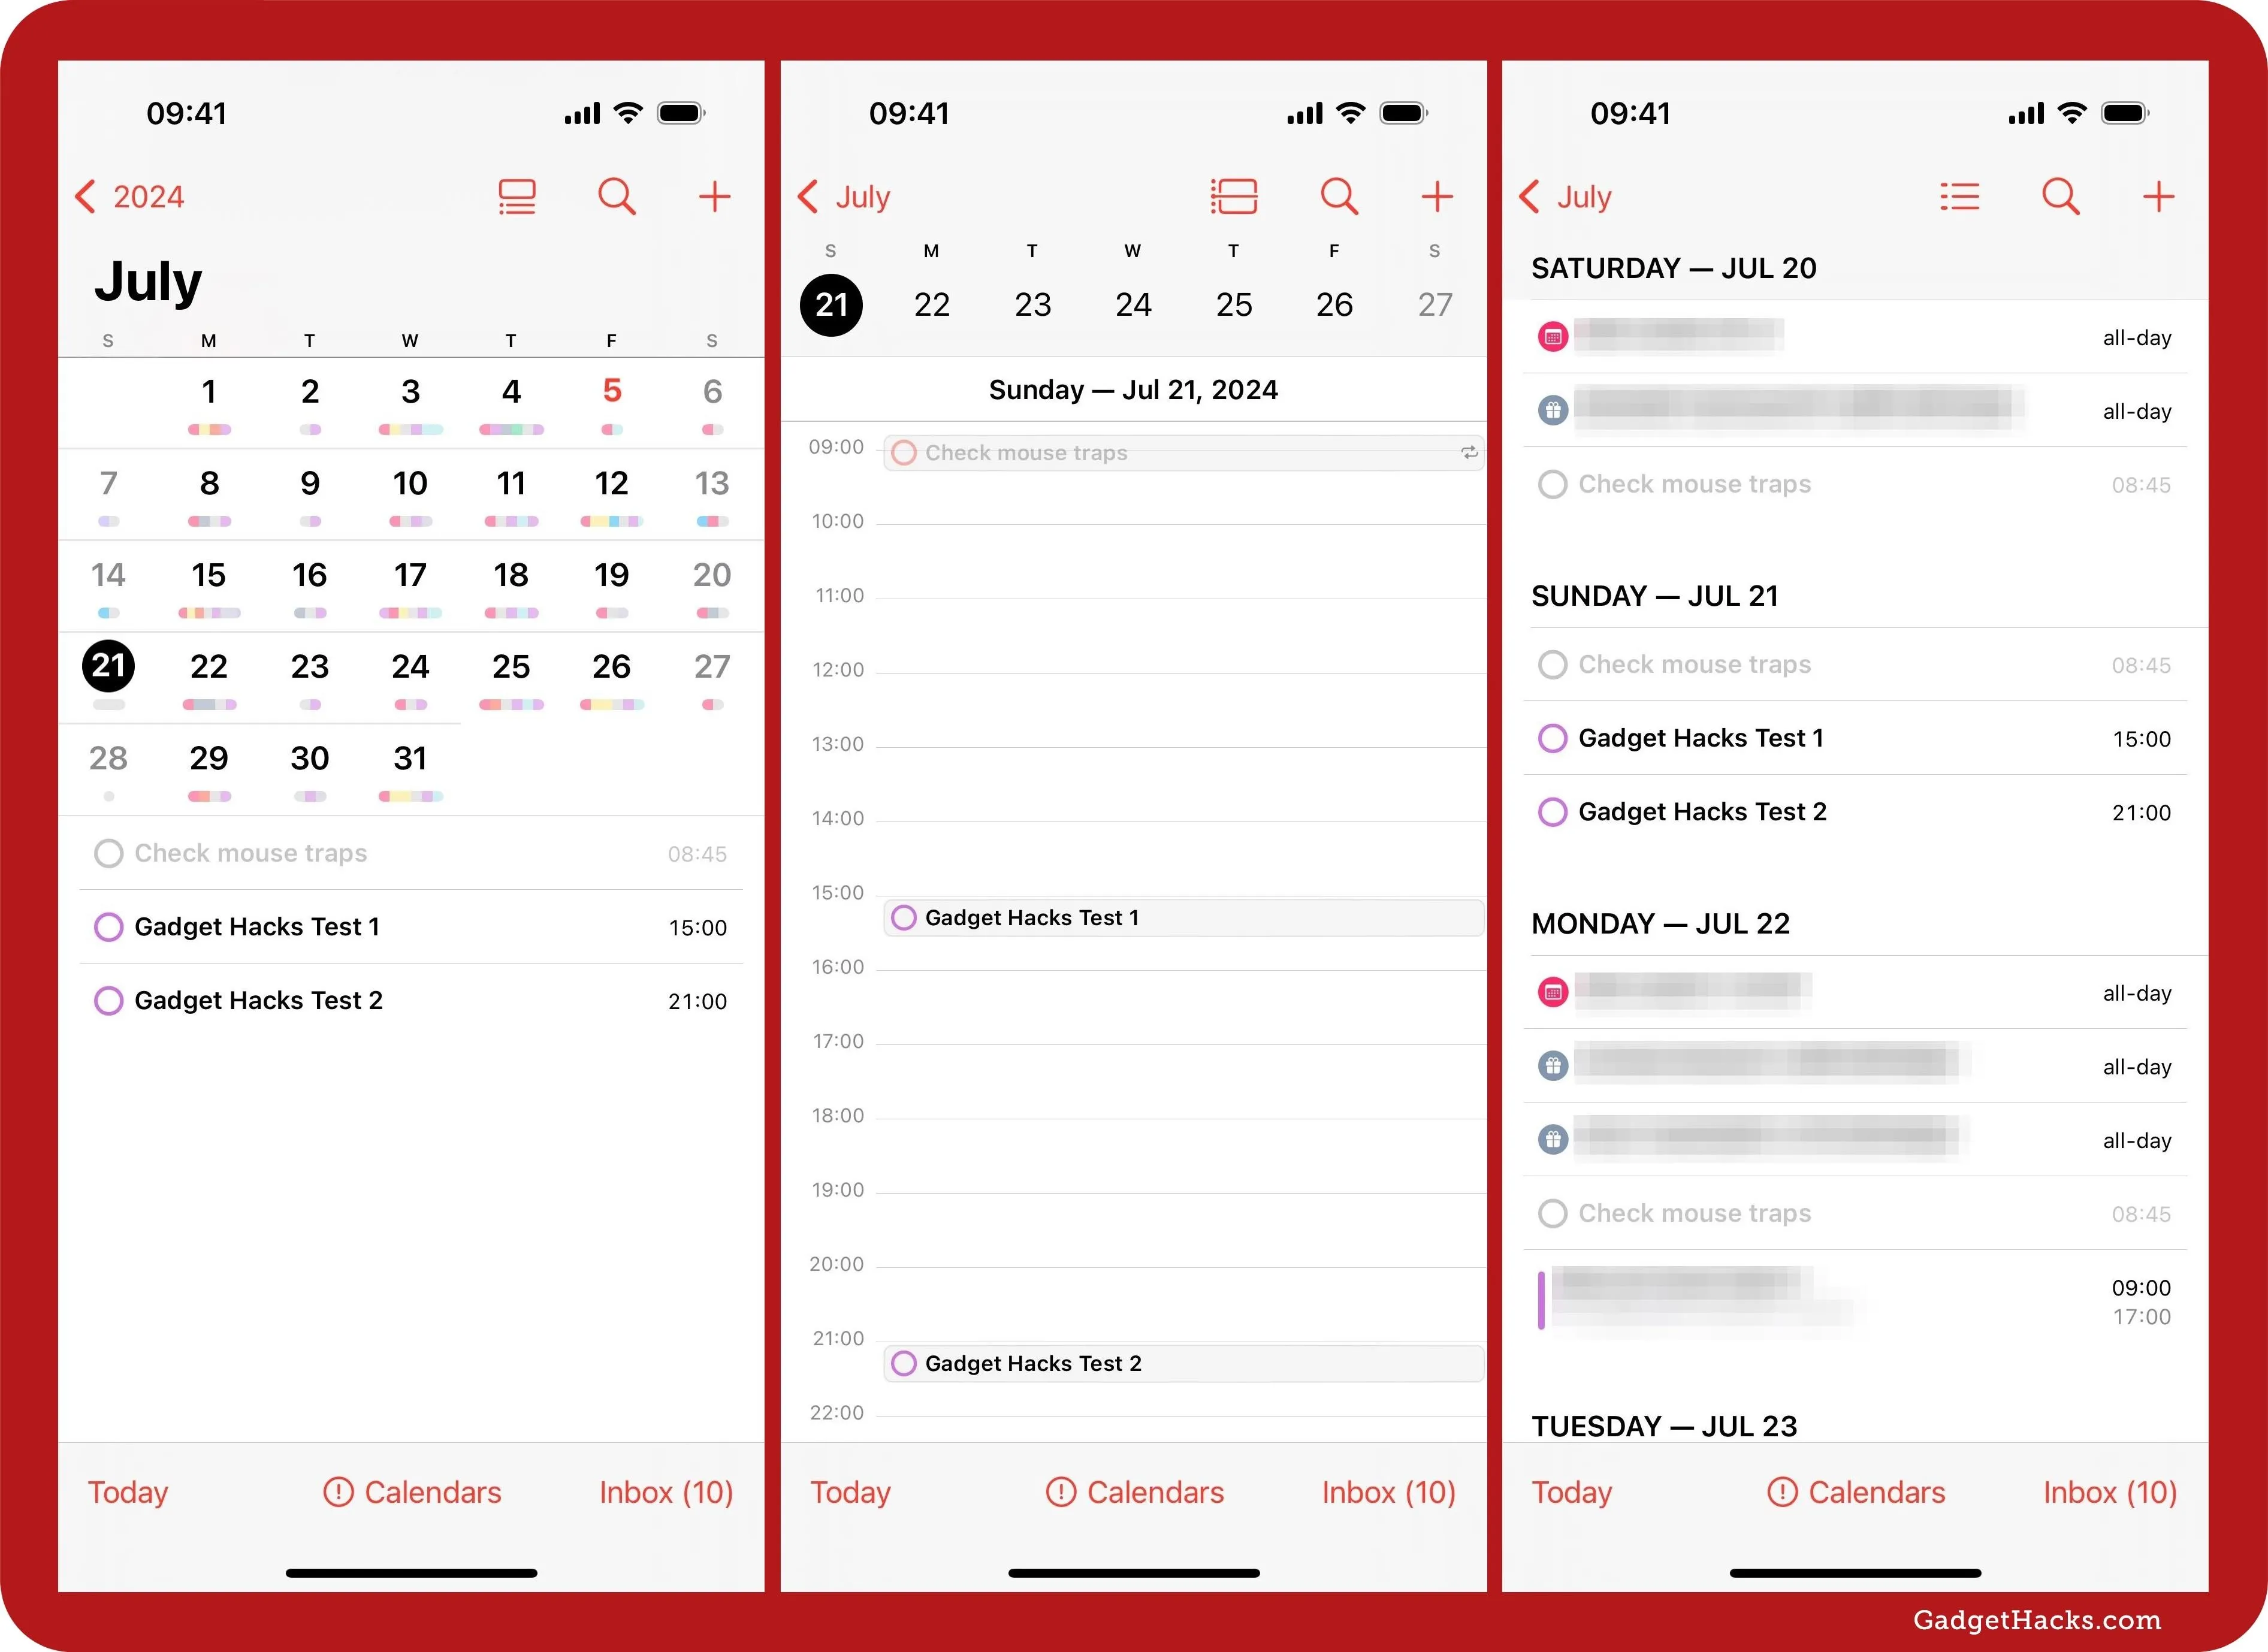
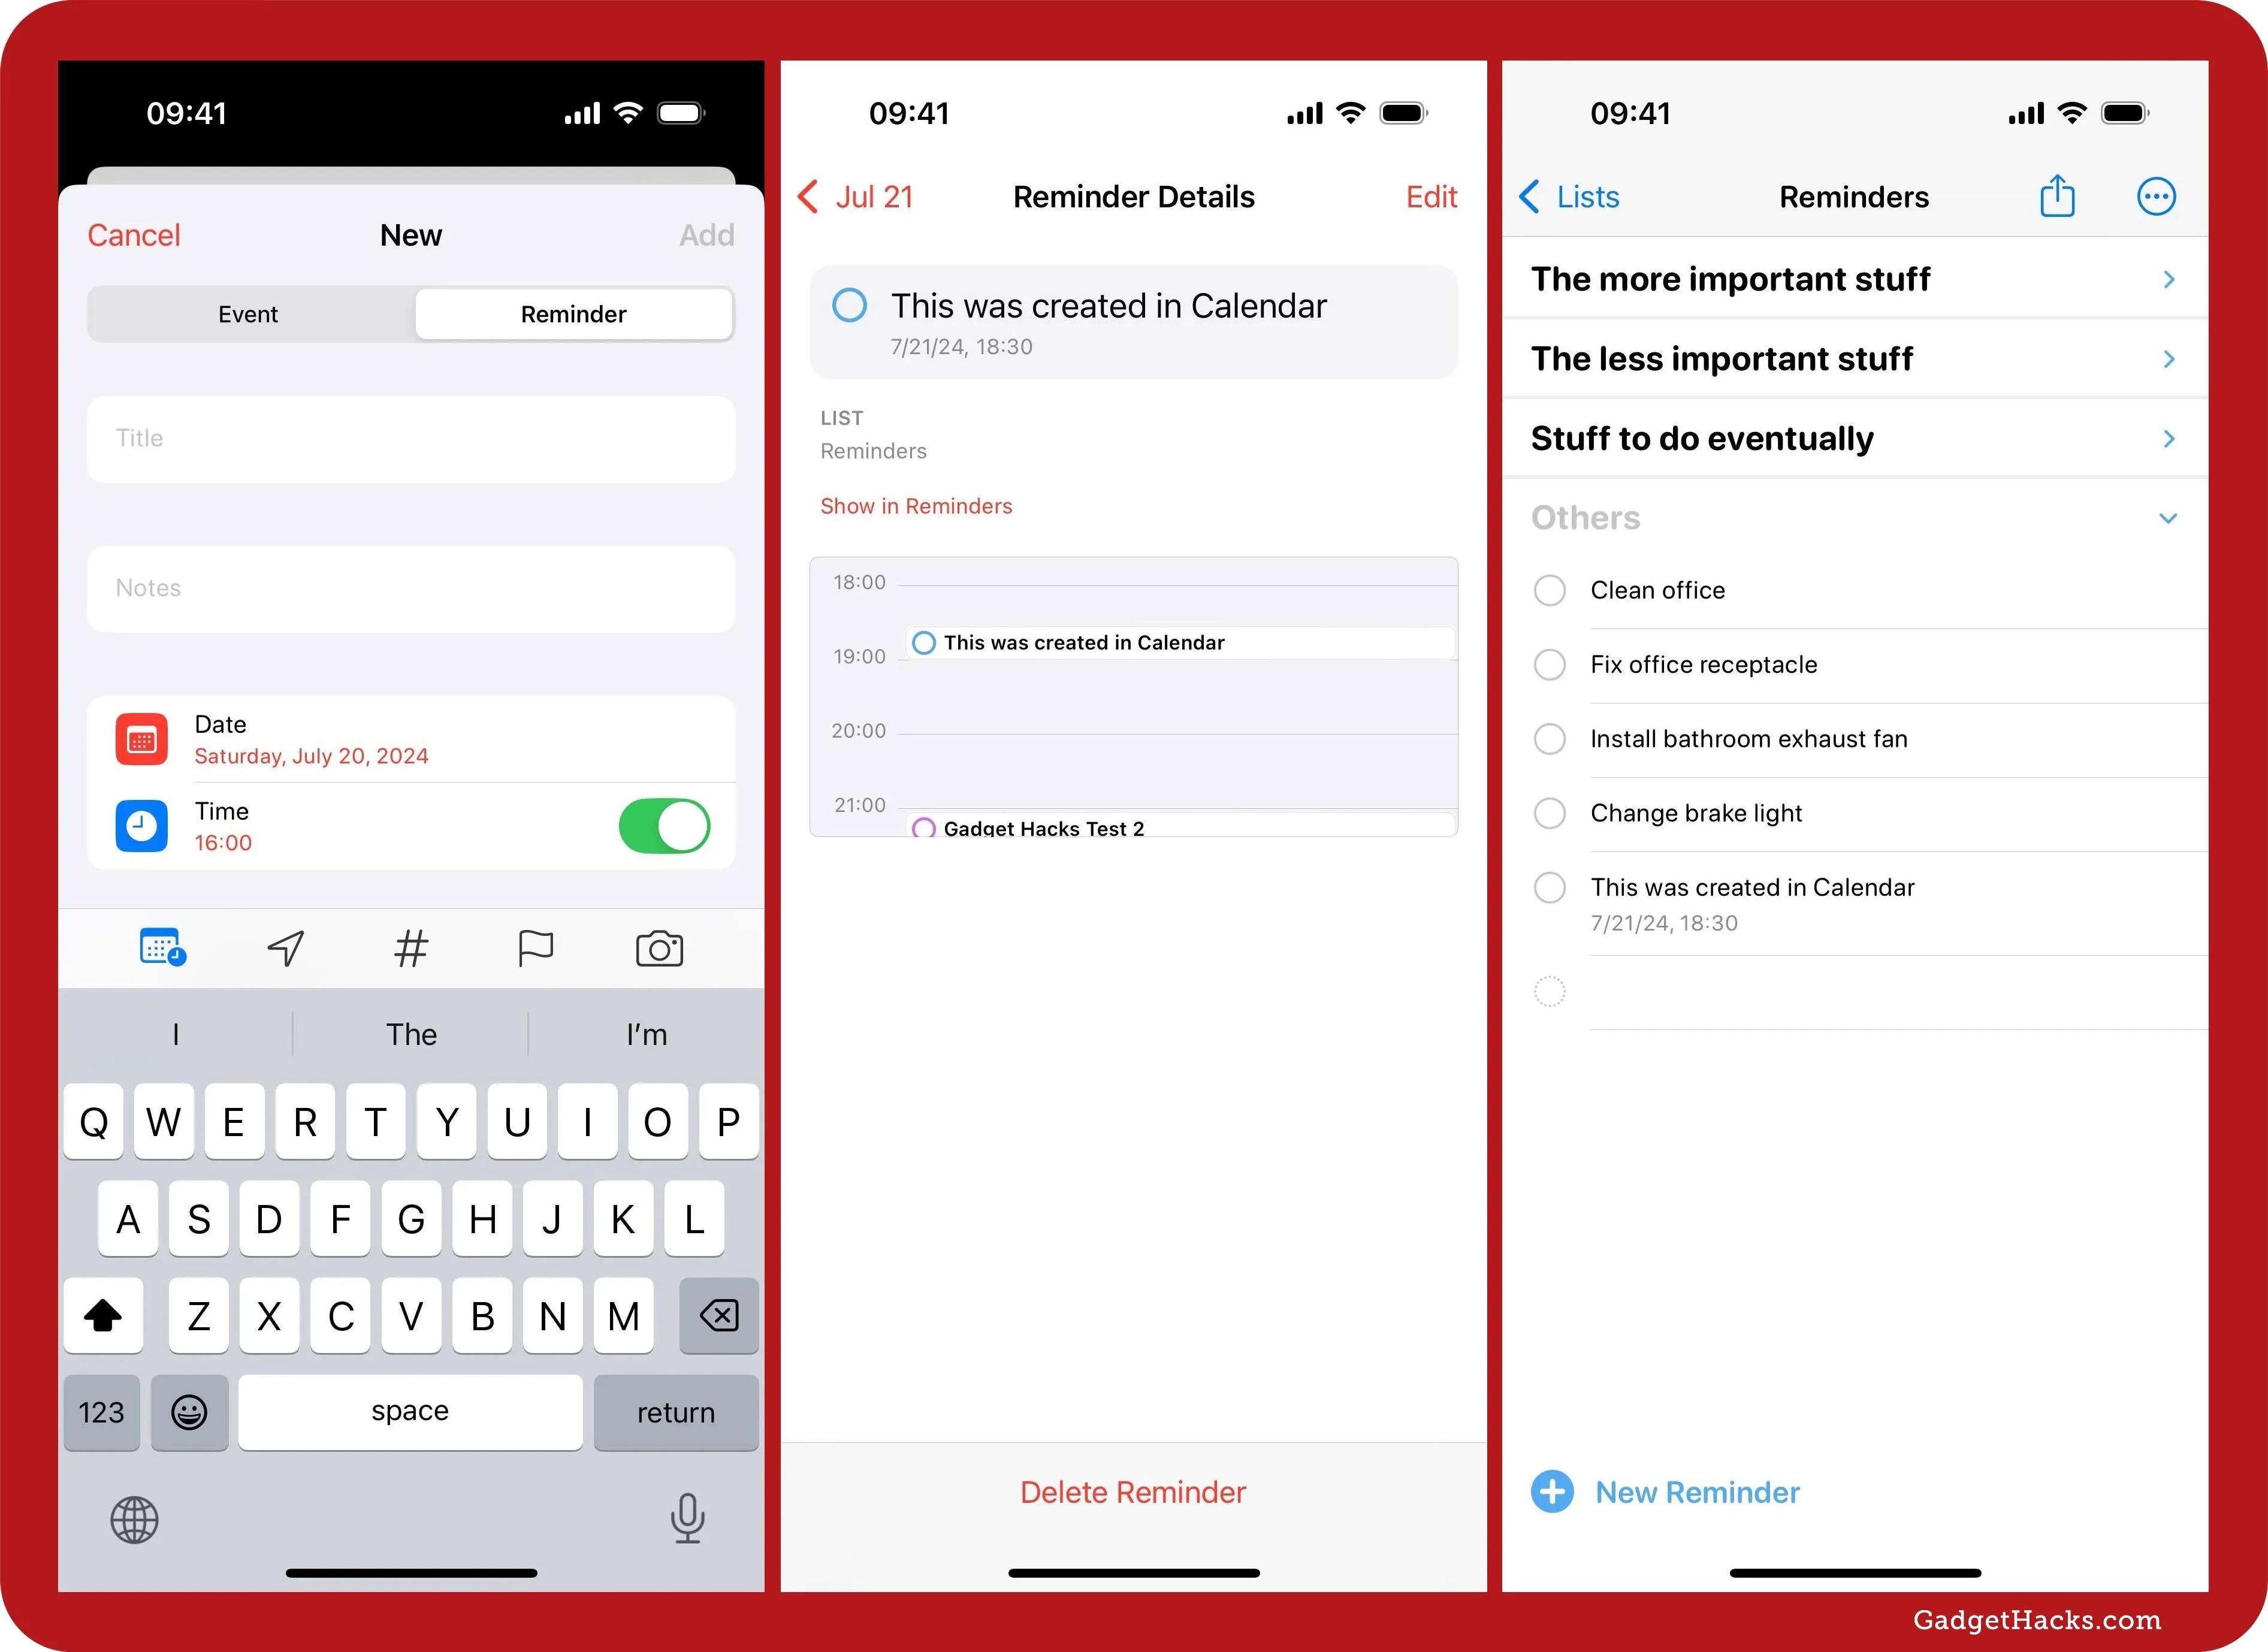
This integration ensures you never miss a reminder because it's now visually represented in your daily, weekly, and monthly calendar views. To create a new reminder from within Calendar, tap or clip the plus (+) icon. If you locked Reminders, you may have to authenticate yourself to continue. When the new card pops up, choose "Reminder" instead of "Event," then enter the task details just like you can from the Reminders app.
Reminder items in Calendar will each have a colored circle to indicate which Reminders list they belong to. You can tap that to complete the task. When you tap the reminder's title, you can see more information and get a direct link to the task in the Reminders app. You can mark it as done from this view, delete it, or edit it.
While you can't see a calendar view from Reminders, you will see all the reminders you created via Calendar.
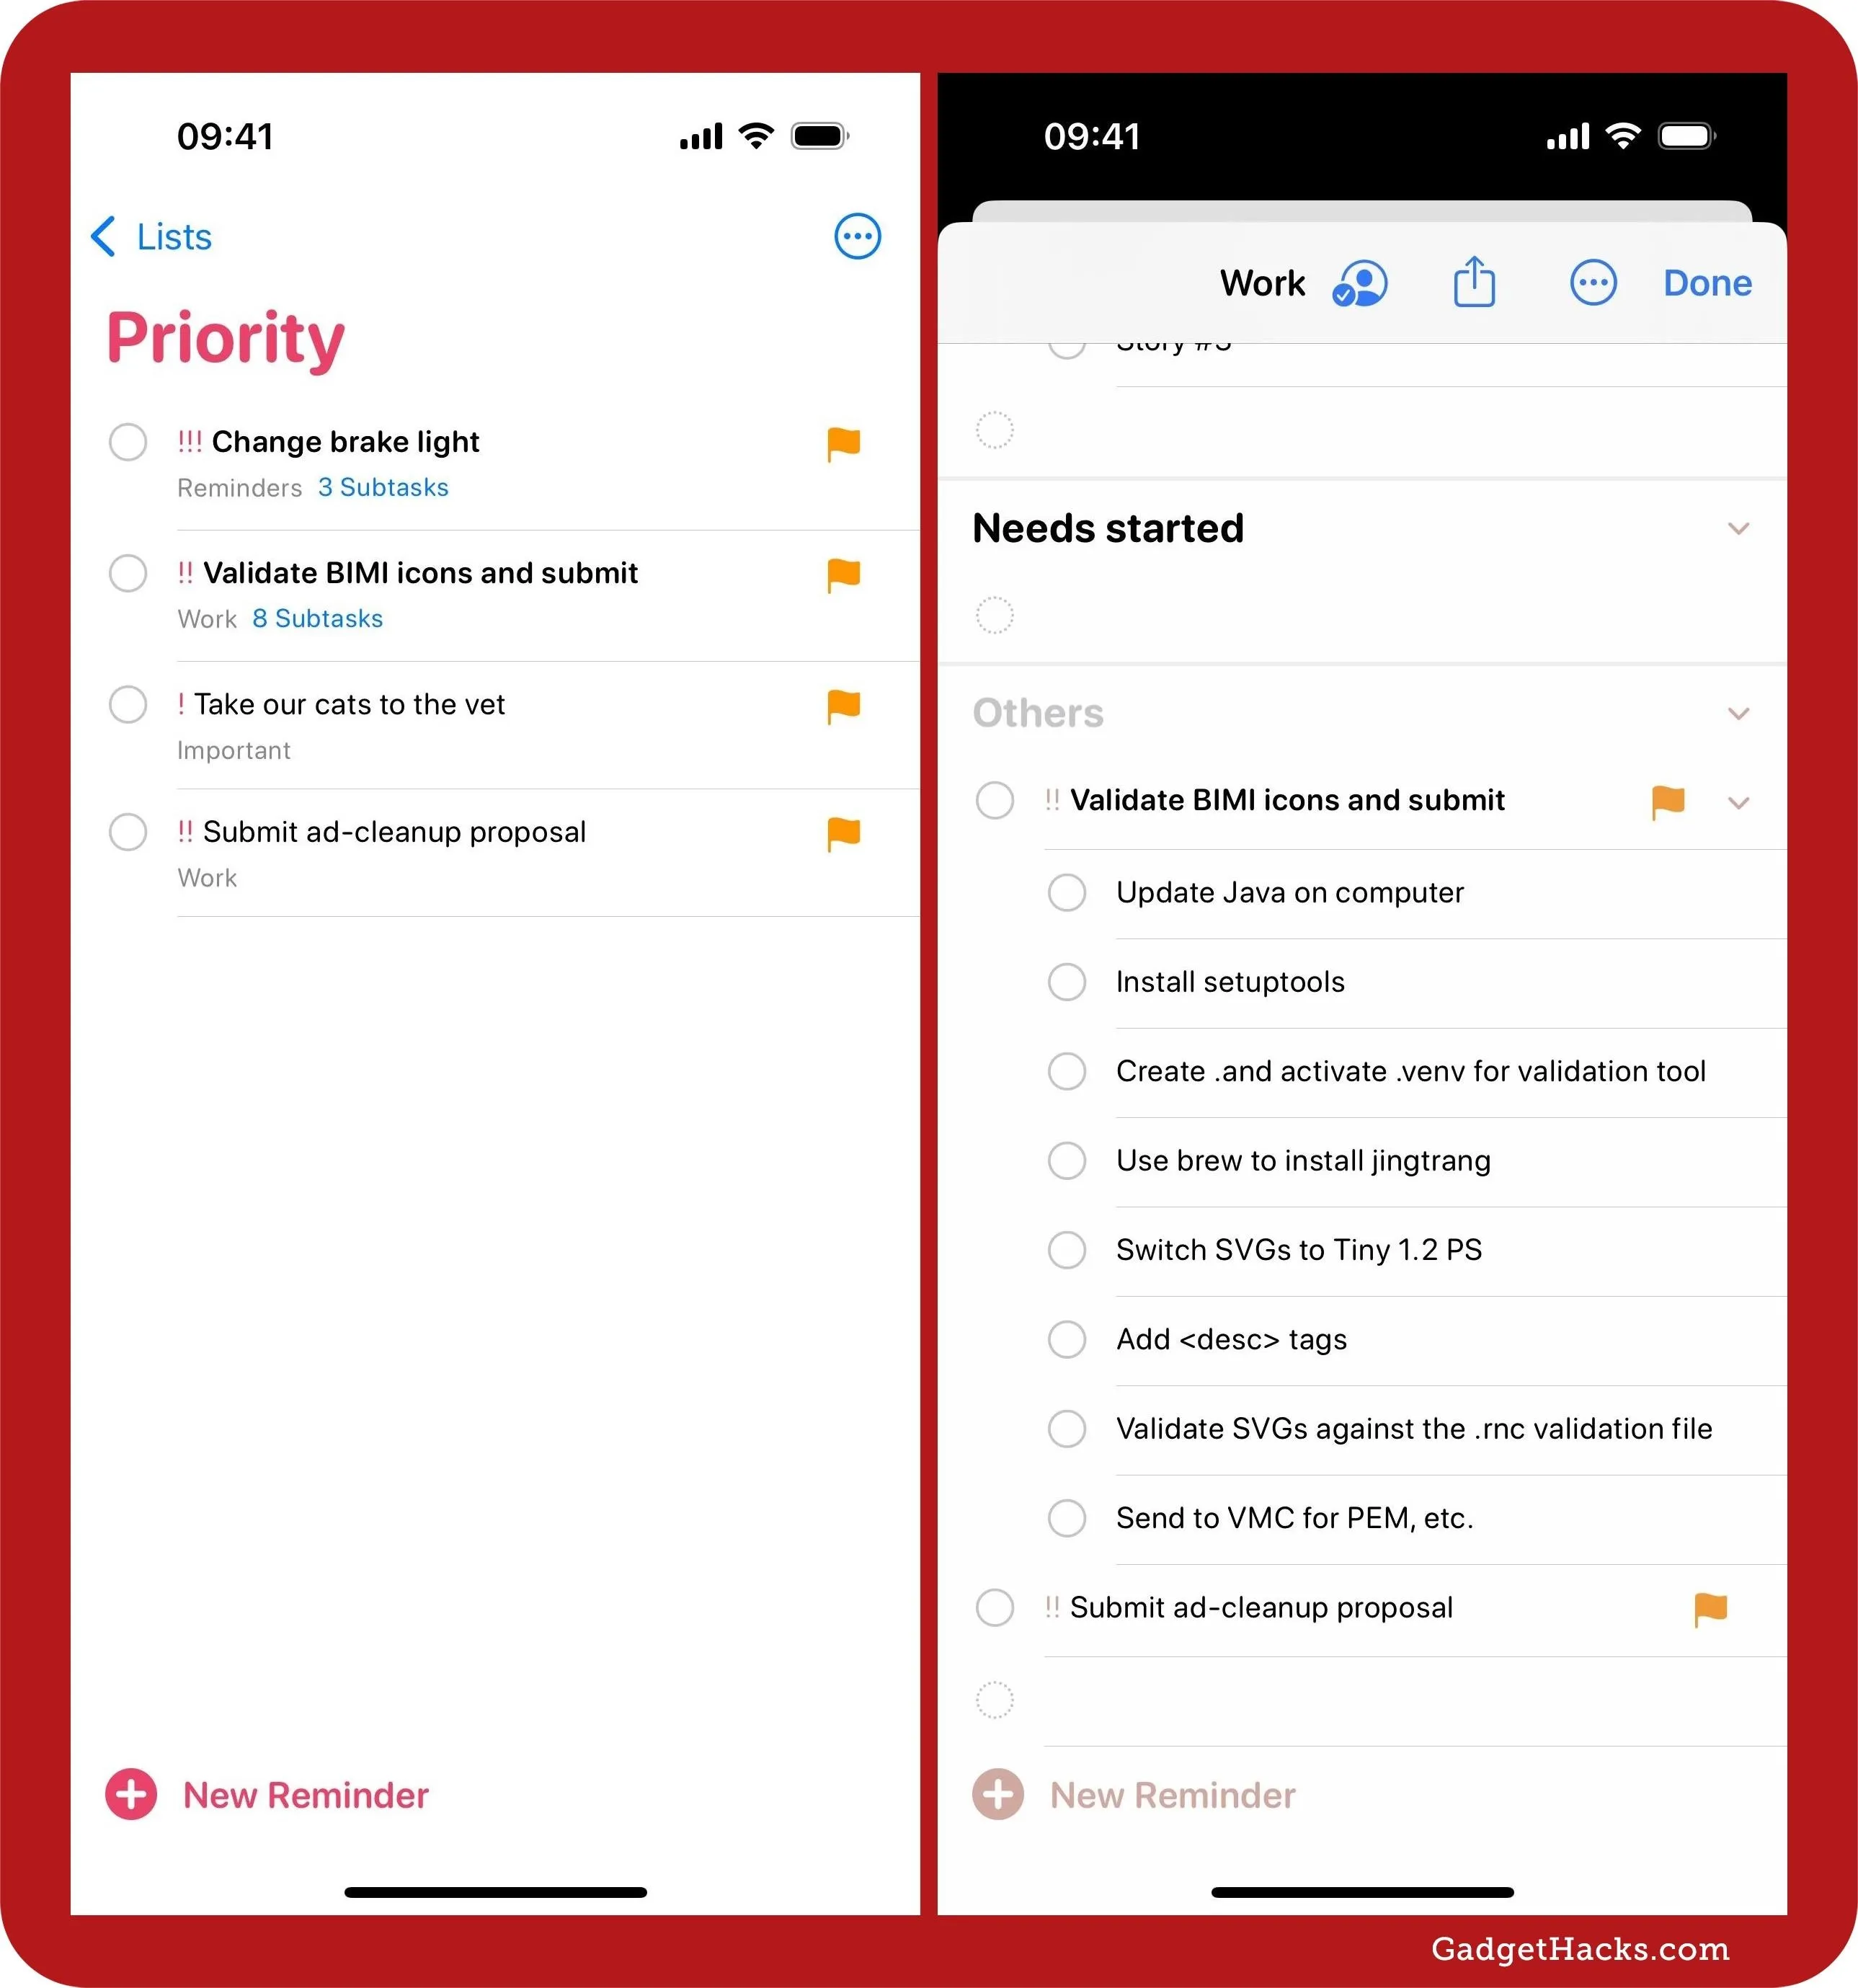
3. View Subtasks in Smart Lists
Before iOS 18, iPadOS 18, and macOS 15, when viewing reminders in any smart list, such as your Today list, you could see if any tasks had subtasks and, if so, how many. But that was it. You couldn't interact with them directly without opening the reminder's details. Now, just tap or click the blue "[#] Subtasks" link under its parent task, and you'll jump right to that task's list, where you can quickly check subtasks off.
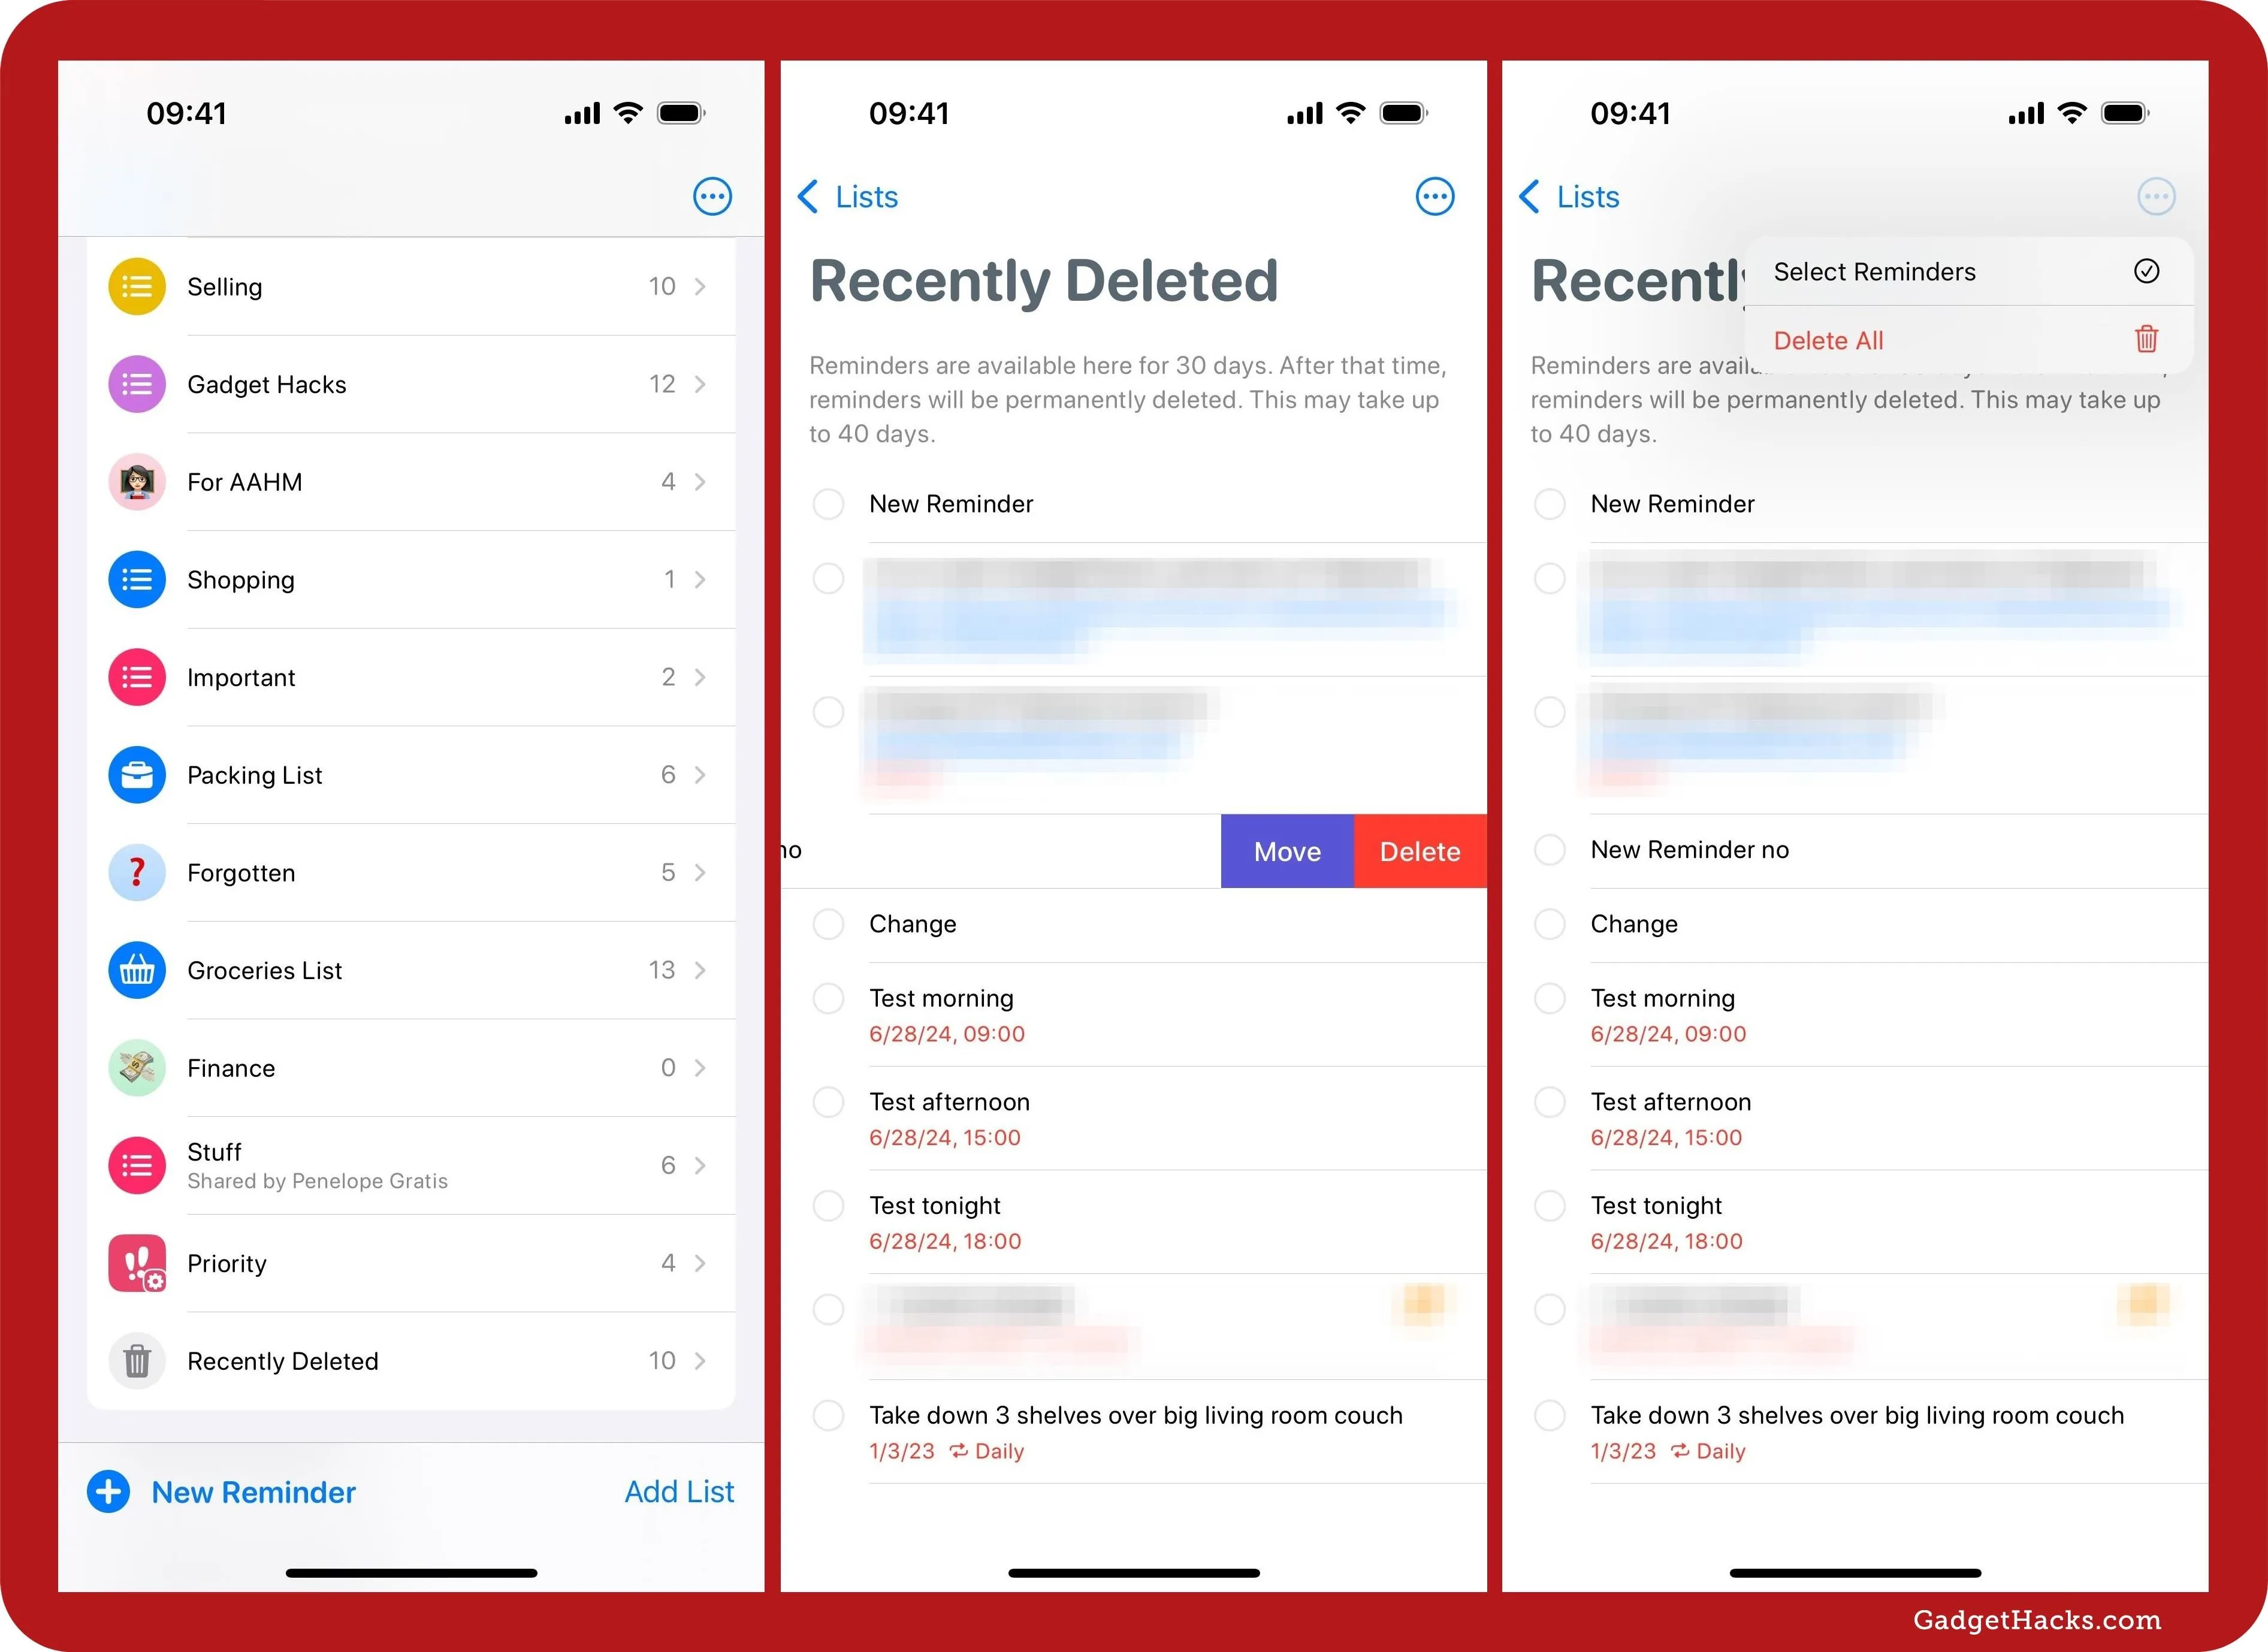
4. See Your Recently Deleted Reminders
One thing that's been missing from Reminders since its birth is an easy way to access recently deleted tasks to review or retrieve complete tasks. Apple finally addresses this with iOS 18, iPadOS 18, and macOS 15.
From the lists view, you'll see a new "Recently Deleted" list under My Lists. This neatly holds deleted reminders for 30 days. After that, Reminders will permanently delete them.
To restate a task, tap or click the circle beside it and hit "Recover" to confirm. You can swipe left on any task to "Delete" it manually. On iPhone and iPad, you can also "Move" them via the swipe menu, but you need to right-click or Control-click the reminder to find the "Move" option on your Mac.
The More (•••) menu on iOS and iPadOS will let you select multiple reminders or "Delete All," while you can use keyboard shortcuts on macOS to select all and delete them.
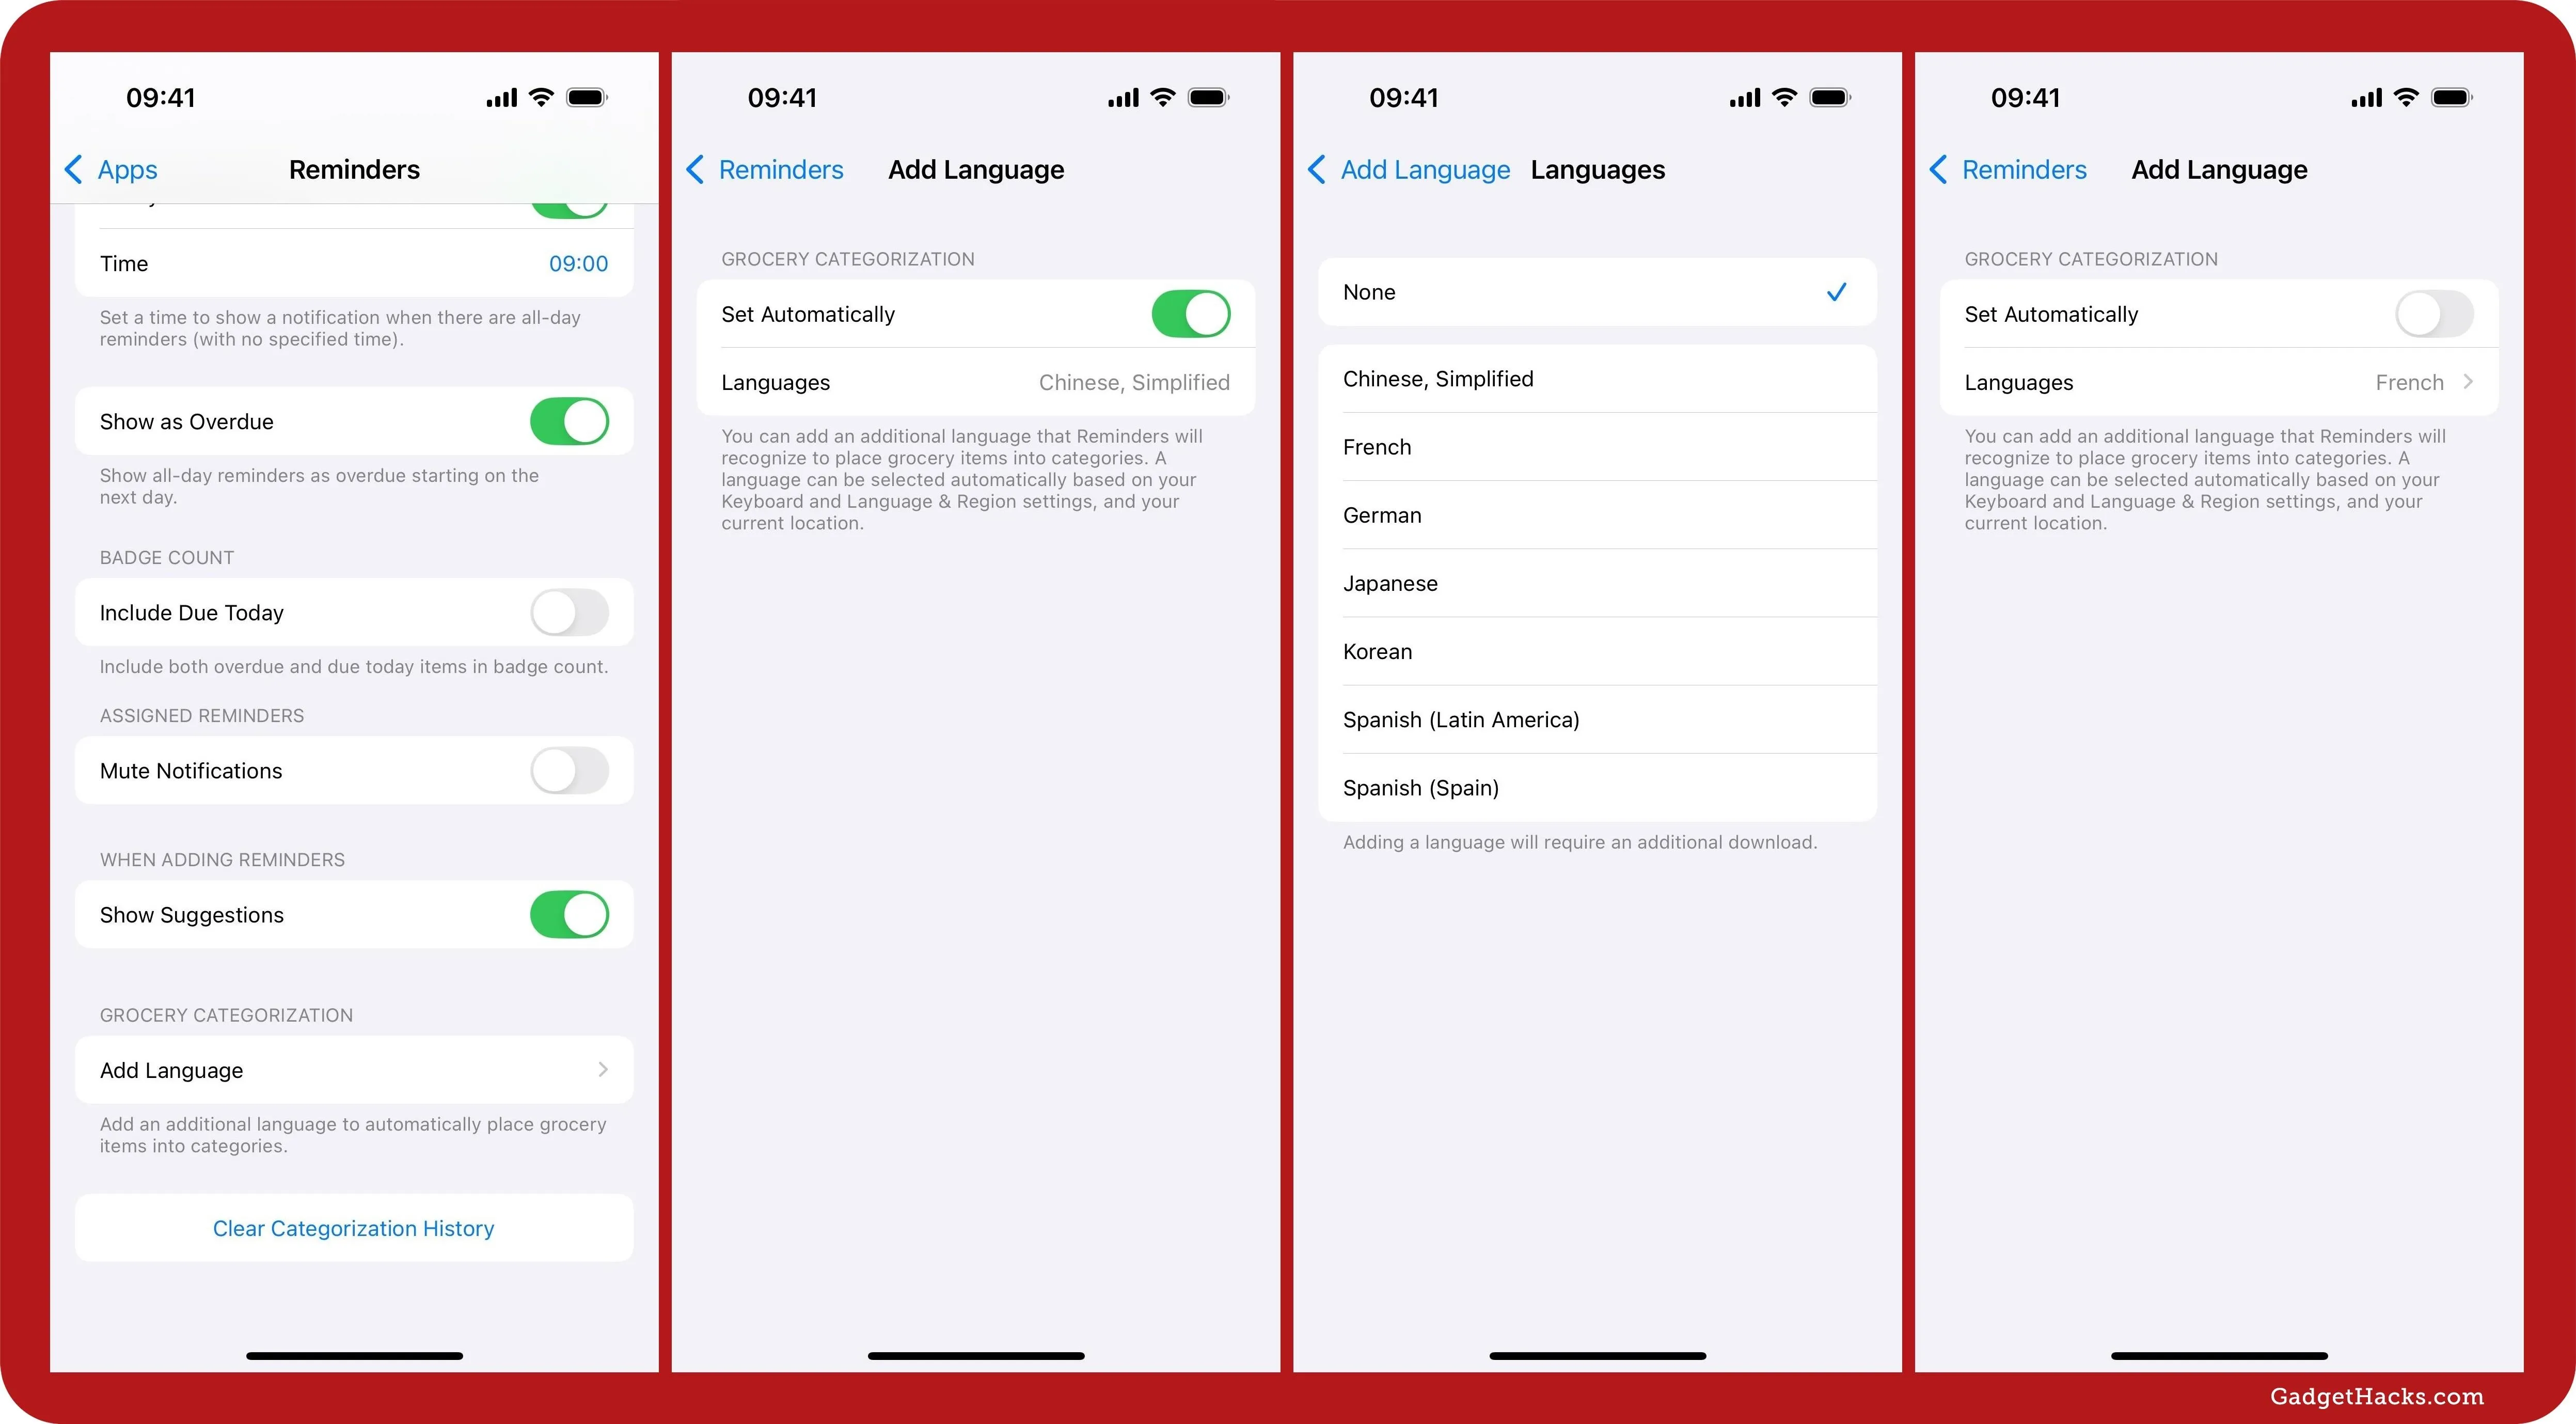
5. Add Languages to Your Groceries List
Using the built-in Groceries List in Reminders just got more accessible.
On iOS and iPadOS 18, go to Settings » Apps » Reminders, scroll down to Grocery Categorization, and tap "Add Language." Keep the "Set Automatically" toggle switch on if you want Reminders to automatically choose an additional language based on your installed keyboards, Language & Region settings, and current location. Turn it off to disable the feature or manually select a different language. On macOS 15, you can find the same options via Reminders » Settings in the menu bar.
There are seven supported languages you can choose from:
- Chinese, Simplified
- French
- German
- Japanese
- Korean
- Spanish (Latin America)
- Spanish (Spain)
Adding a language will allow Reminders to automatically place Groceries List items into their proper categories. For example, with French selected, adding "saucisson" should automatically move it to the Meat category instead of the Produce category.
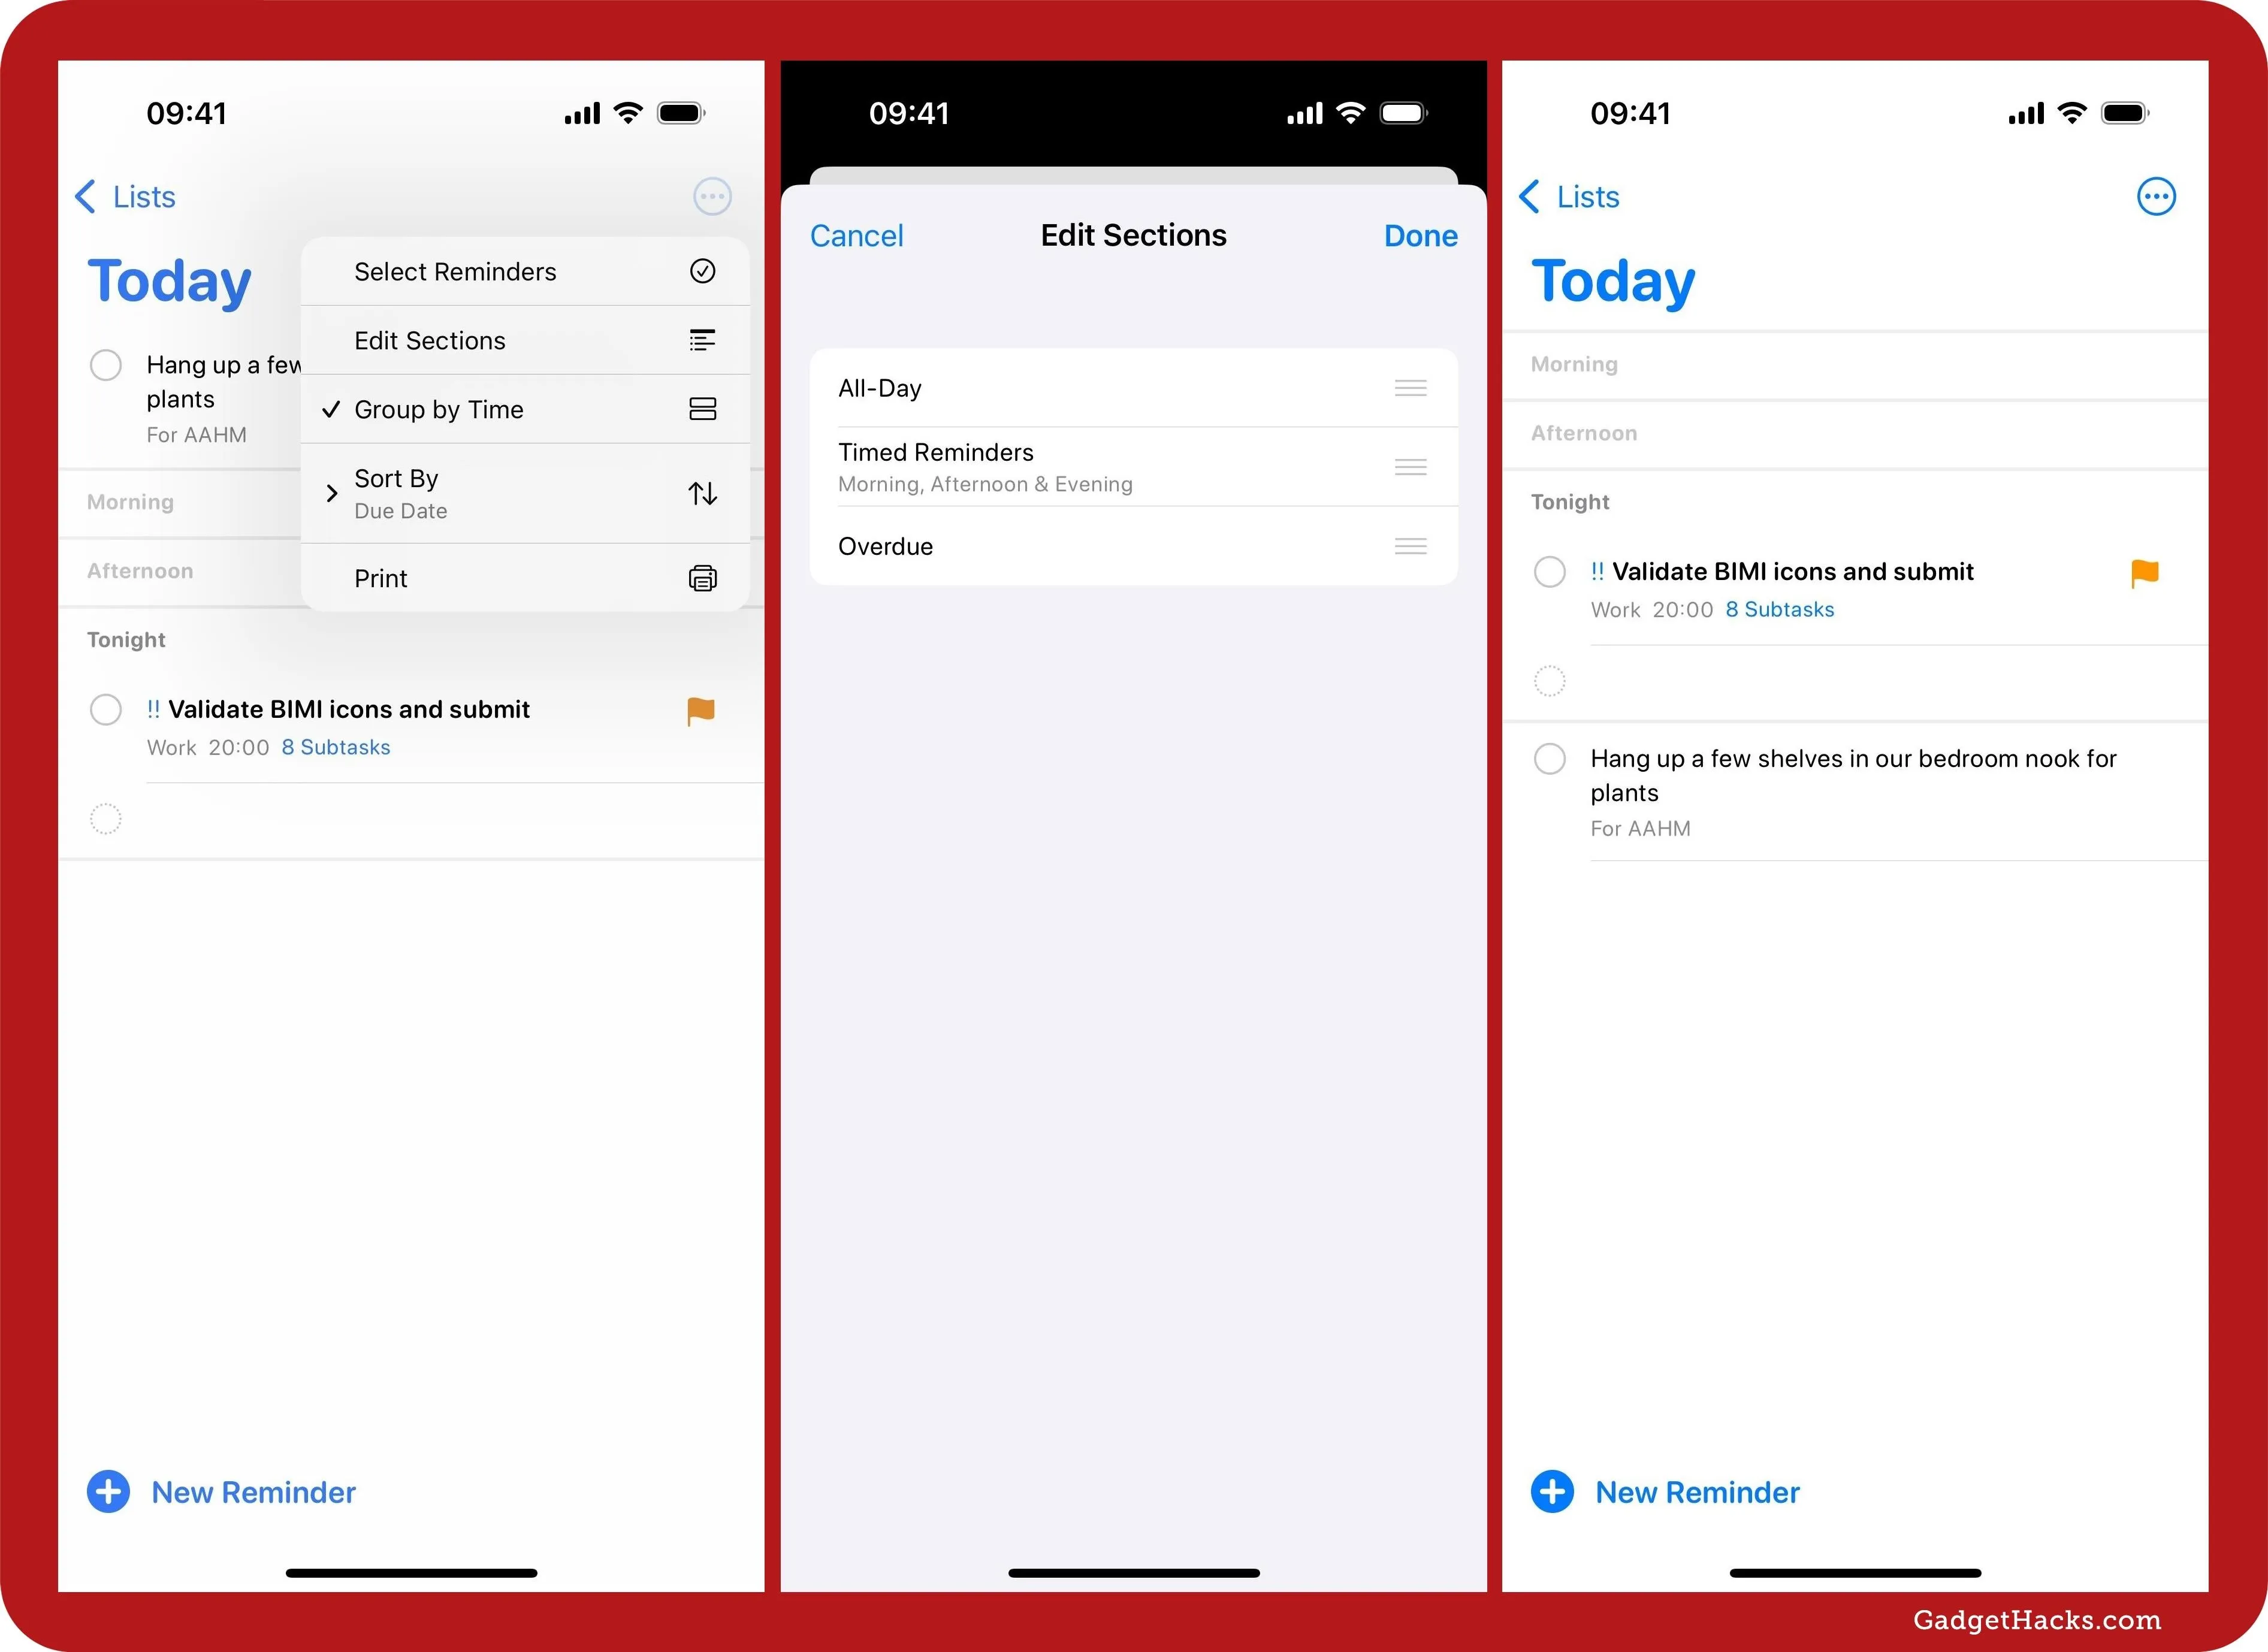
6. Edit Sections in Today List
Before the new Reminders update, the Today list consisted of fixed Morning, Afternoon, and Tonight sections. Those sections are still there, but you have more room for customization.
Open the Reminders app and go to Lists » Today. On iOS and iPadOS 18, tap the More (•••) button in the upper right and select the new option called "Edit Sections." On macOS 15, go to File » Edit Sections" in the menu bar. By dragging sections up and down, you can set the Today reminders to show in your preferred order:
- Timed Reminders (Morning, Afternoon, and Evening)
- Overdue
- All Day
Drag them around to arrange them any way you like.
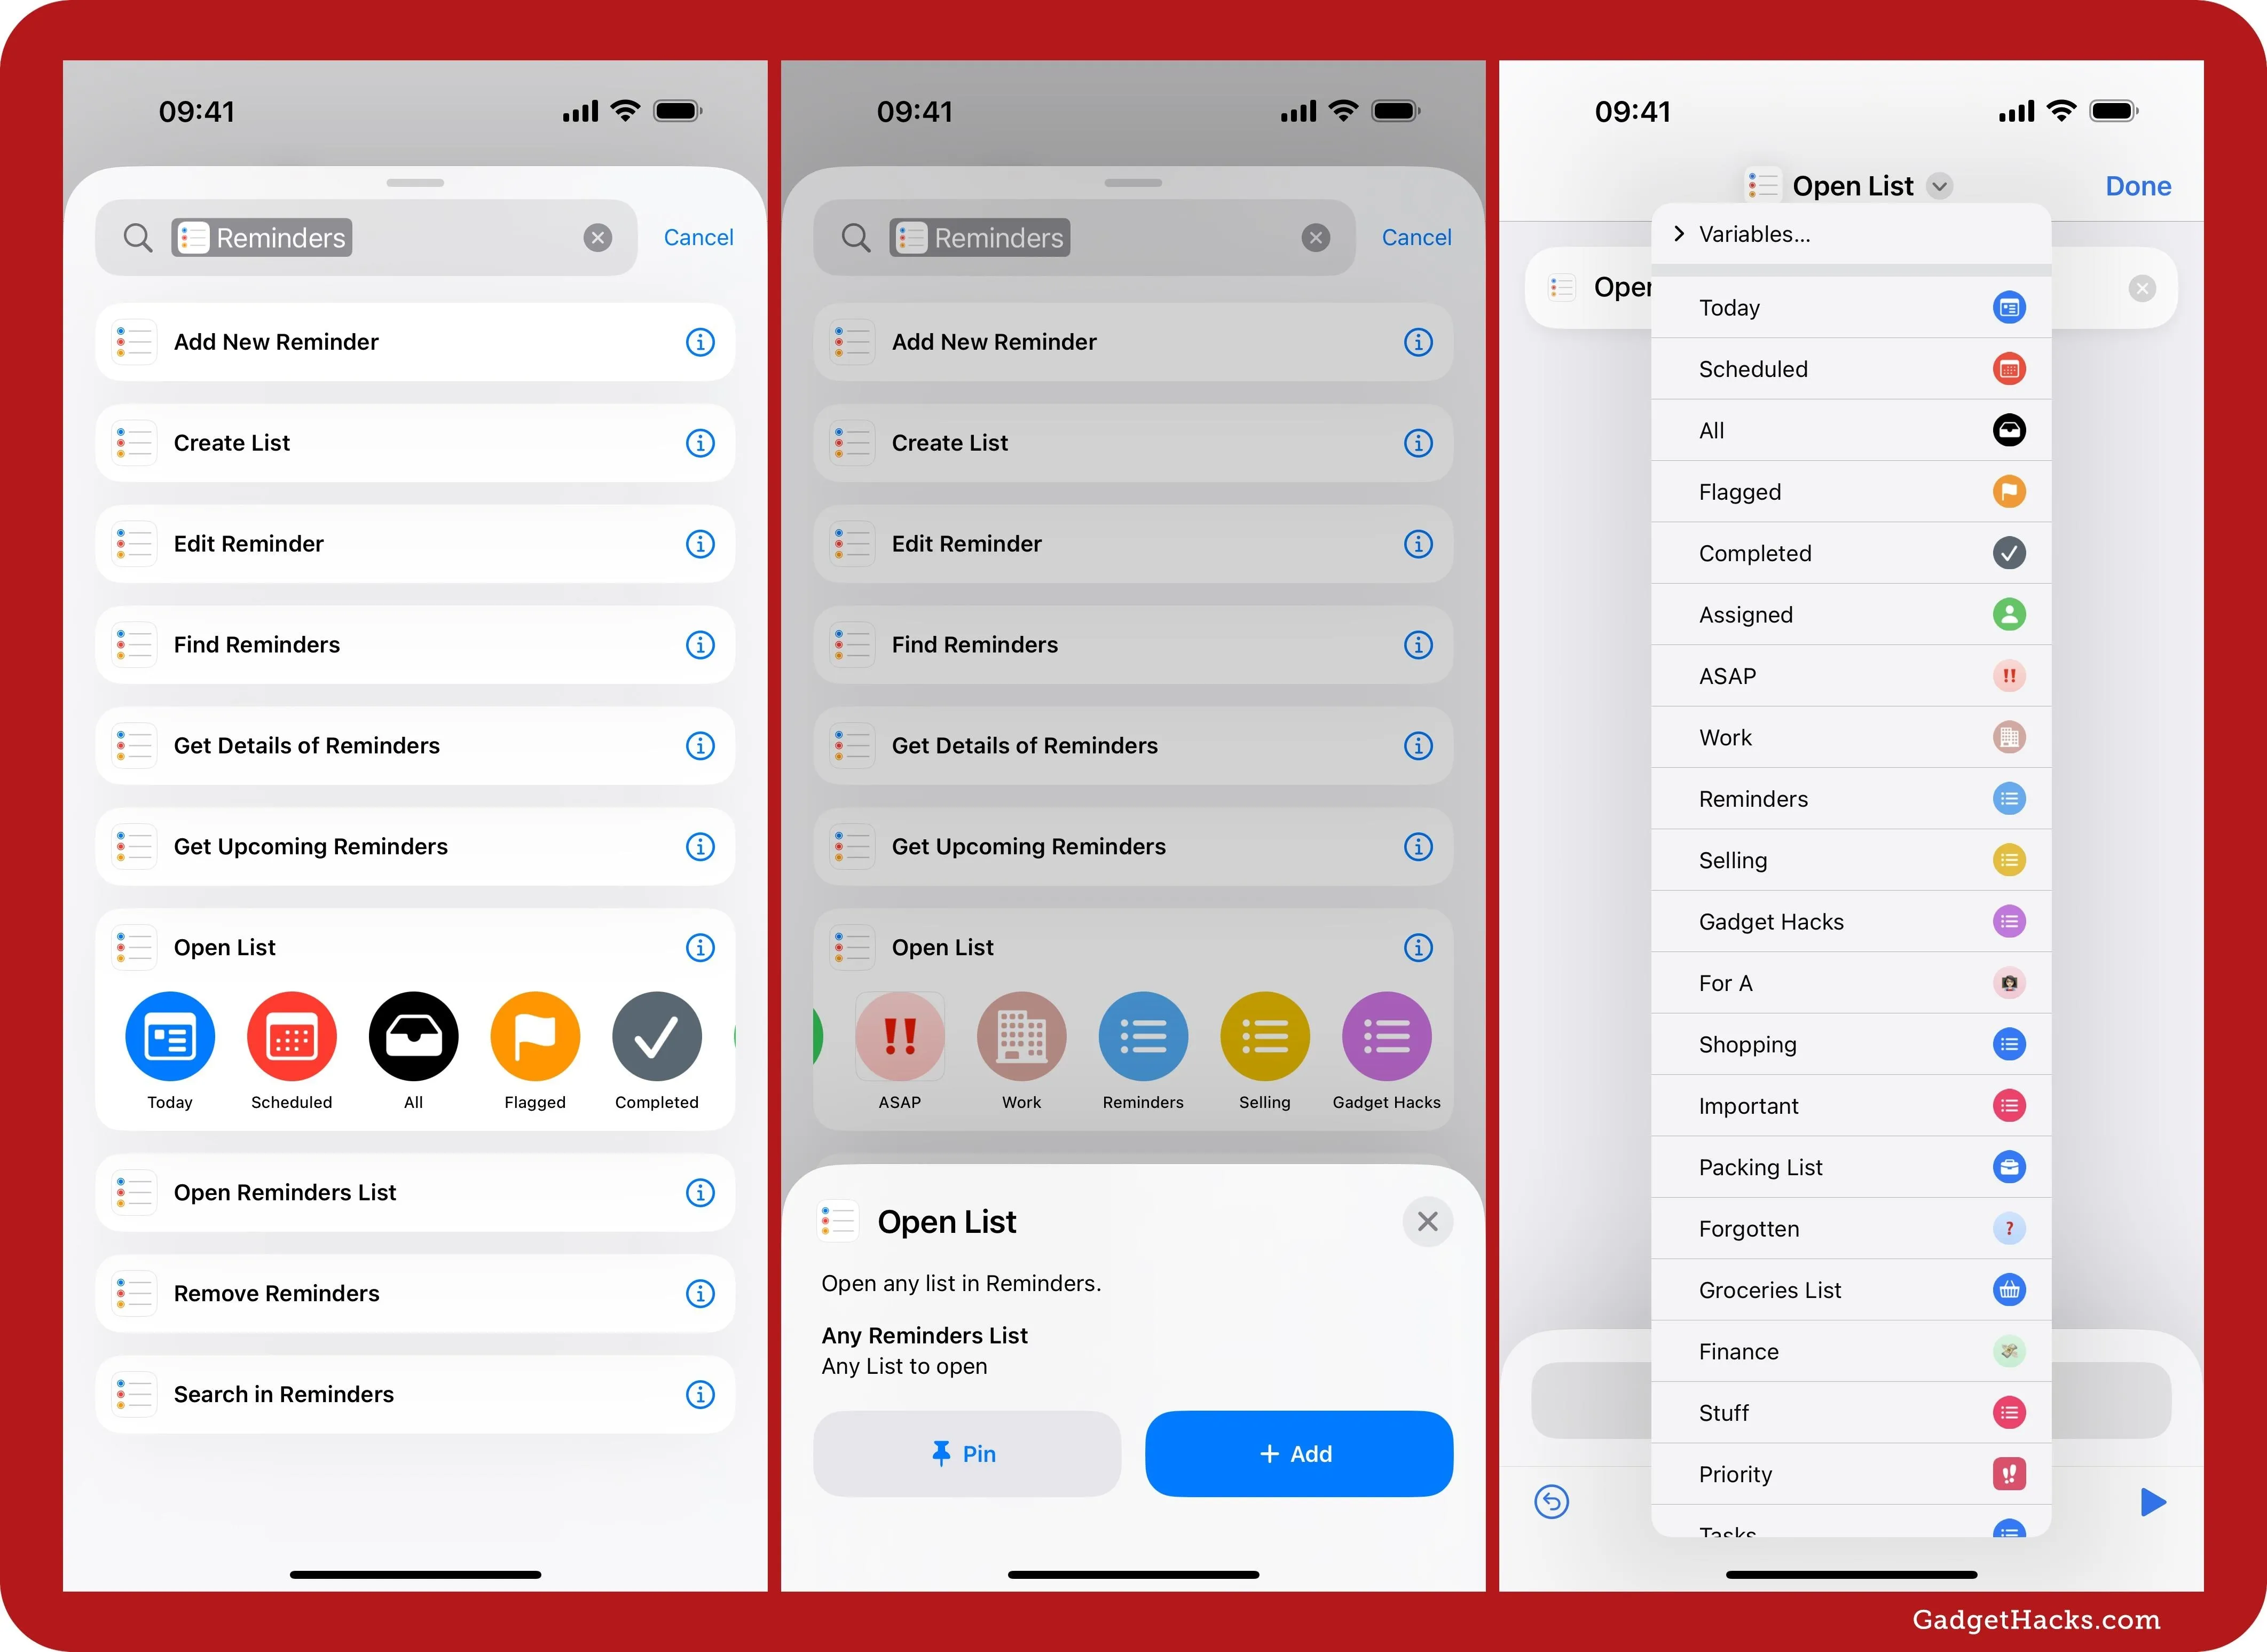
7. Better Reminder Actions in Shortcuts
In the Shortcuts app, the Reminder app's "Open Reminders List" and "Open Smart List" actions have been combined into one "Open List" action, making it easier to work with when building shortcuts and automations.
Before, "Open Reminders List" would only let you choose a custom Reminders list, including your Groceries list, while "Open Smart List" would let you pick between premade smart lists like Today and Flagged. Neither option let you select a custom smart list. On iOS 18, iPadOS 18, and macOS 15, the new "Open List" action enables you to choose any list, whether premade or custom, including custom smart lists.
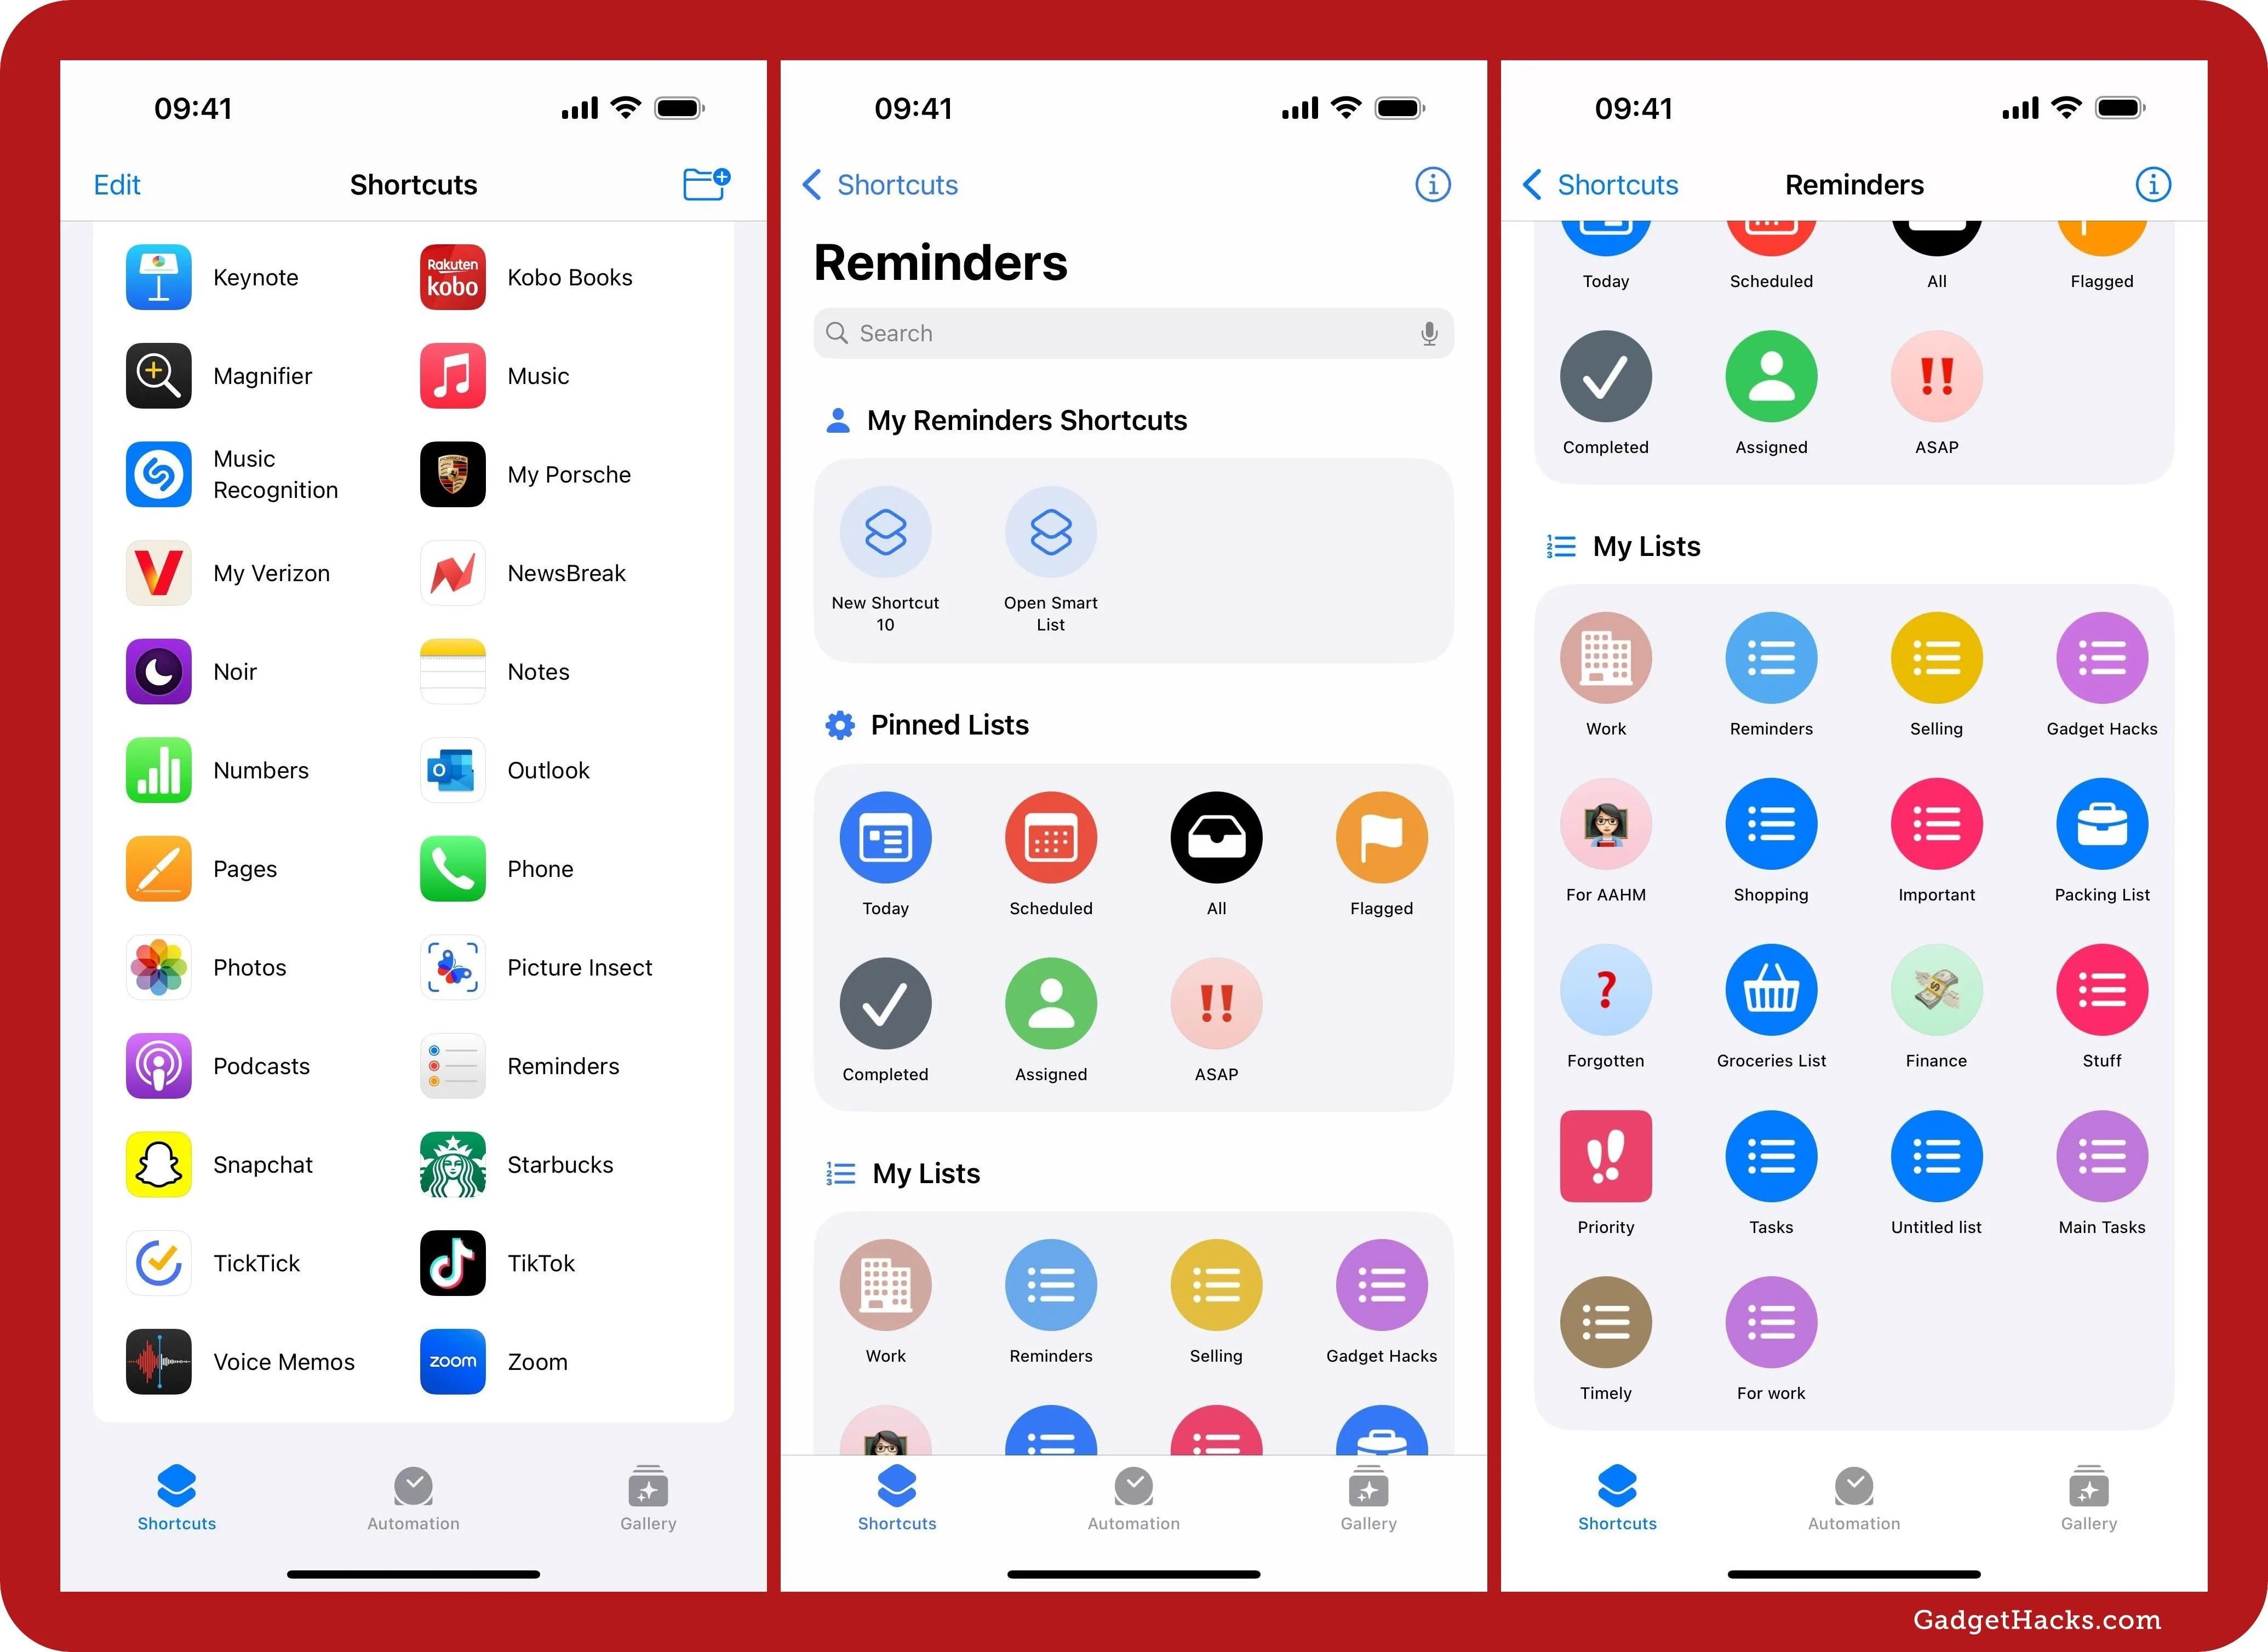
8. New App Shortcuts for Reminders
Open the Shortcuts app on iOS or iPadOS and go back to the main Shortcuts directory. Under App Shortcuts, tap "Reminders." Here, you will see several sections:
- My Reminders Shortcuts: This section shows Reminders shortcuts you've already created, just like on iOS and iPadOS 17.
- Pinned Lists: This section shows all lists pinned to the lists view in Reminders. It replaces the Smart Lists section from iOS and iPadOS 17.
- My Lists: This new section shows all your other iCloud l are not already in the Pinned Lists section.
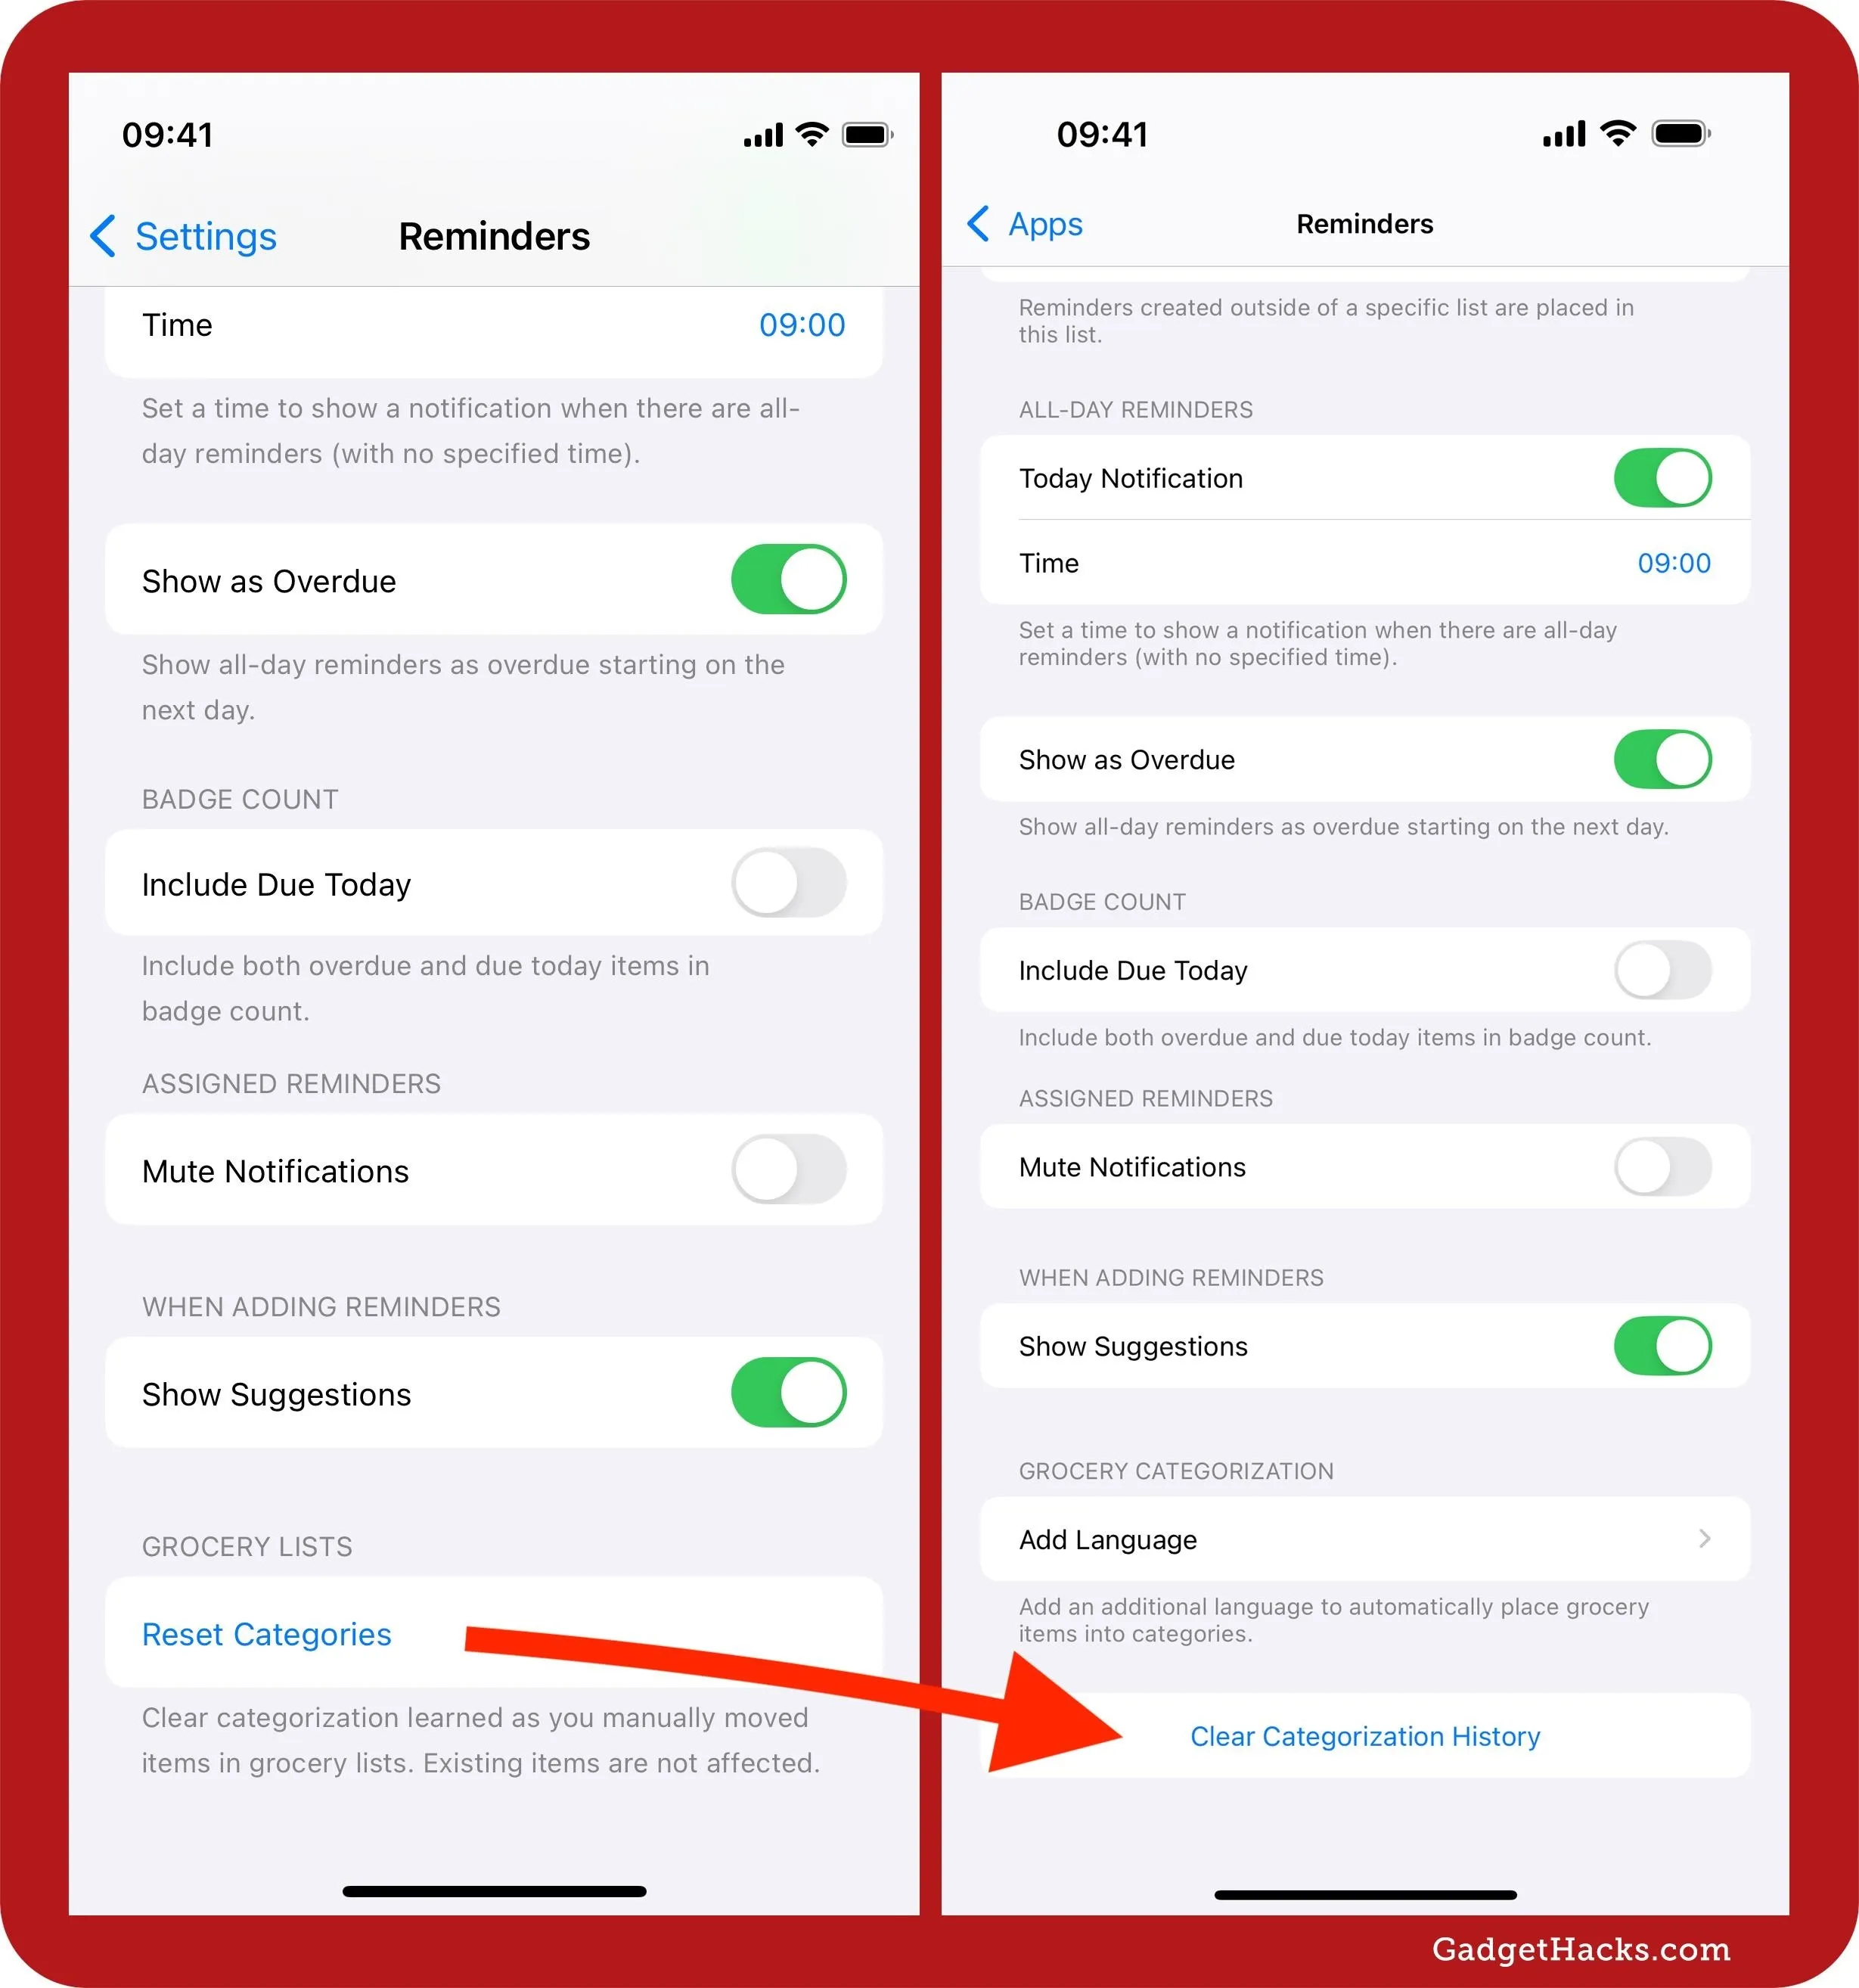
9. Clear Grocery List Categorization History
In a small change, the "Reset Categories" option found in Settings » Reminders on iOS and iPadOS 17 has been changed to "Clear Categorization History" on iOS and iPadOS 18. The footnote for it ("Clear categorization learned as you manually moved items in grocery lists. Existing items are not affected.") is no longer visible, but you still get the same warning information when you tap the button:
Clearing manual categorization for your grocery lists applies to all of your devices and grocery lists you've shared.
On macOS 15, the option is still "Reset Grocery Categories" as in prior versions.
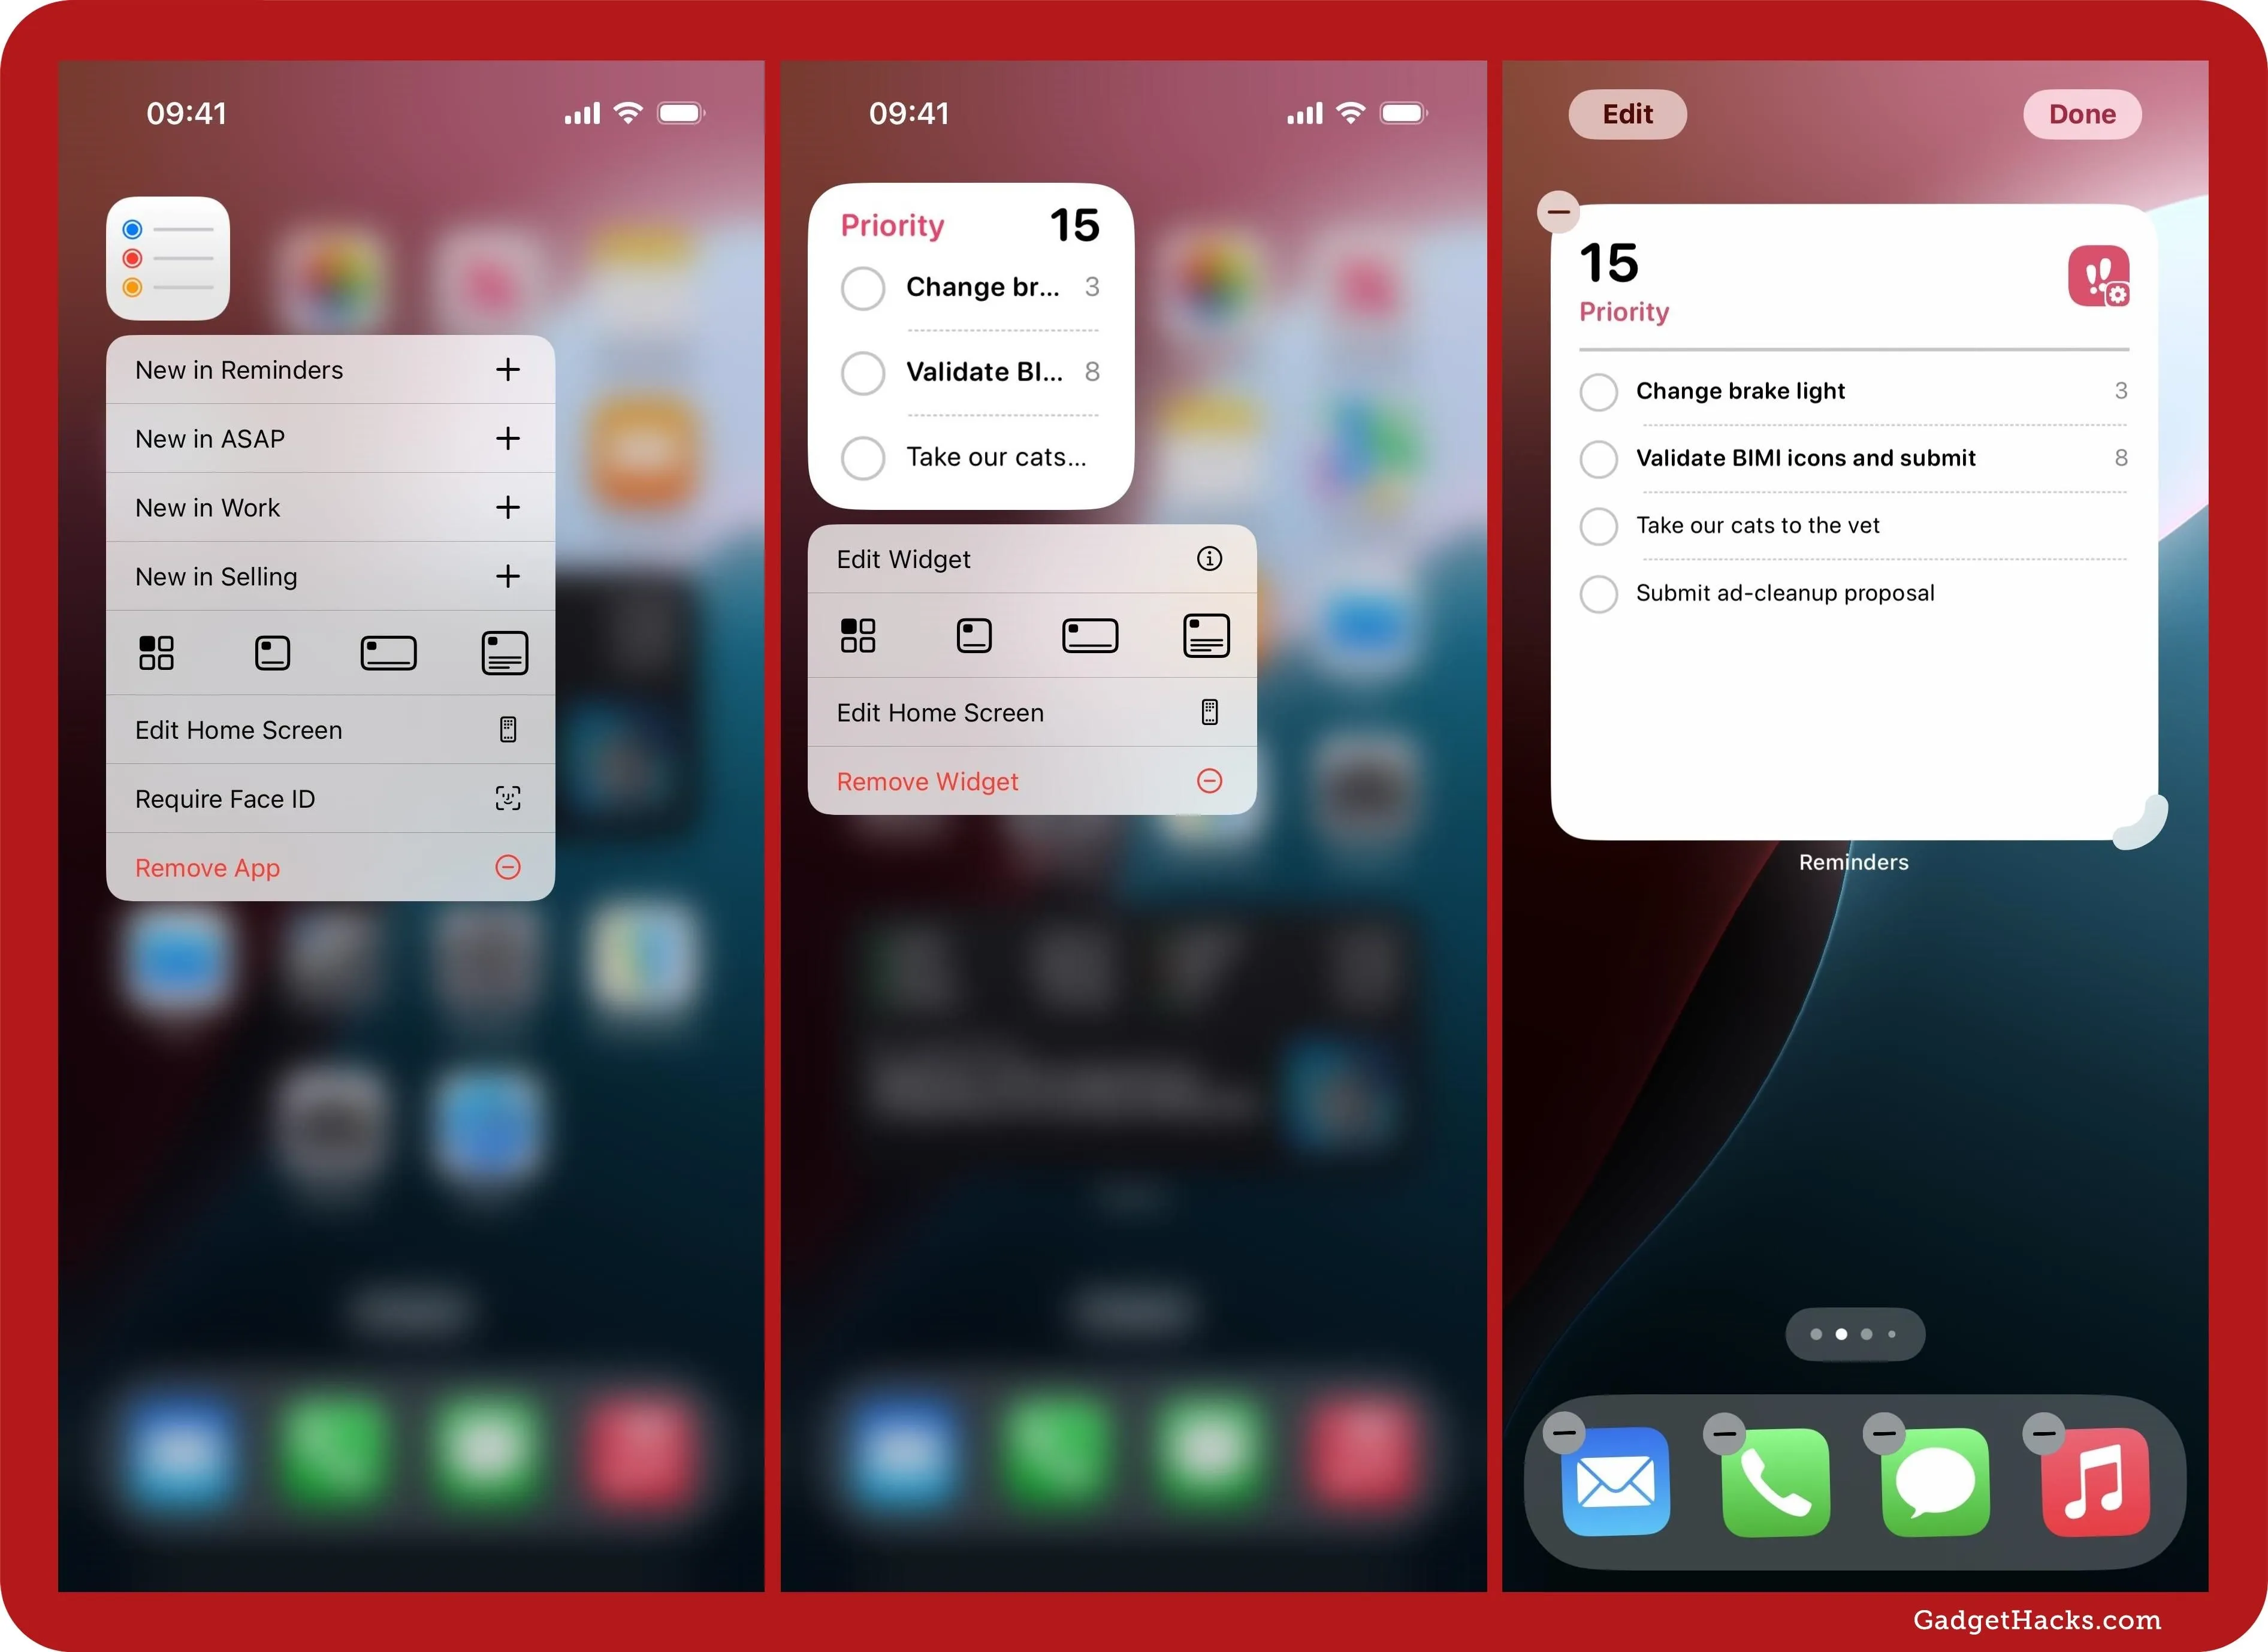
10. Easily Switch Between Home Screen Icon and Widgets
As long as your Reminders app isn't locked, you can quickly convert the Reminders app icon on your iPhone or iPad's Home Screen into a widget of any available size. This also works for all other apps that support Home Screen widgets.
Touch and hold the app icon or a Reminders widget on the Home Screen, and you'll see a row of icons for different display options, including an app icon, small widget, medium widget, and large widget. Tap any of them to quickly switch Reminders' Home Screen presence. If you switch a widget to the app icon and already have an app icon, it will just make the one you're changing disappear.
Alternatively, you can enter edit mode on the Home Screen and drag the rounded corner bar of the Reminders widget to shrink or enlarge the widget.
- Complete Instructions: iOS 18 Lets You Change Widget Sizes on Your iPhone's Home Screen Without Deleting Them First
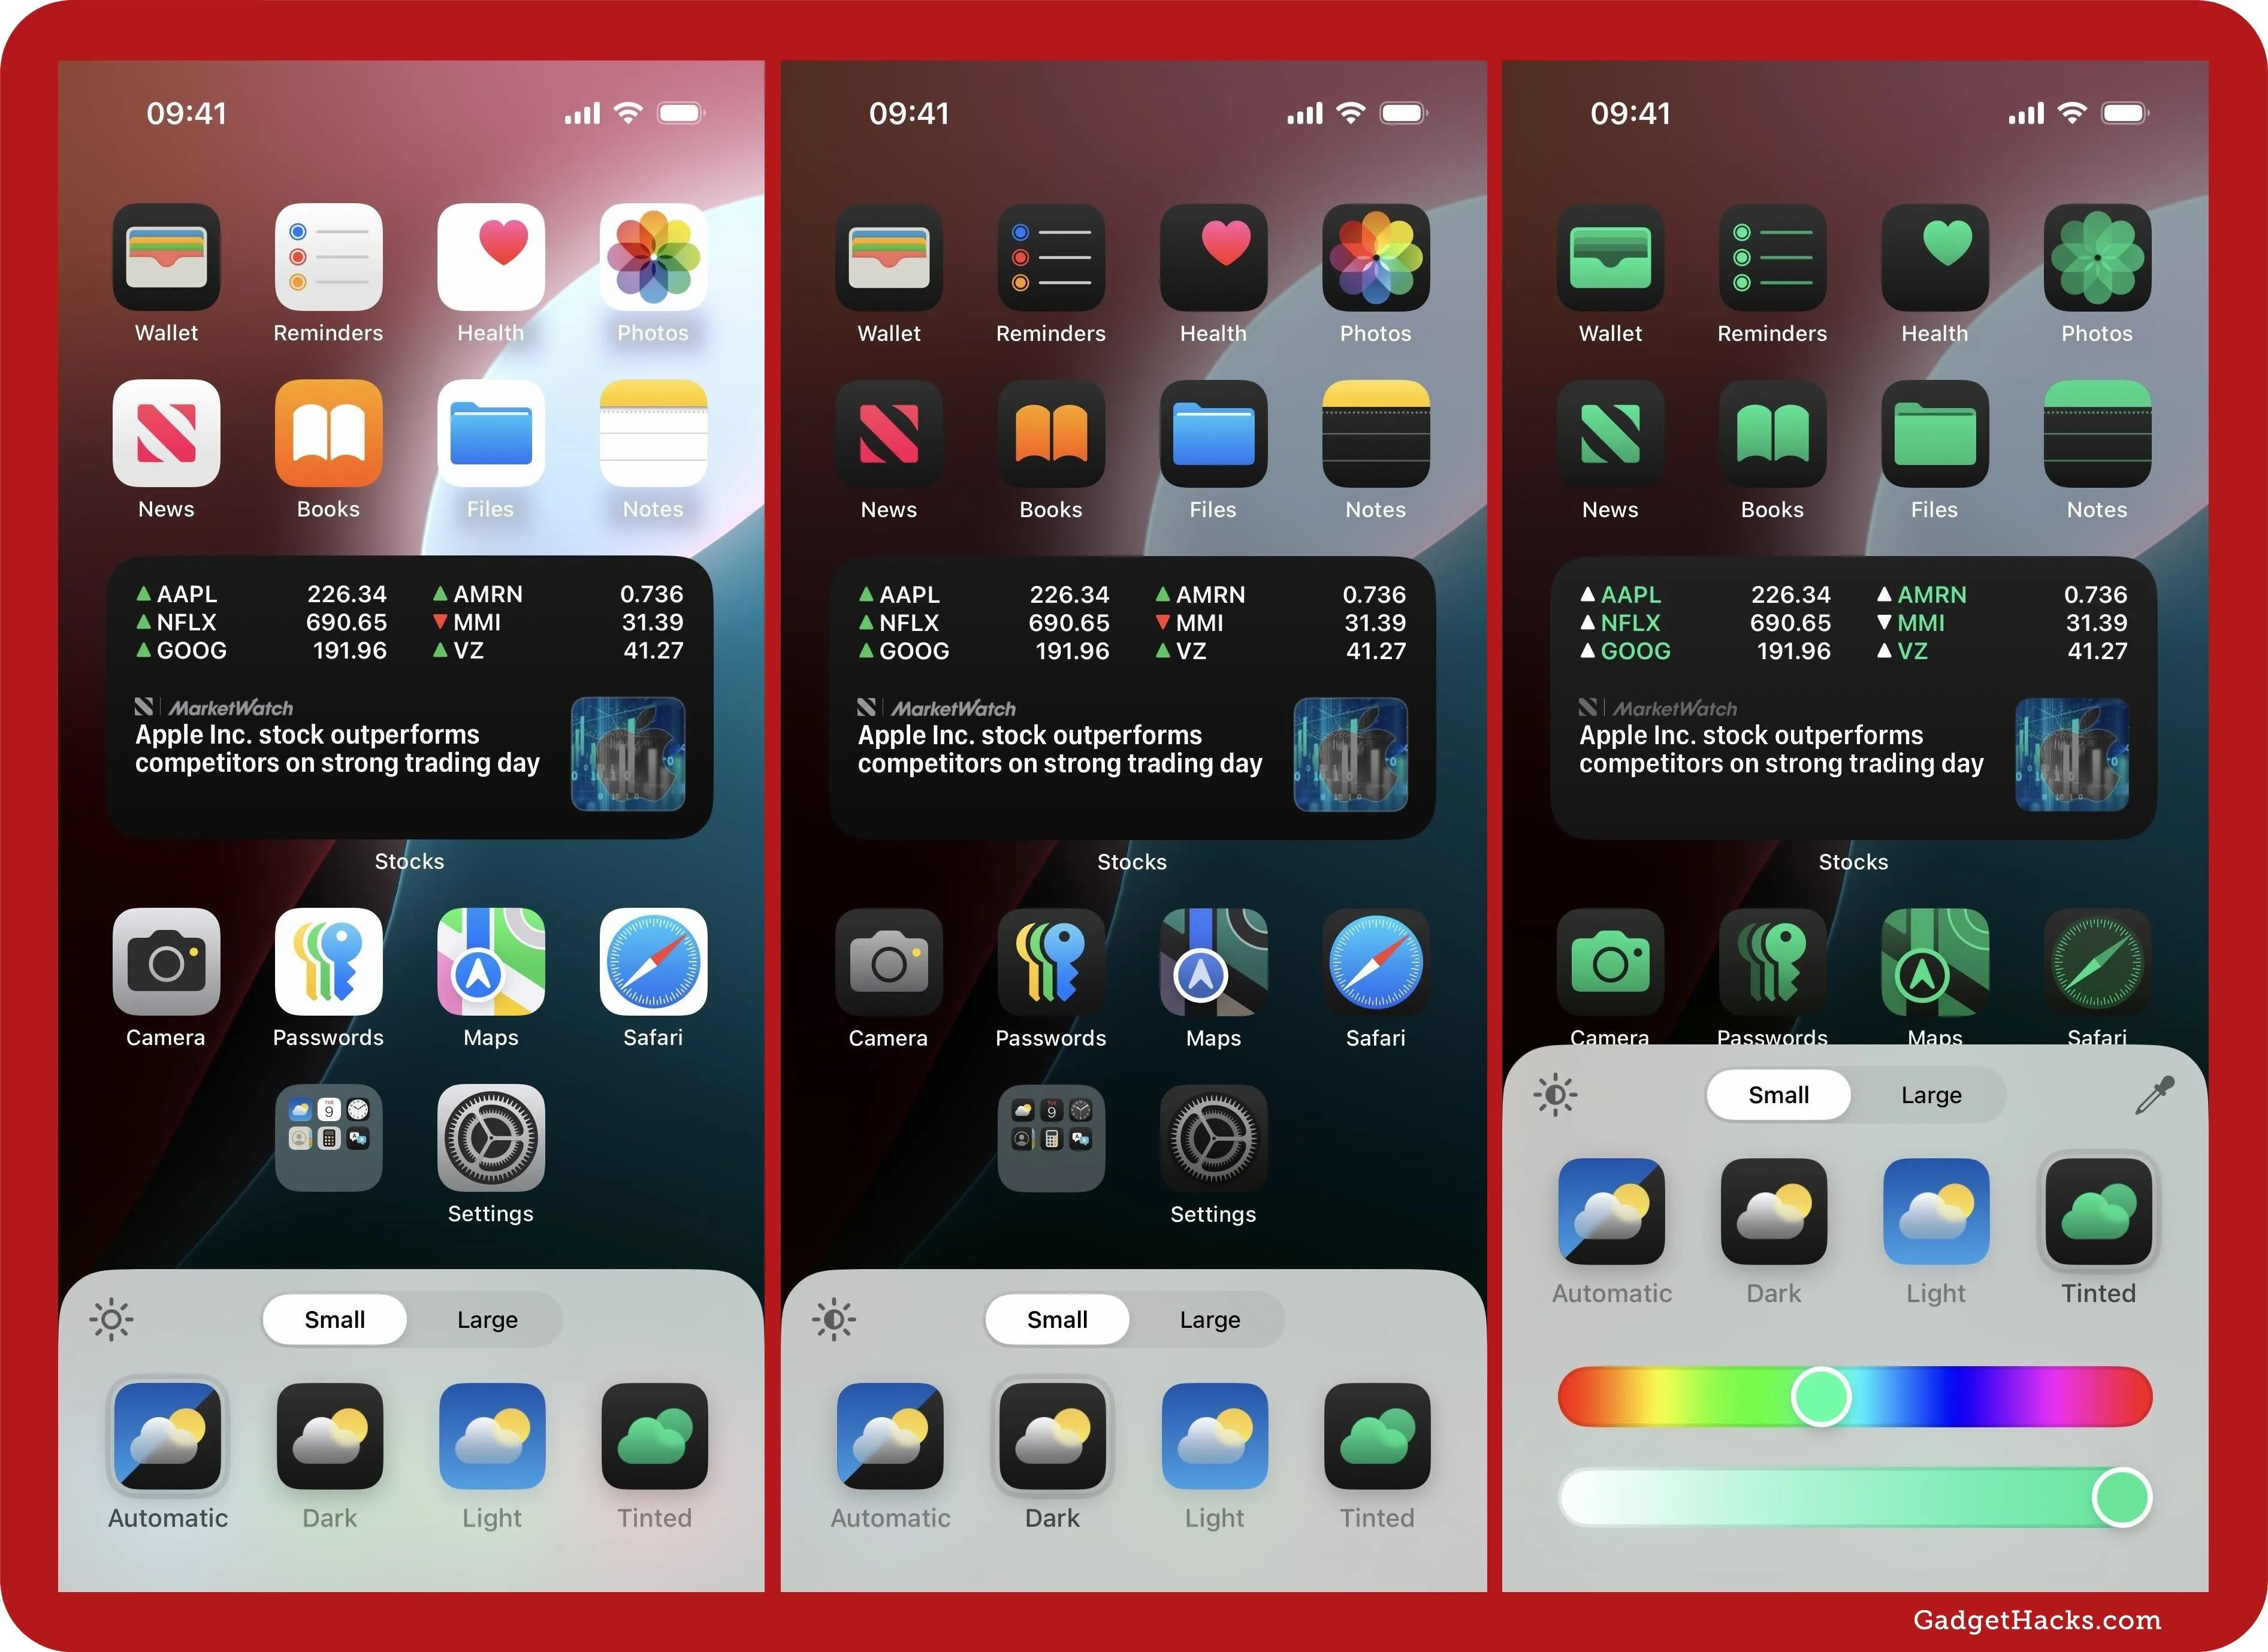
11. Customize the Home Screen Icon
Did you know you now have Dark Mode icons on your iPhone or iPad? On iOS and iPadOS 18, it's pretty easy to switch from Light Mode to Dark Mode icons and even to customize their color to your liking.
Simply touch and hold the wallpaper on your Home Screen, tap "Customize" in the corner, and choose "Dark" to permanently make all the Home Screen icons dark all the time or "Automatic" to turn them dark only when Dark Mode for iOS or iPadOS is on. There's also a "Tinted" option, which lets you choose the shade and saturation from a long bar, giving you the option to them all your icons and widgets.
From this menu, you can also enlarge the Reminders icon and every other icon, which also hides app, folder, and widget names!
Cover photo and screenshots by Justin Meyers/Gadget Hacks


Comments
Be the first, drop a comment!