


On your iCloud Mail account, you can easily use subaddressing to create hundreds of new iCloud email addresses to give to companies and other parties, all of which go straight to your primary iCloud email address's inbox. The problem with these types of alternative email addresses is that you can't ever respond to emails with the plus tag intact. But Apple has another alternative for you to start using.
Actually, Apple offers at least two other ways to obfuscate your primary iCloud email address while retaining the alternative email address in the from: field.
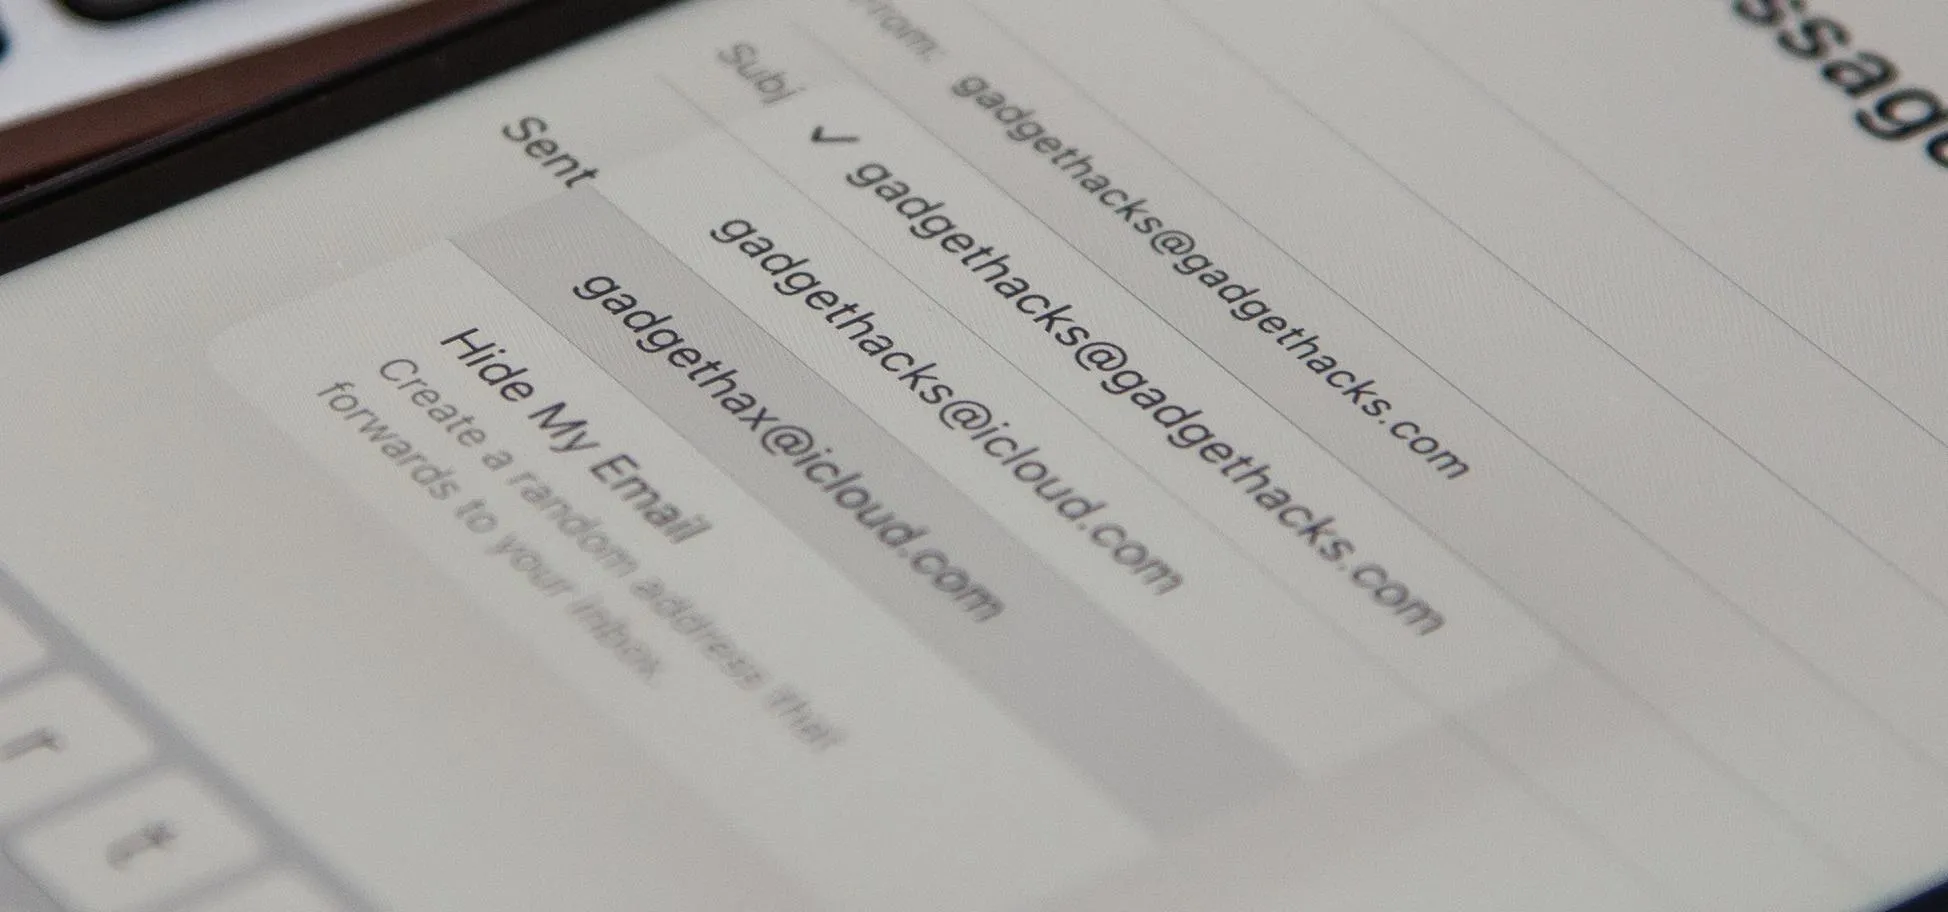
Hide My Email
First, there's Hide My Email, available with an iCloud+ subscription.
Hide My Email lets you generate unique, random email addresses when signing up for websites and apps using Sign in with Apple. These email addresses end in @privaterelay.appleid.com. You can also create new Hide My Email aliases via the Mail app, your iCloud+ preferences on your device or iCloud.com, and even supported third-party apps. These addresses end in @icloud.com.
All the random email addresses you create ending in @icloud.com connect directly to your iCloud account, and you can easily reply to emails using the same randomized email address.
- Don't Miss: 8 Ways Your iPhone Can Make Emailing More Secure
The emails ending in @privaterelay.appleid.com work a bit differently. Businesses can send you emails to the randomized address, which are funneled and transformed through Apple's Private Relay mail transfer agent (MTA), which then forwards the transformed email to your inbox. When you reply, even if it looks like you're replying using your unobfuscated email address, it gets sent back through Apple's Private Relay MTA, where it's transformed and randomized before being sent to the business.
Email addresses created with Hide My Email are great because they act more like throwaway email addresses. They're intended to communicate privately with one business or person, so when you no longer need the account or need to contact them — or when junk mail is piling up — you can delete it, and it's gone forever. And you can organize them with labels, so it's easy to keep track of what address goes with what.
The problem with Hide My Email is that it can be confusing, especially when trying to reply via an @privaterelay.appleid.com address. You also can't start a new email and select an already created Hide My Email address for the from: field — it only works with replies unless you create a new Hide My Email address. The address is limited to 100 incoming and outgoing emails per day. Lastly, you need to pay for iCloud+ to use it.
- Don't Miss: How to Find and Manage Your 'Sign in with Apple' and 'Hide My Email' Accounts on Your iPhone
Aliases
If you want an alternative iCloud email address for specific purposes instead of individual businesses and contacts, you'll want to start using iCloud email aliases. To compartmentalize your inbox, for example, you can use your primary address for personal messaging, an alias for work-related communications, another alias for school, and another alias for newsletters, websites, and apps.
Unlike iCloud email subaddresses, you can send emails directly from your alias, whether they are new emails or replies. And unlike Hide My Email addresses, they aren't confusing, they won't cost anything, and you can choose the local part, or username, that appears before the @ sign. These aliases function as separate email addresses from your main account address, but their incoming messages will end up in the same iCloud Mail inbox.
Aliases are also useful for privacy reasons, to keep your primary email address secure. And you can disable an alias temporarily to pause incoming emails and return them to the sender instead of deleting the alias outright (which is also an option).
How to Create iCloud Mail Aliases
Apple gives every iCloud user up to three free email address aliases, which will end with the @icloud.com domain. If you've already used up three aliases, you won't be able to create any new ones until you delete one of the other aliases.
If you've been an Apple user for a long time and have already created aliases, you may see up to five on your account. This would happen if you made a MobileMe and/or .Mac account before you migrated to iCloud. So, you may have aliases with the @me.com and @icloud.com domains, and your primary email could end in @icloud.com, @me.com, and/or @mac.com. To create new aliases, you must delete enough aliases to have two or fewer aliases in total. But know that deleting an alias is irreversible.
Quick notes:
- Once you create an alias, any message sent to the alias address will appear in your primary inbox for your iCloud Mail account, along with your primary email address, other aliases, subaddresses, and Hide My Email addresses.
- Any alias you create cannot be changed to your primary iCloud Mail address or used to create a new Apple ID. However, you can pause and delete aliases at any time.
- You cannot create a new alias after deleting one until seven days have passed.
Via iCloud.com
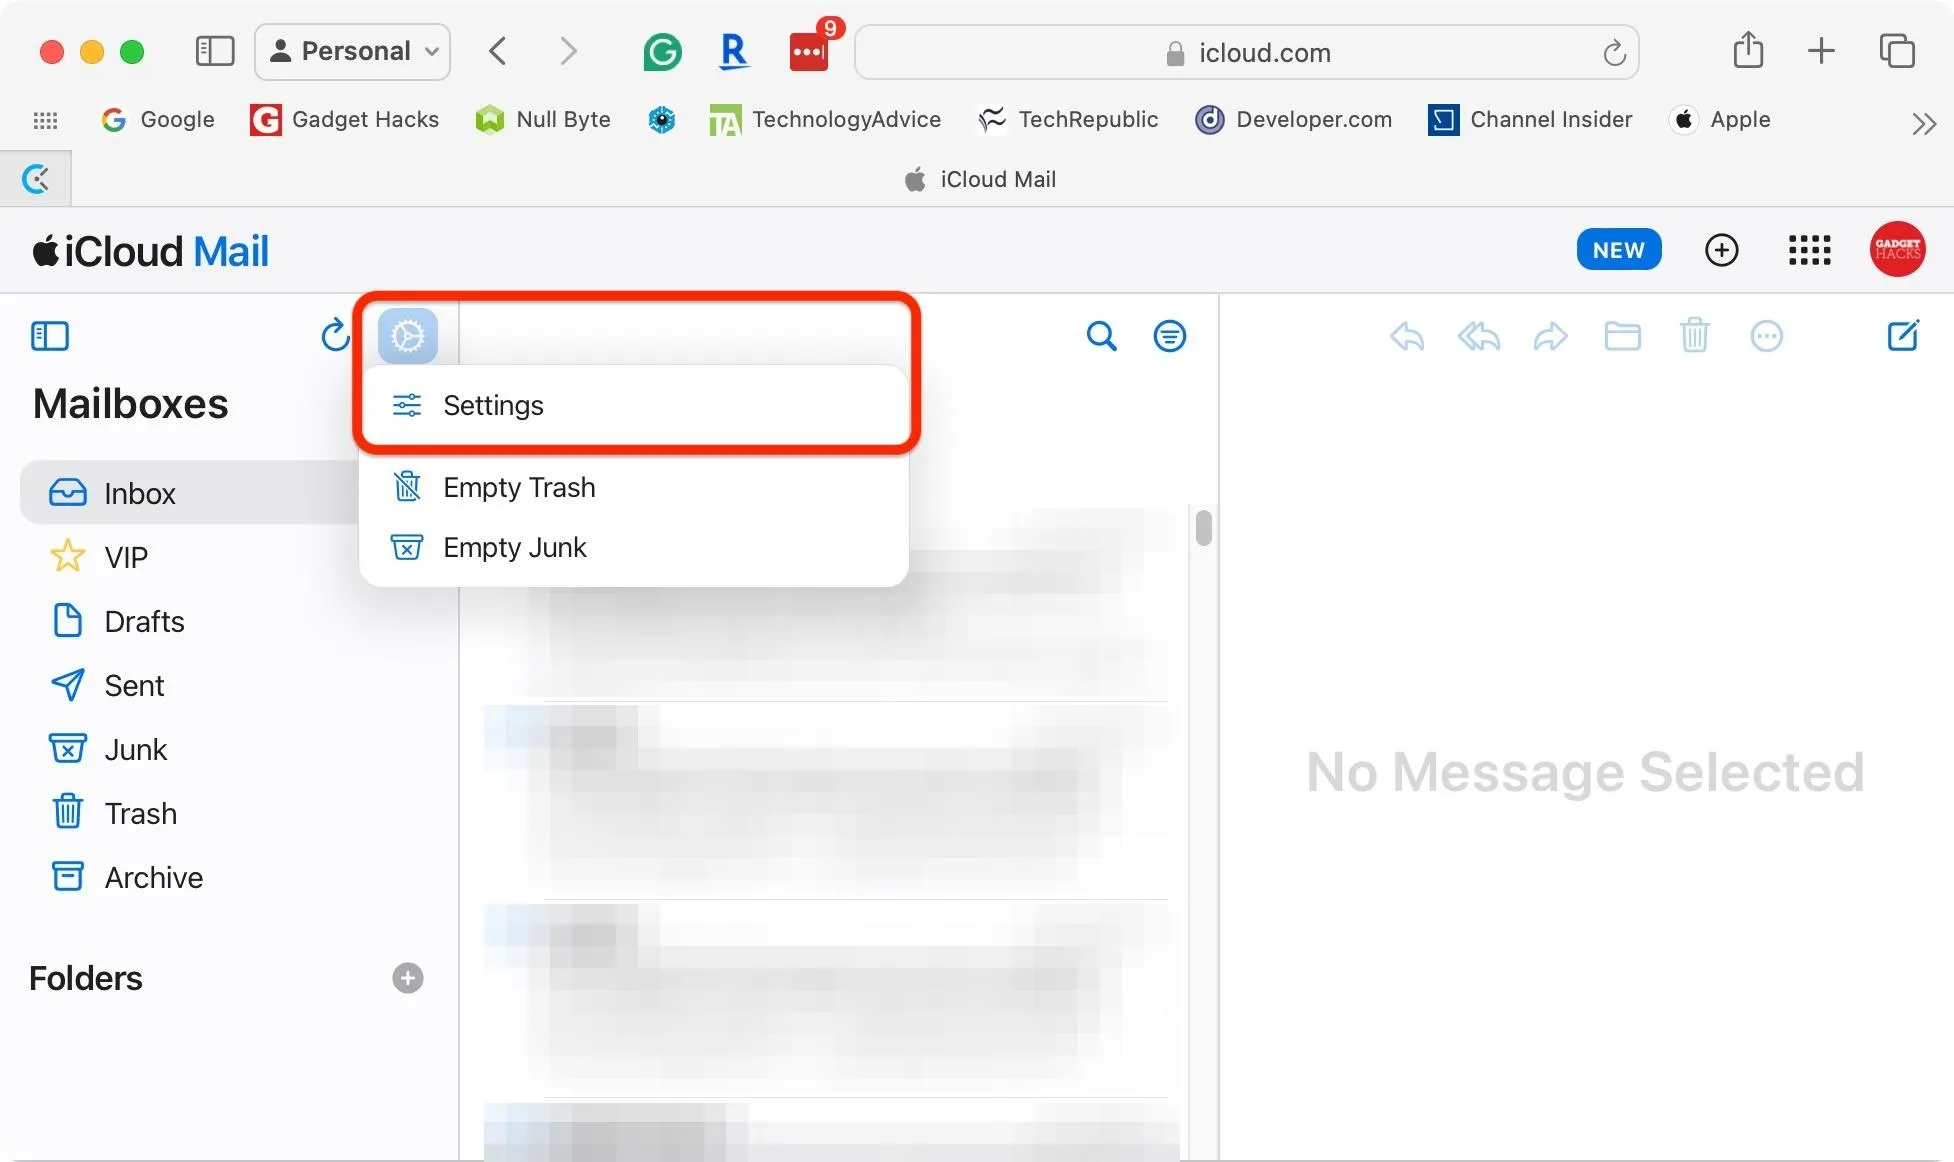
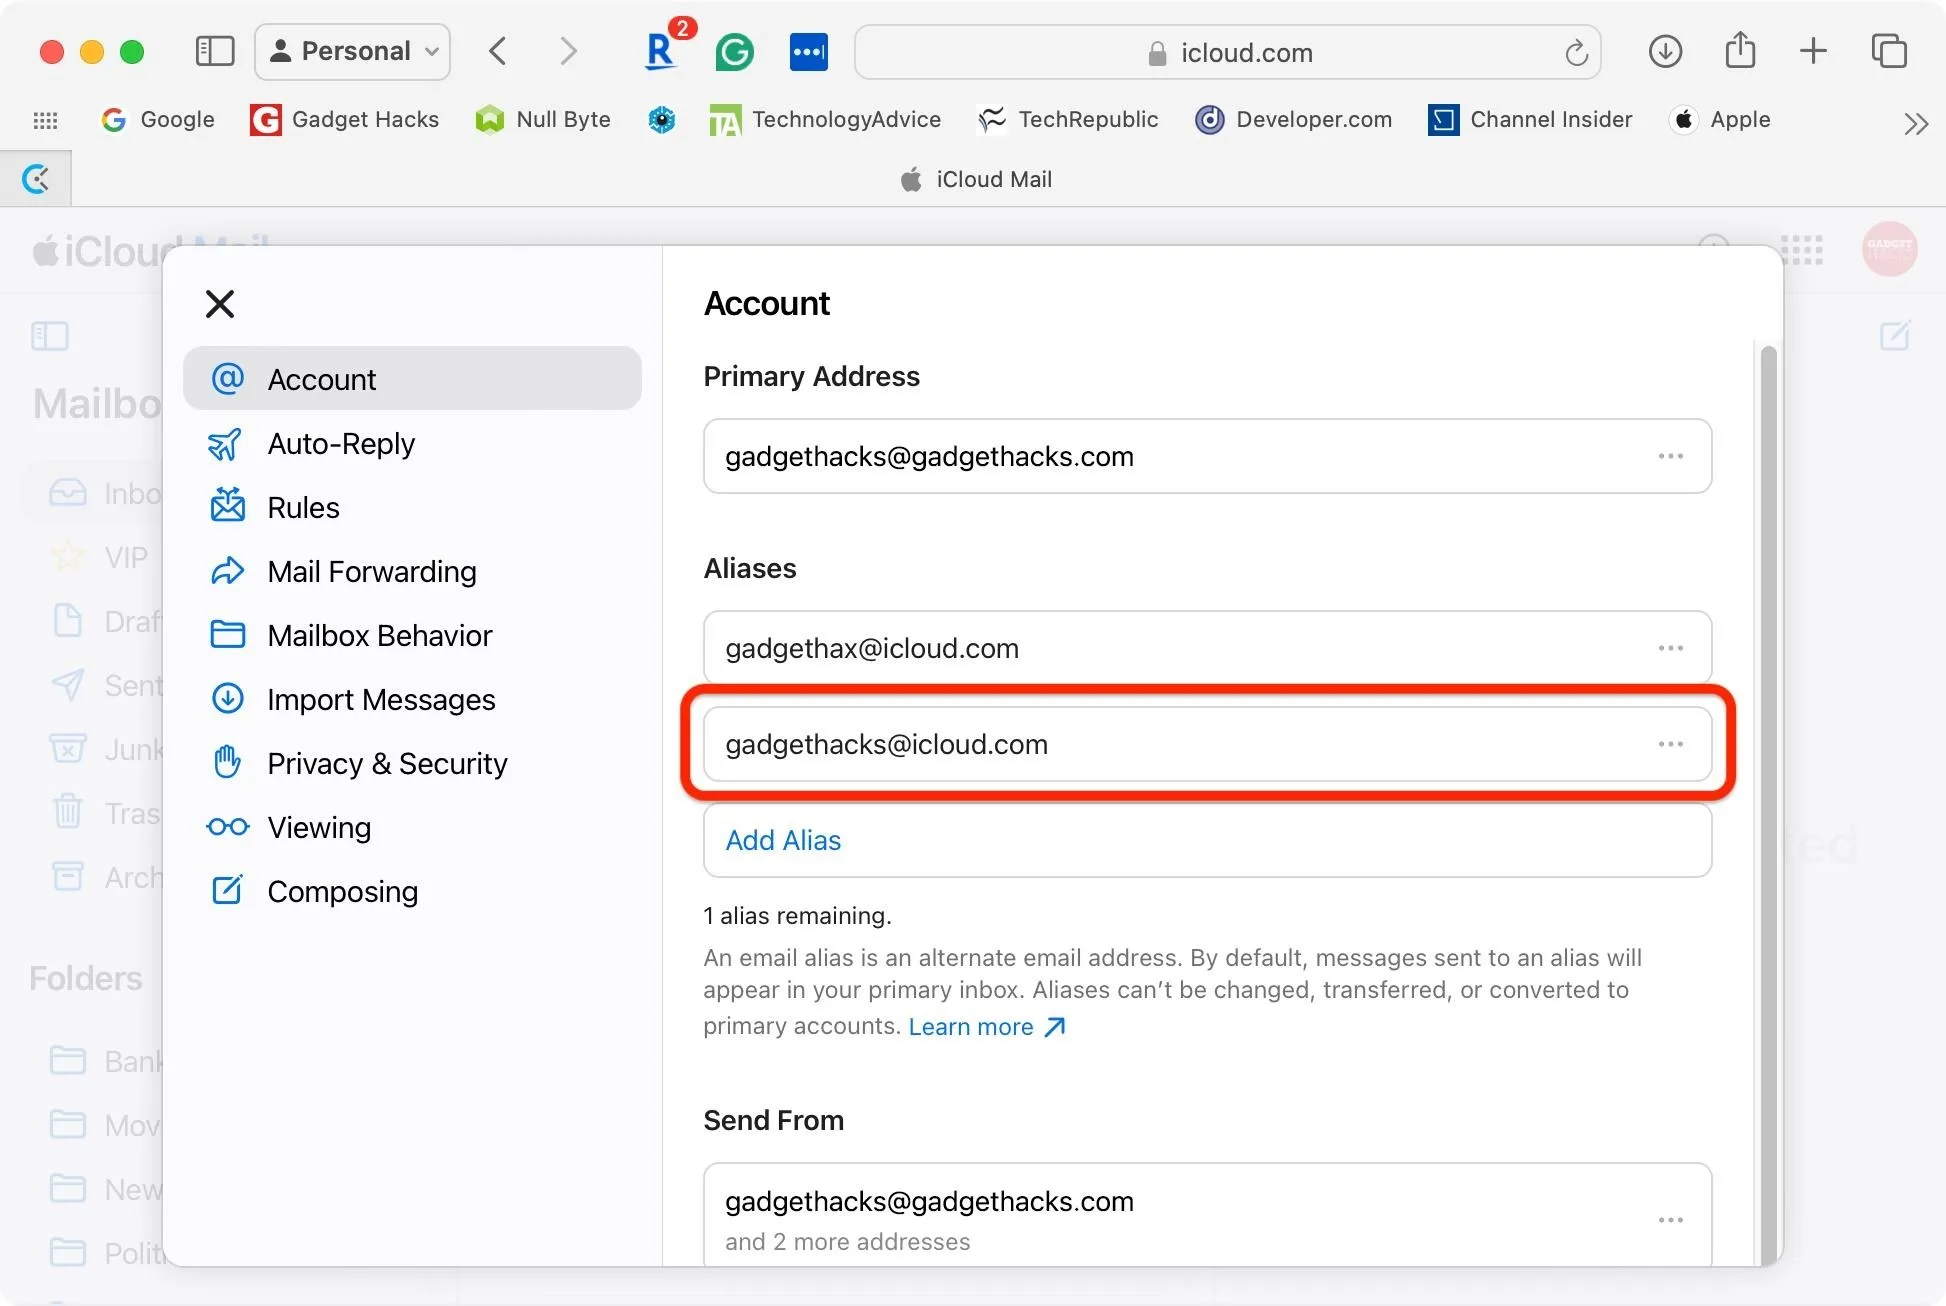
Visit icloud.com/mail in your web browser on your Mac or another device, log in to your Apple ID account, then click the Settings icon, followed by "Settings."
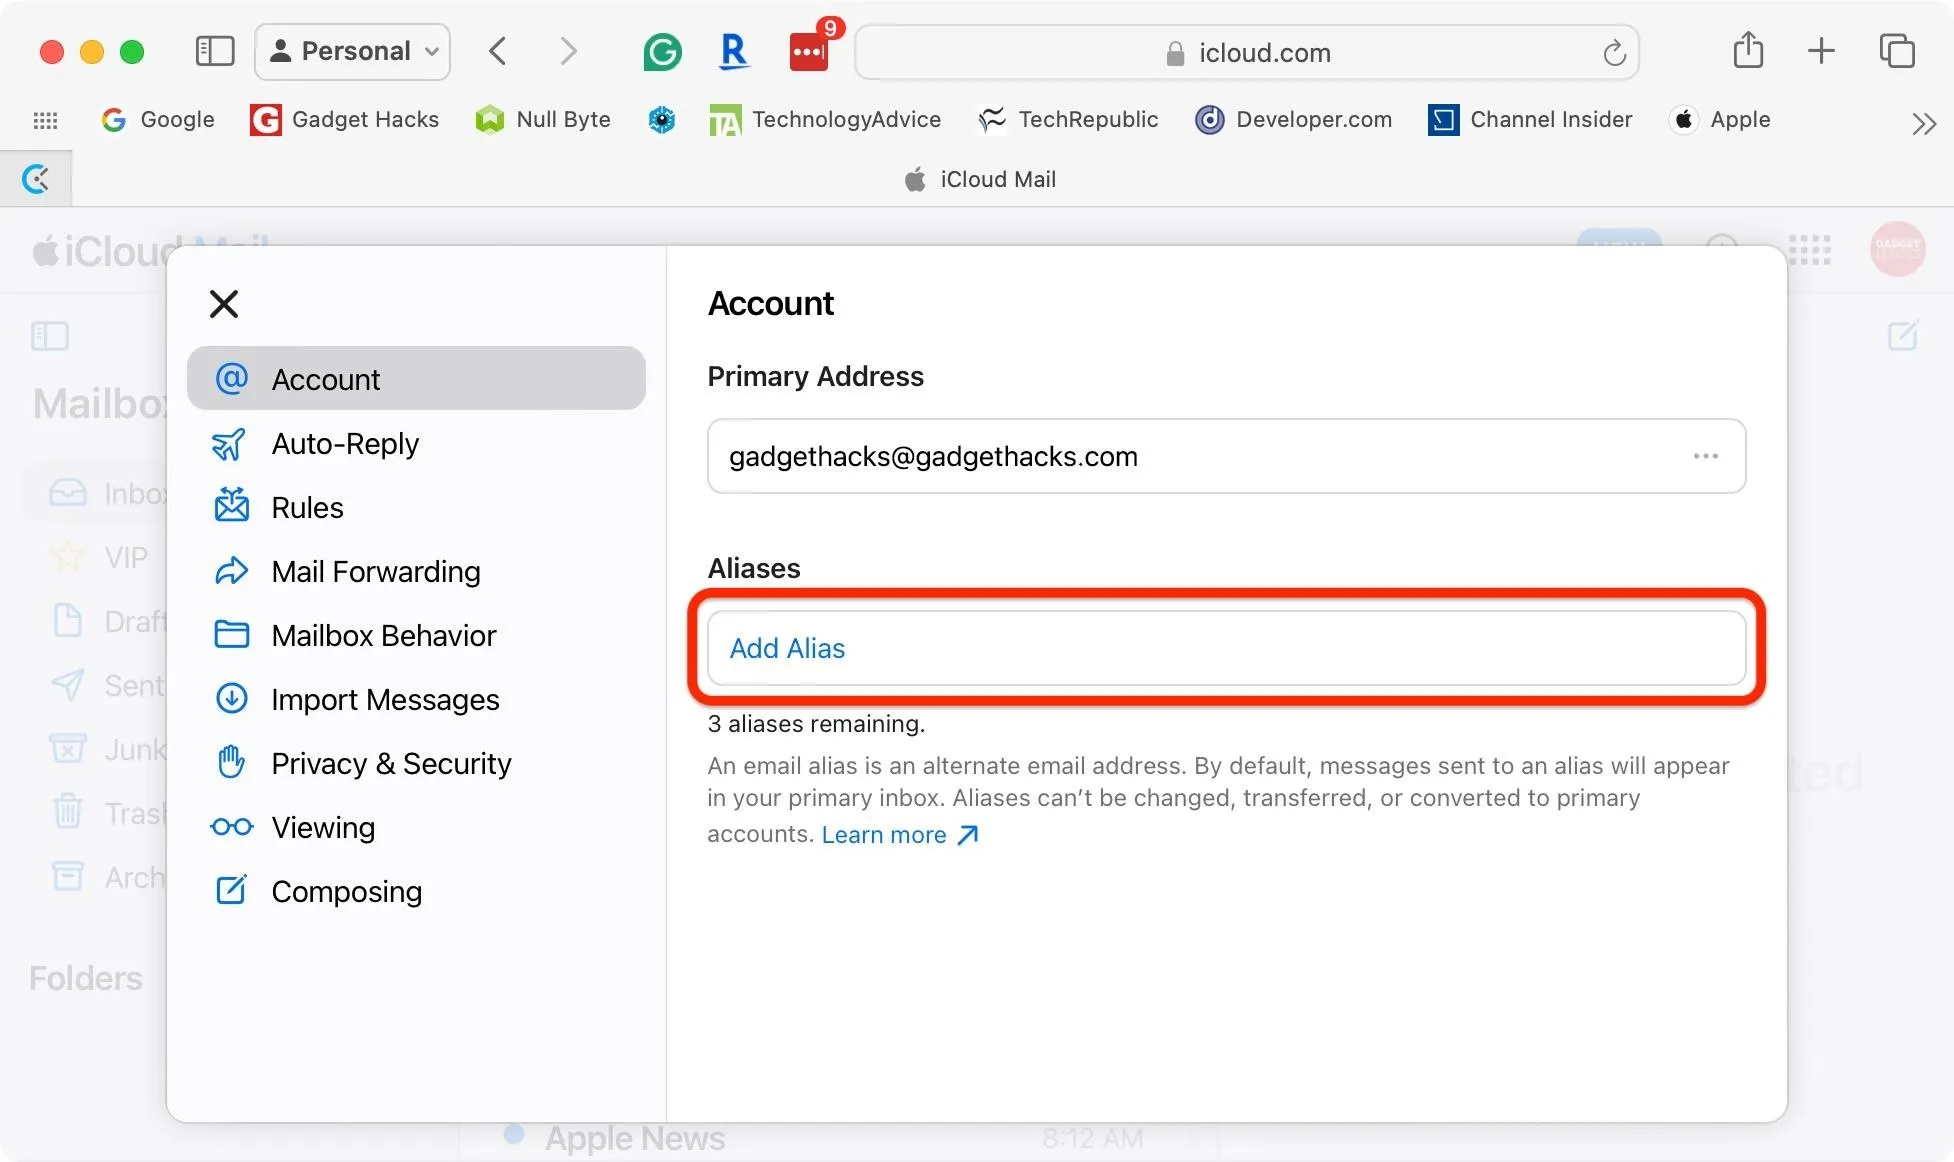
Next, ensure your in the Account tab, then choose "Add Alias" under Aliases.
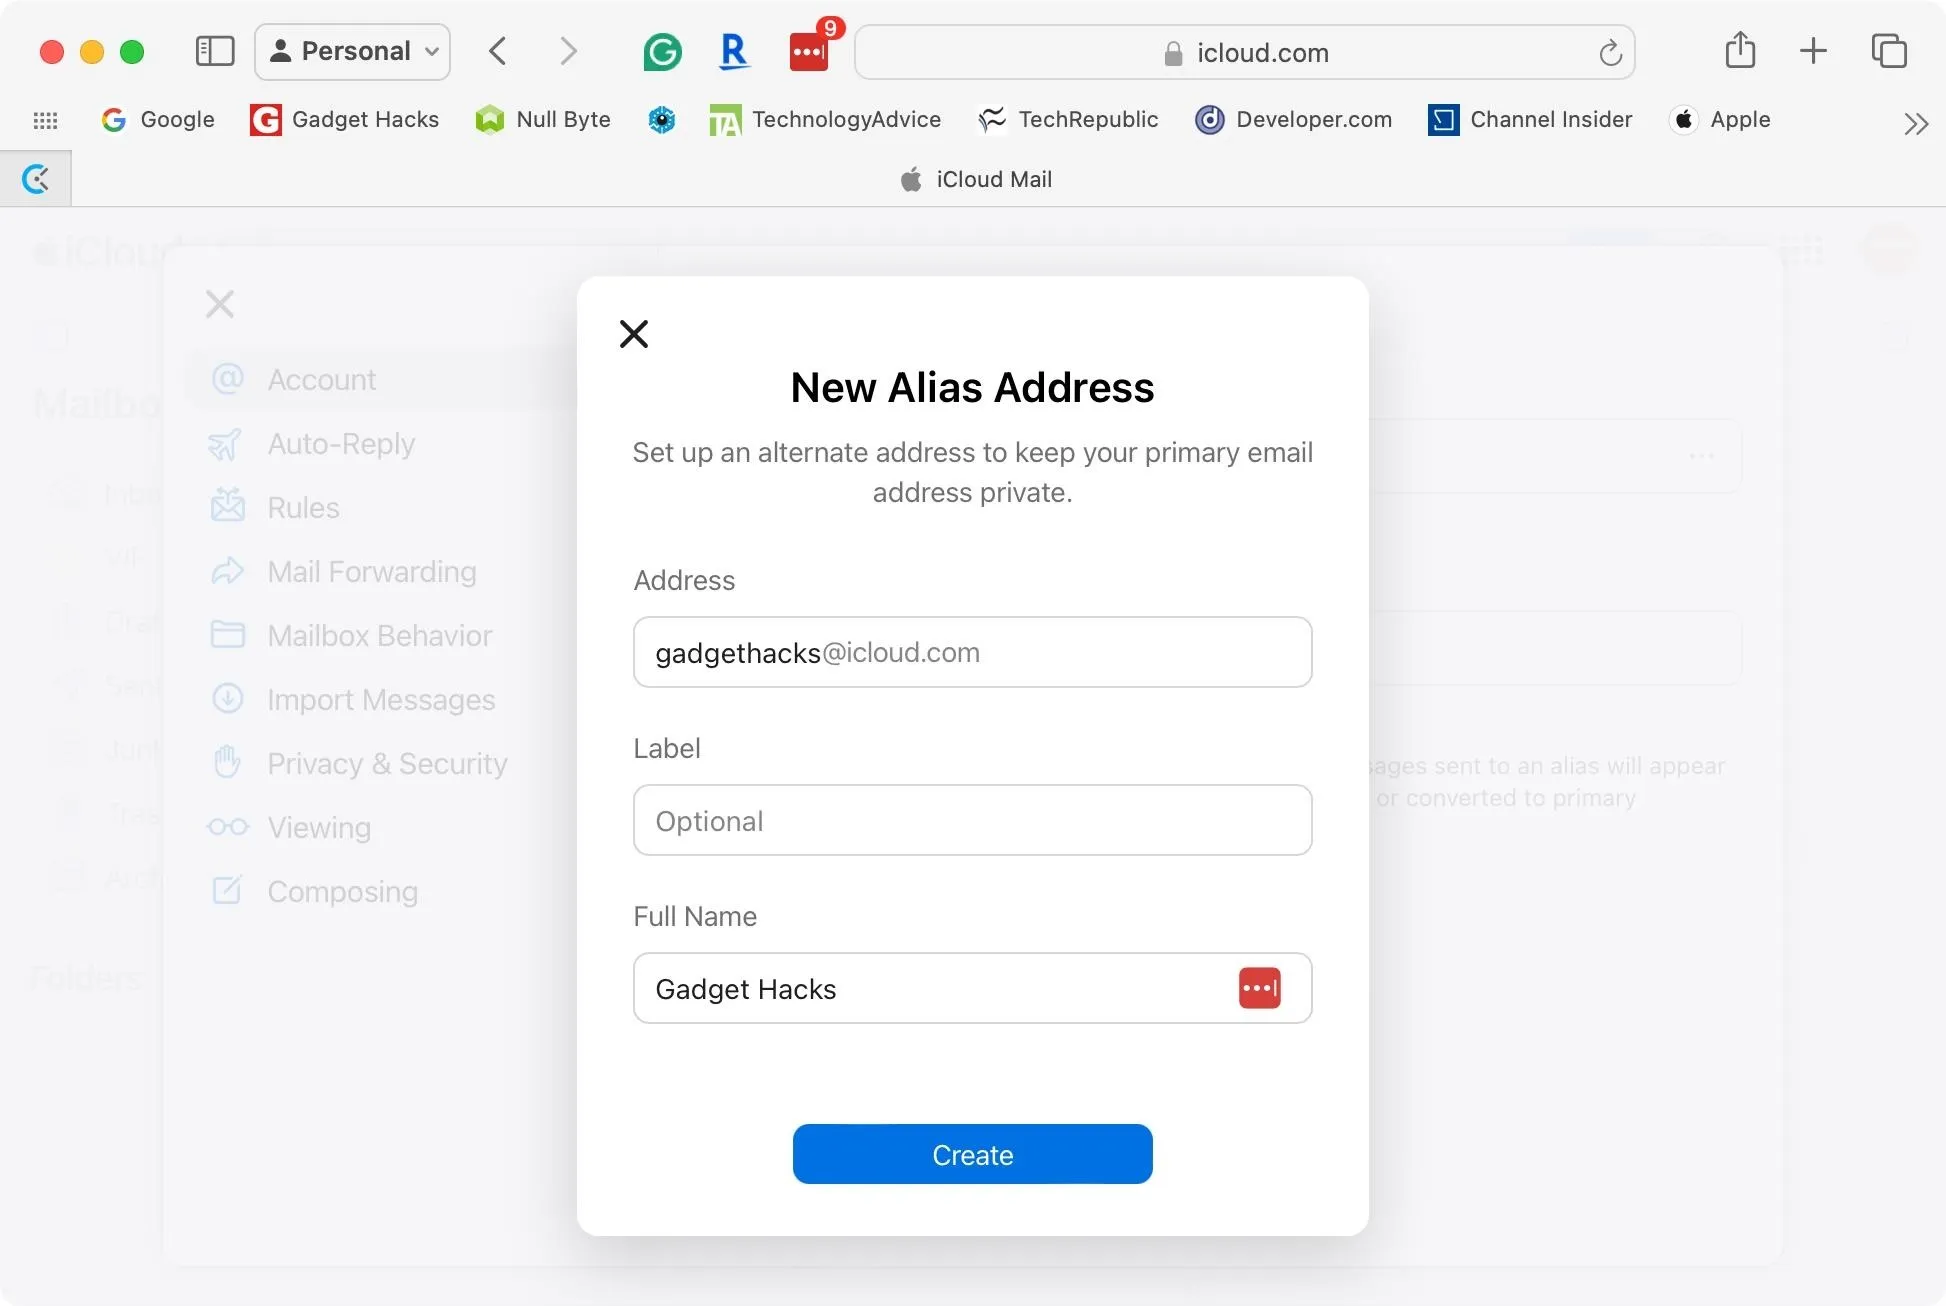
On the New Alias Address form, enter the @icloud.com email address you'd like to use for the alias in the Address field.
The Full Name field will retain your current name, but you can modify it to another name if you want another name to appear when sending emails from this alias address. You can also optionally fill out the Label field.
Click "Create" when done, and that's all there is to it. If another user is already using the email address, iCloud will tell you, and you'll have to choose another email address before creating the alias.
On Your iPhone or iPad
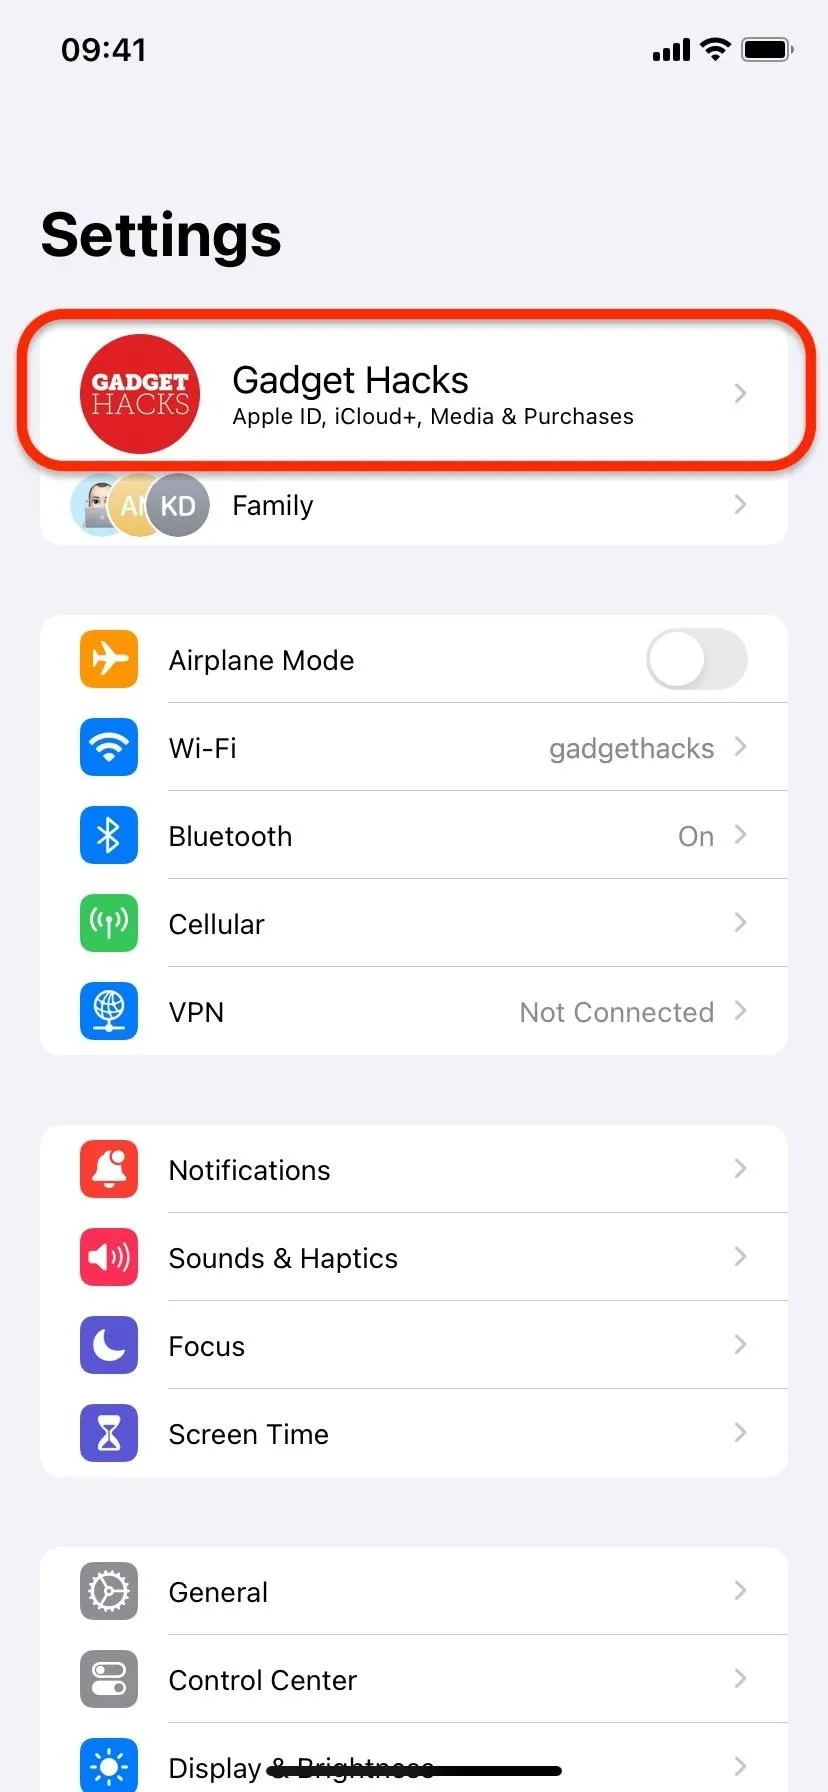
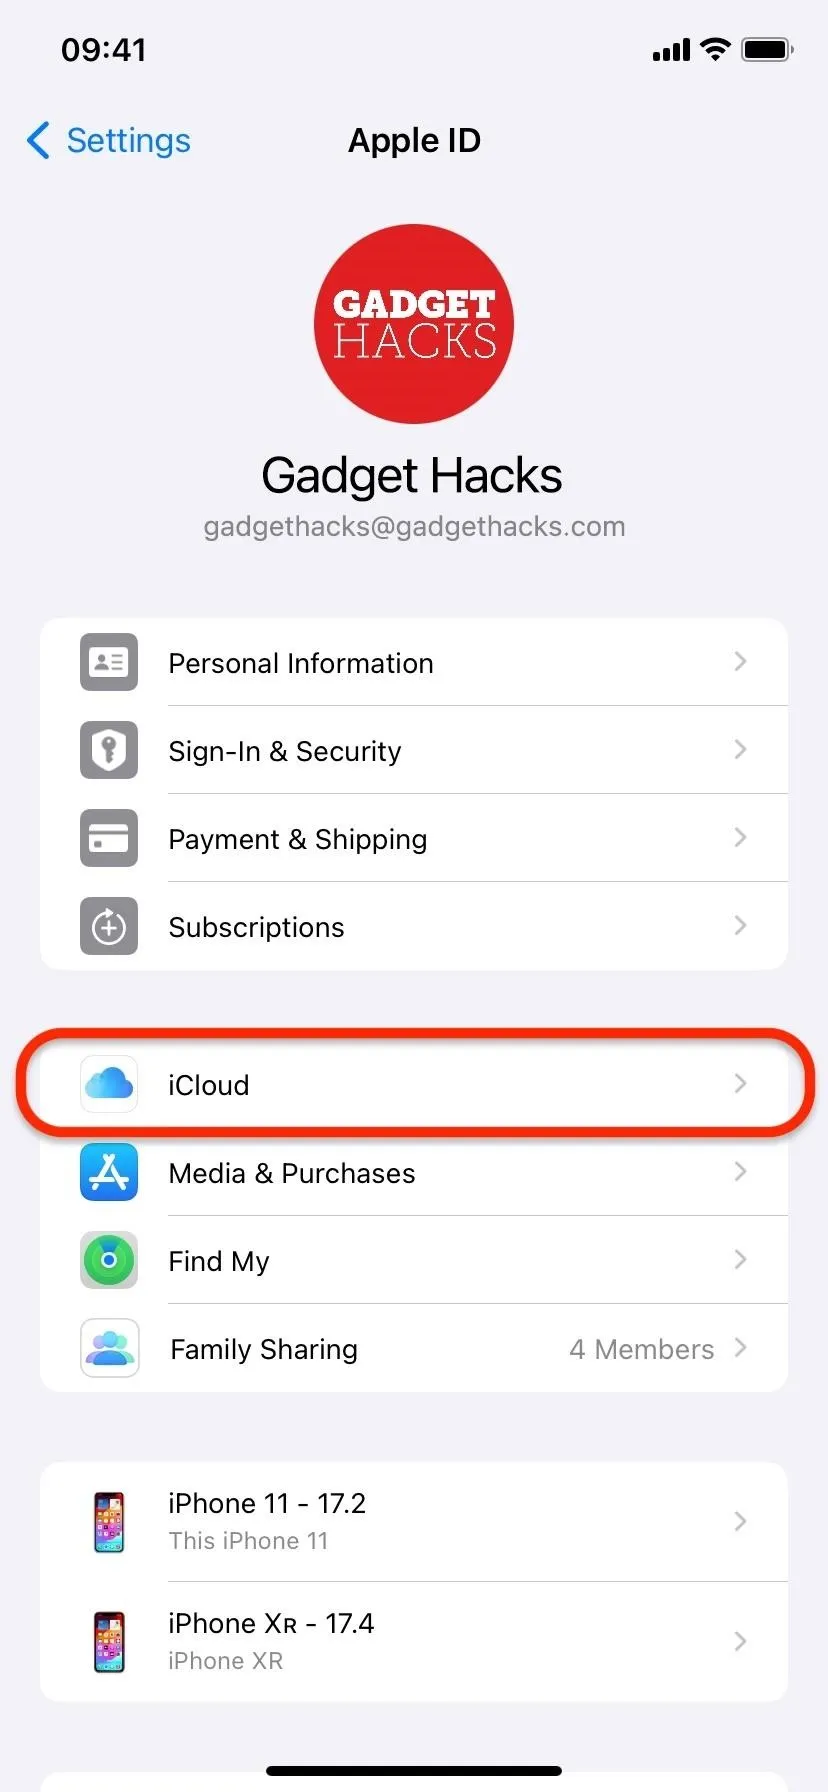
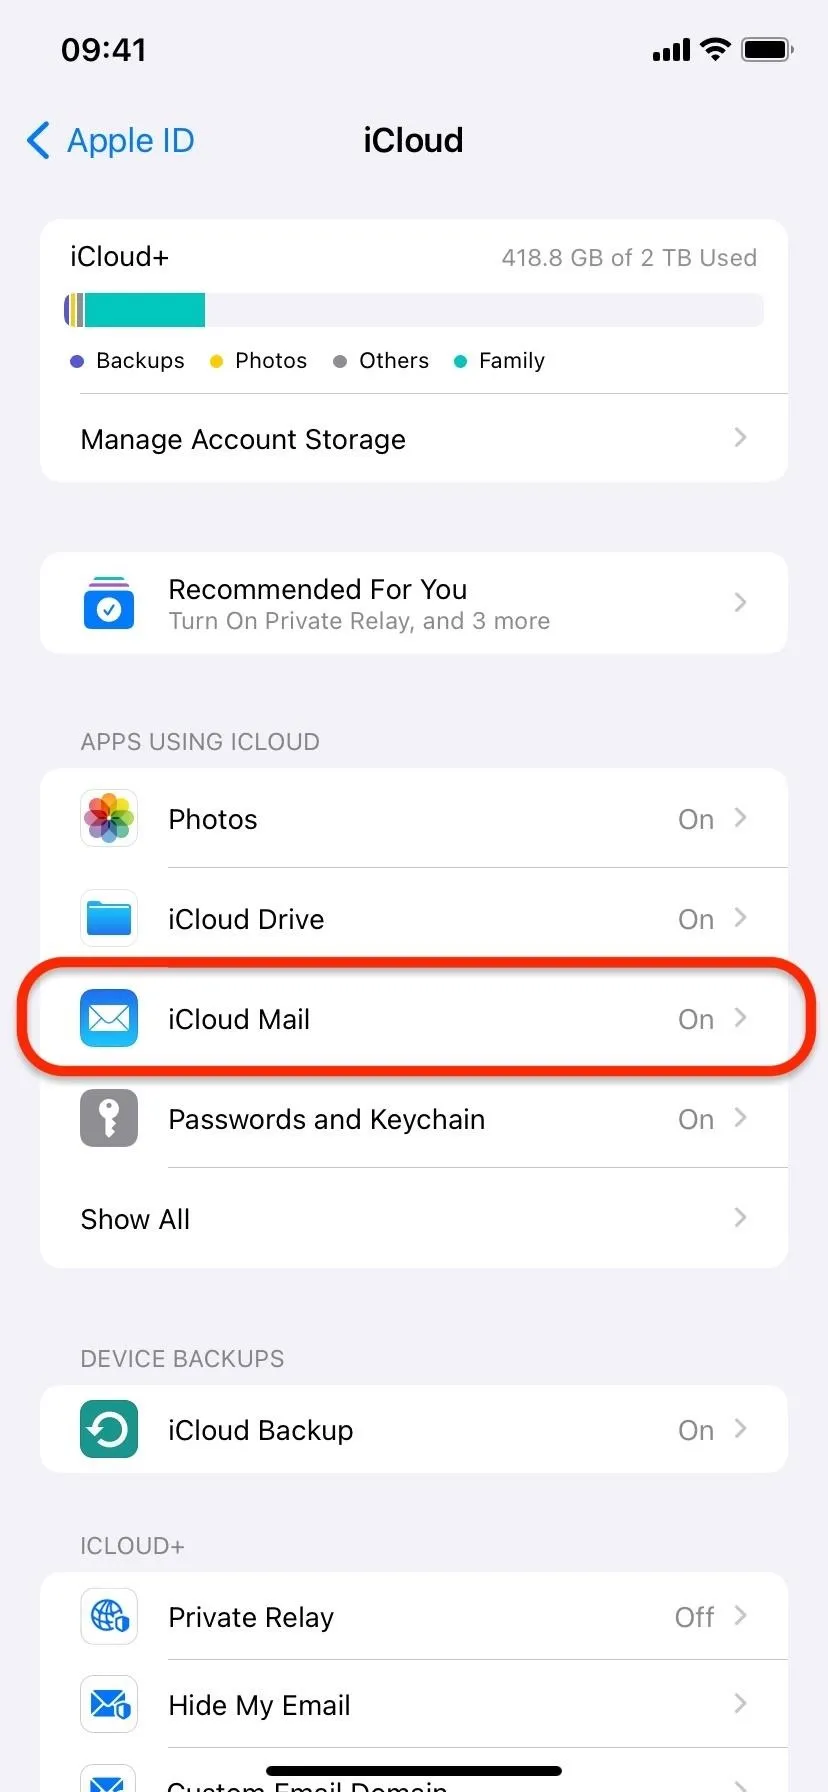
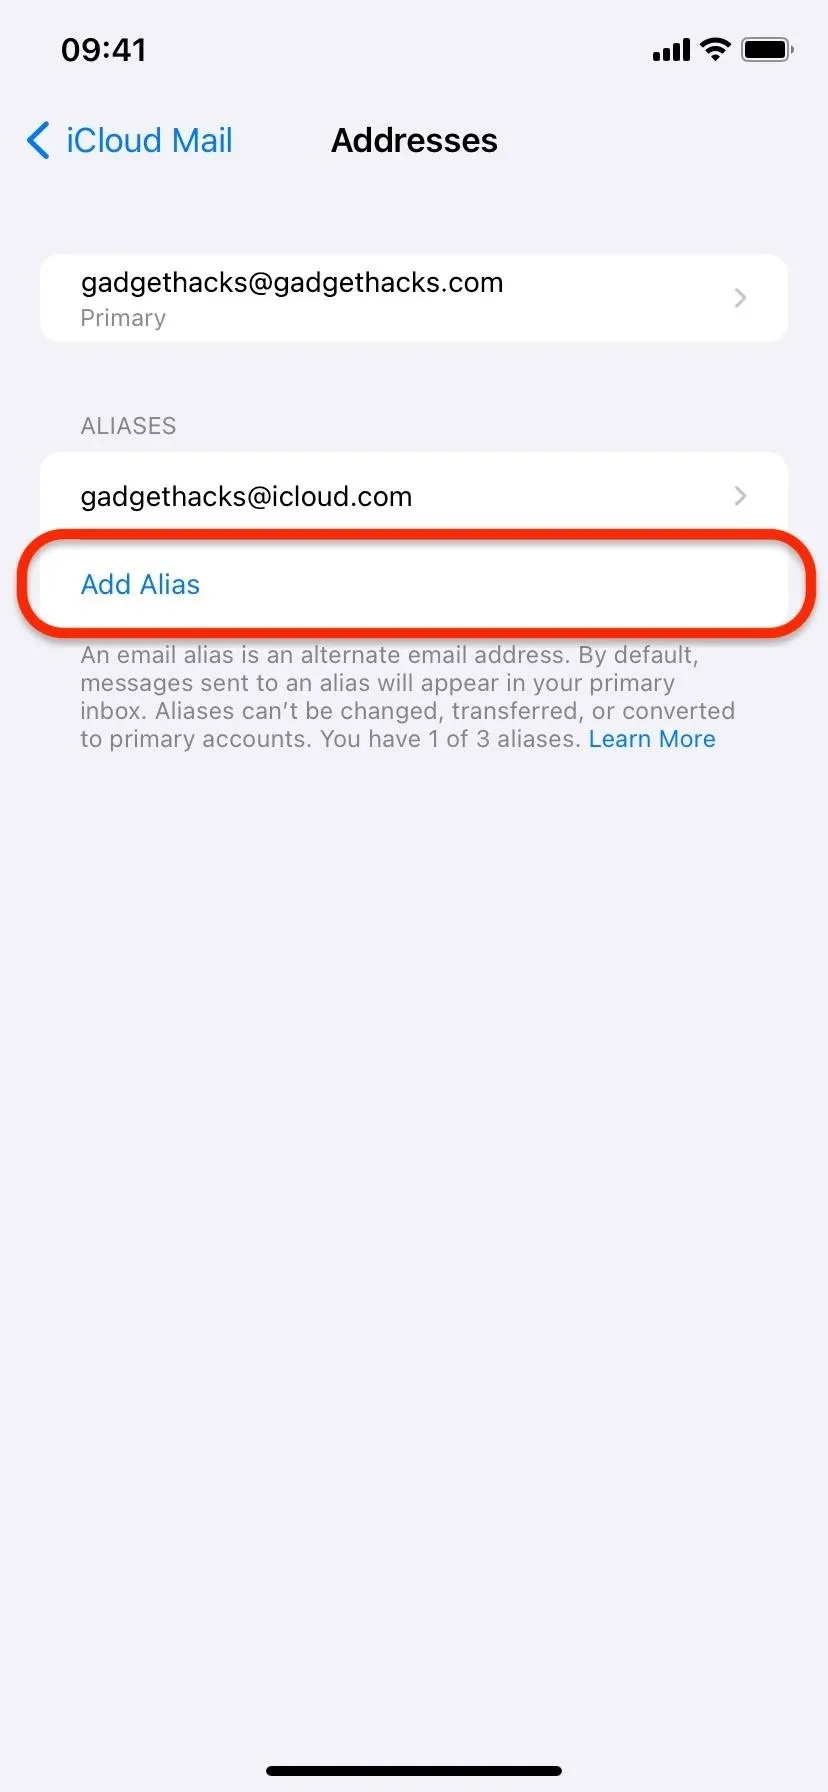
On iOS or iPadOS, open the Settings app, tap your name at the top, choose "iCloud," and then tap "iCloud Mail."
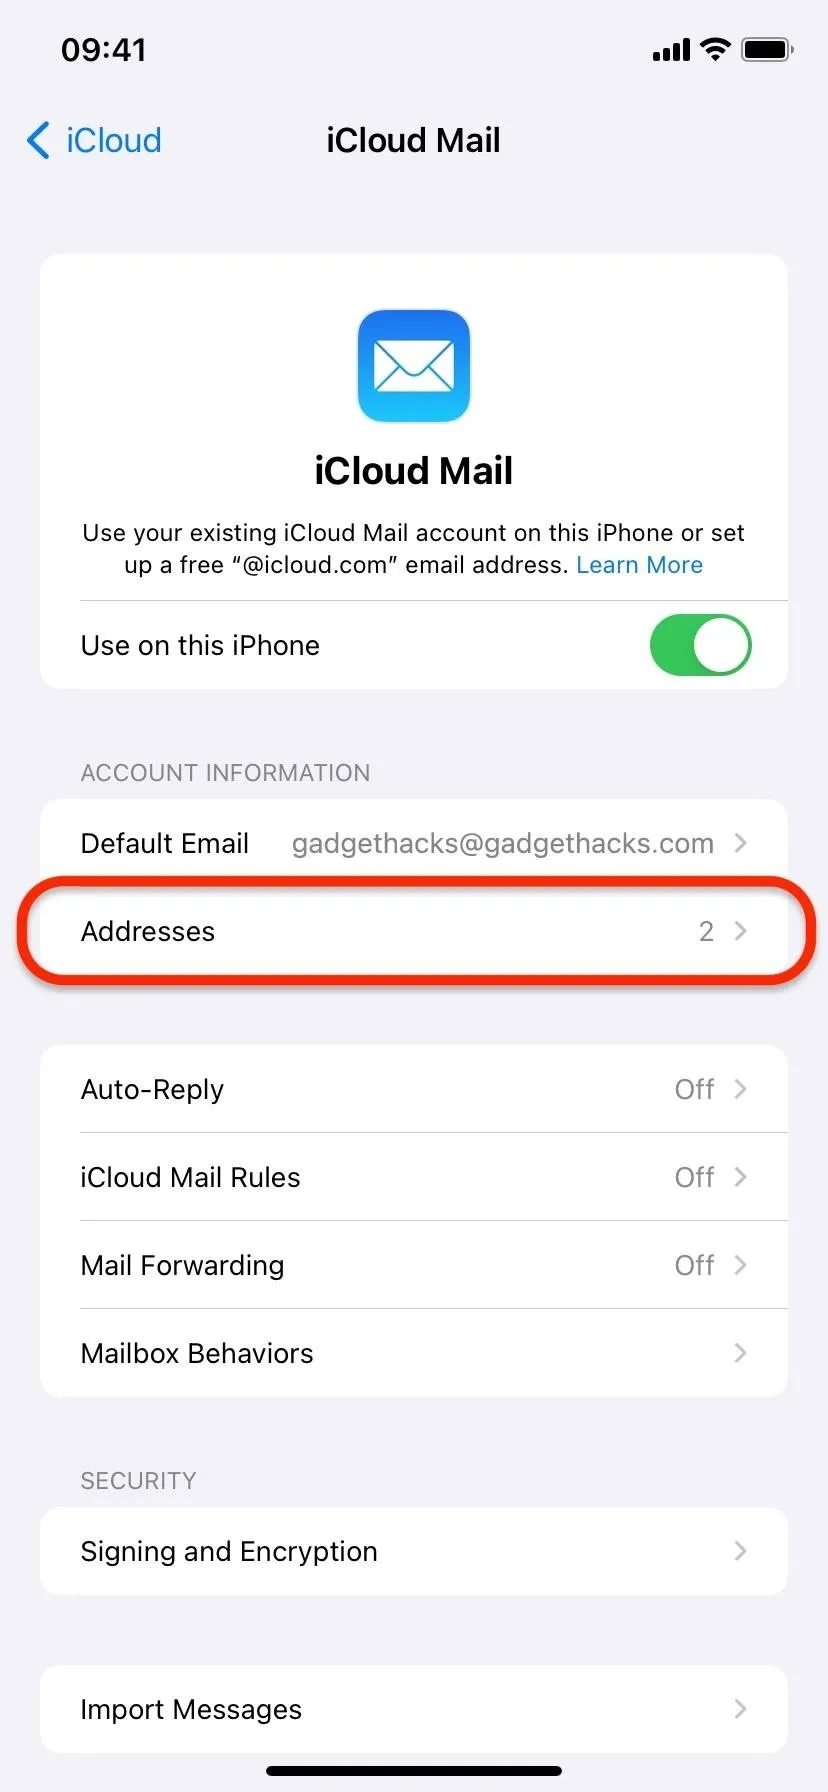
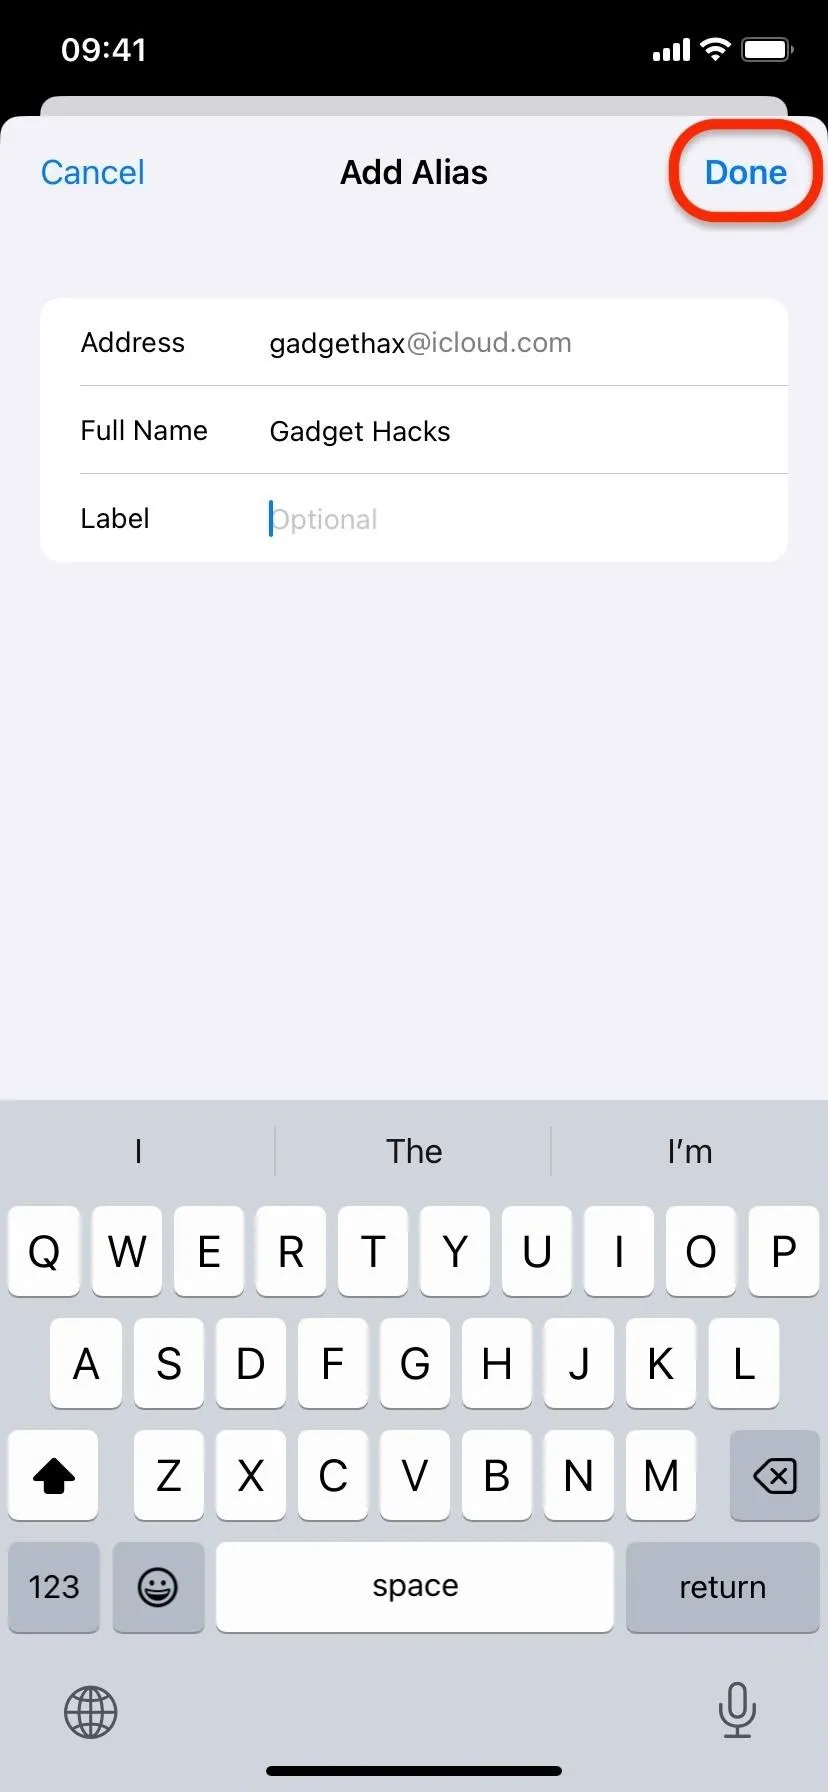
Next, tap "Addresses," followed by "Add Alias" under Aliases. On the Add Alias form, enter the @icloud.com email address you'd like to use for the alias in the Address field.
The Full Name field will retain your current name, but you can modify it to another name if you want another name to appear when sending emails from this alias address. You can also optionally fill out the Label field.
Click "Done" to save, and you're ready to start using the alias. If another user is already using the email address, iCloud will tell you, and you'll have to choose another email address before saving the alias.
How to Pause or Delete an iCloud Mail Alias
One of the best features of alias iCloud Mail addresses is that you can pause emails coming into an alias address by temporarily turning off the alias. You can also remove the alias altogether by deleting it. Either way, emails sent to the alias will return to the sender as undeliverable. If you unpause an alias, emails will get through again.
Via iCloud.com
Visit icloud.com/mail in your web browser on your Mac or another device, log in to your Apple ID account, then click the Settings icon, followed by "Settings." Next, select the alias in question on the Account tab.
To pause or unpause the alias, check or uncheck the "Disable Alias" box and hit the "Save Changes" button. To delete it, hit the "Delete Alias" button.
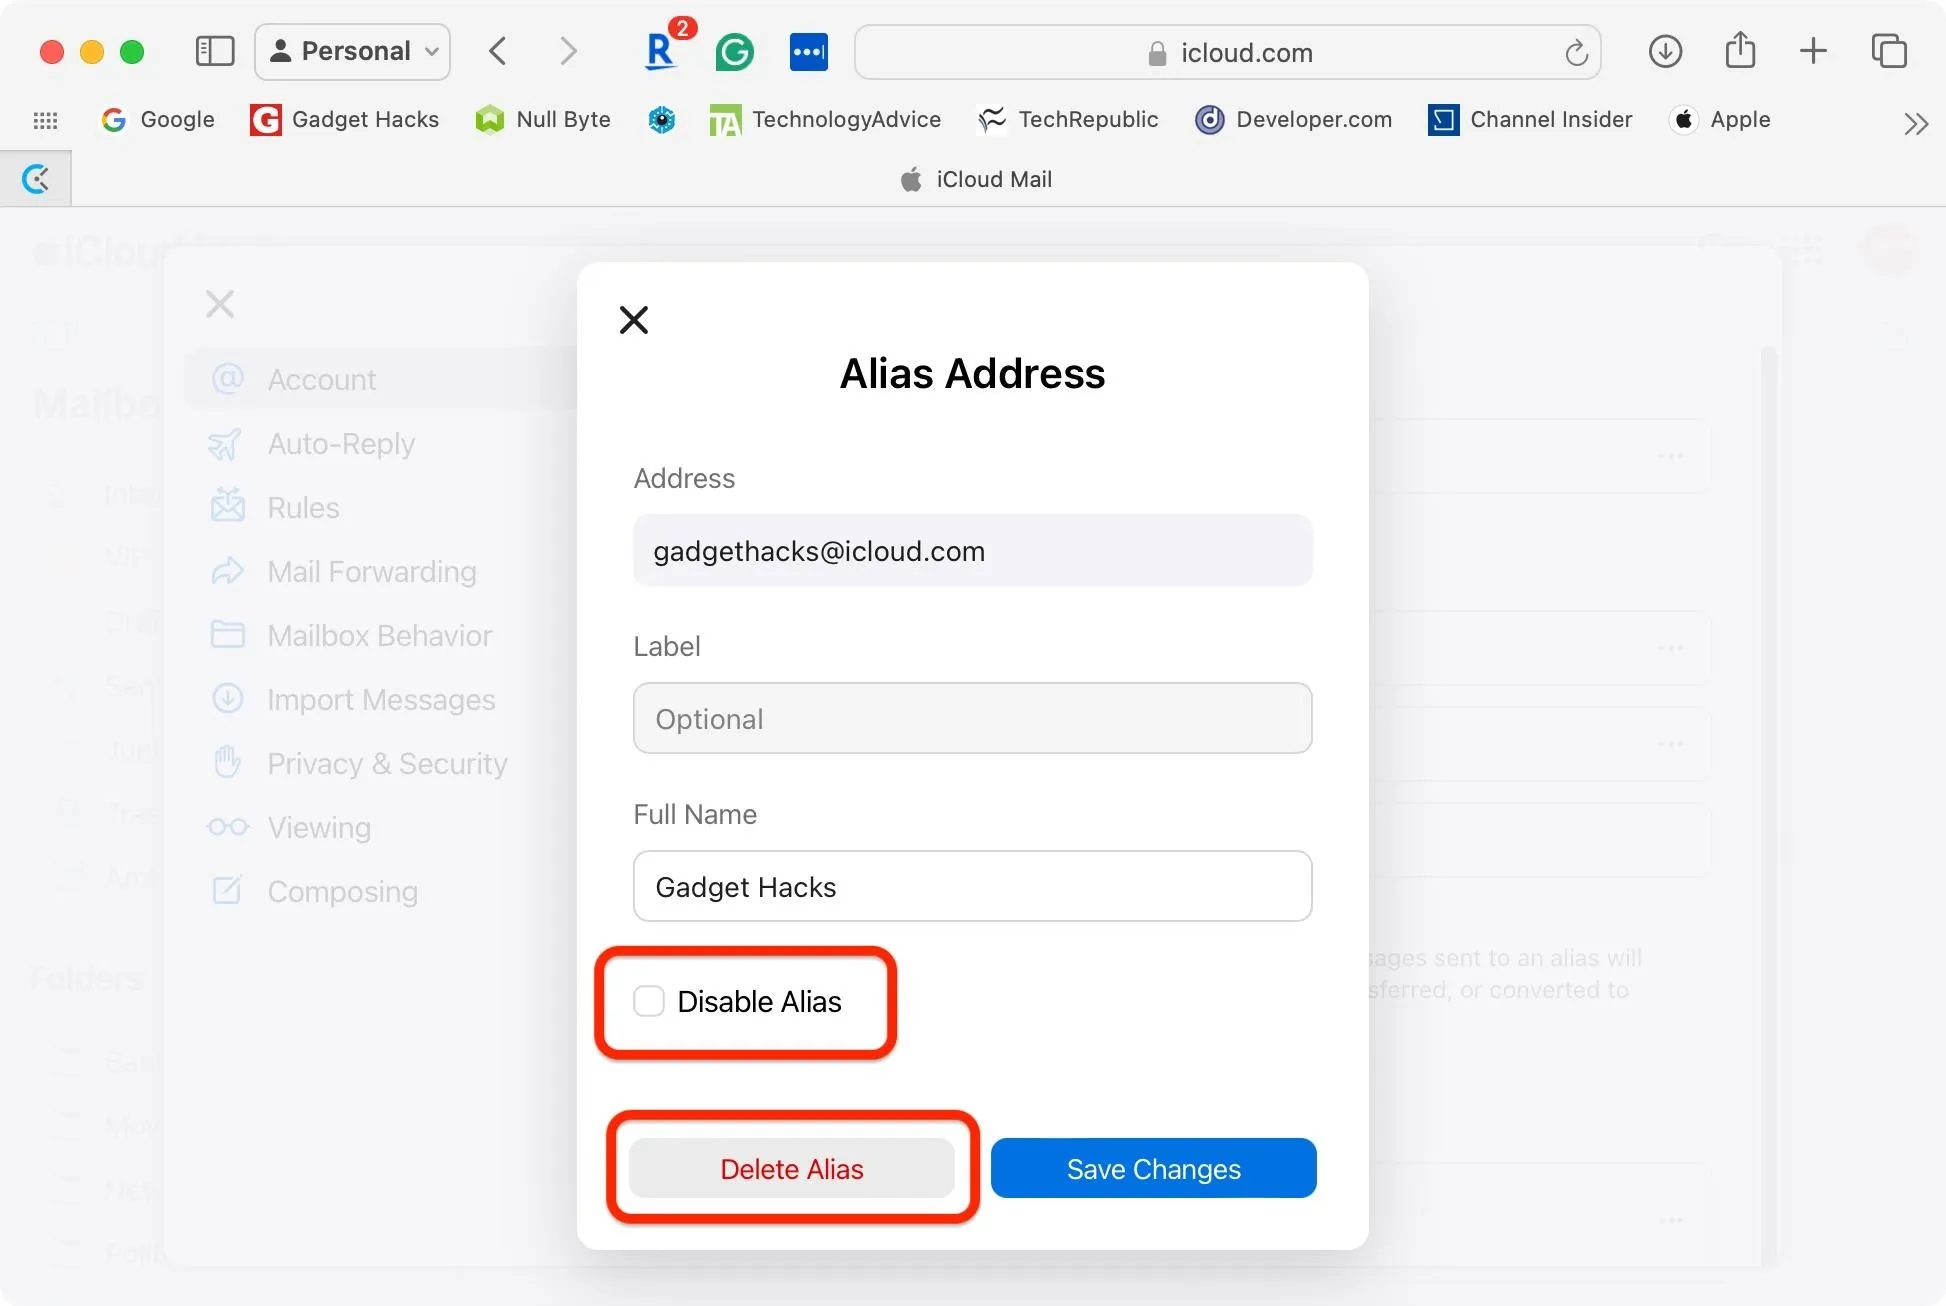
If you choose to delete it, hit the "Delete" button on the prompt to confirm you want to delete it permanently.

On Your iPhone or iPad
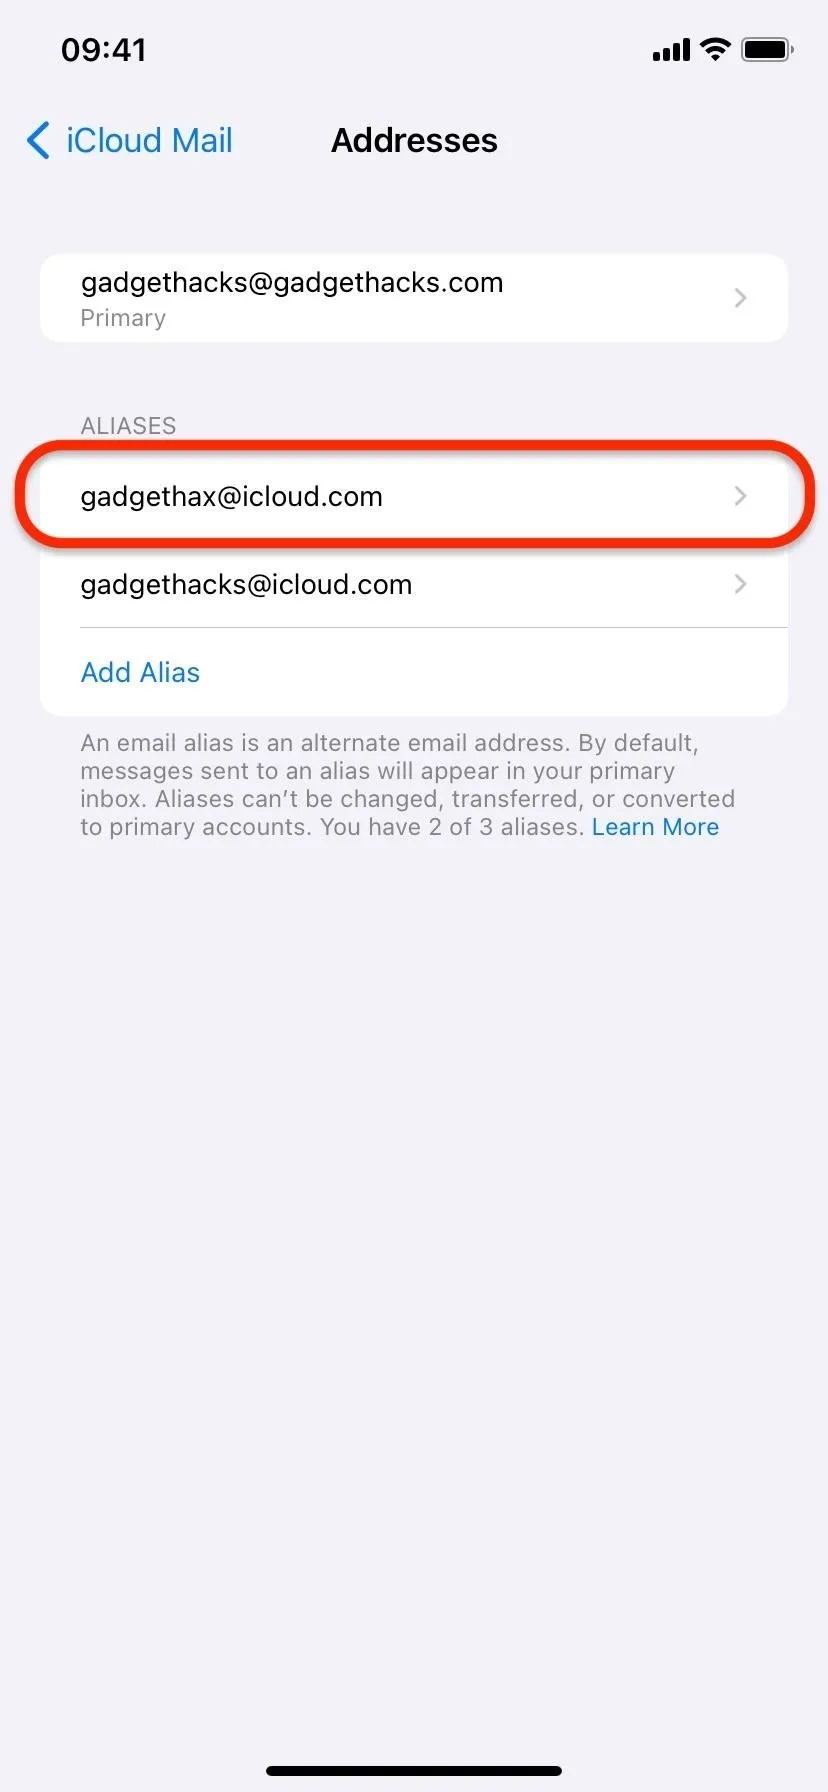
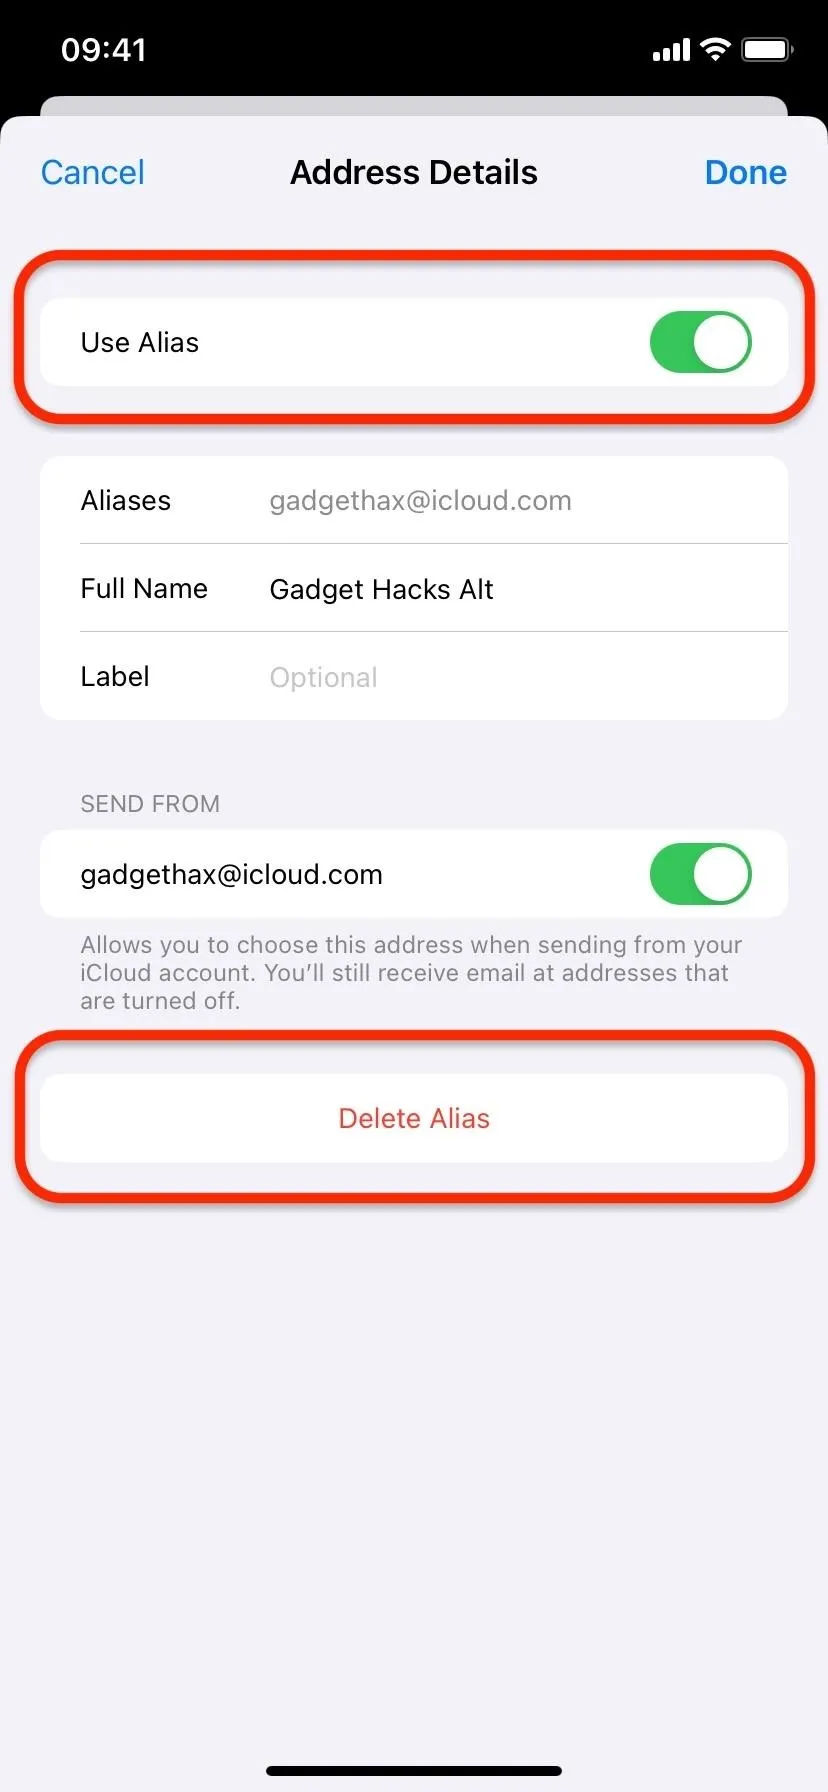
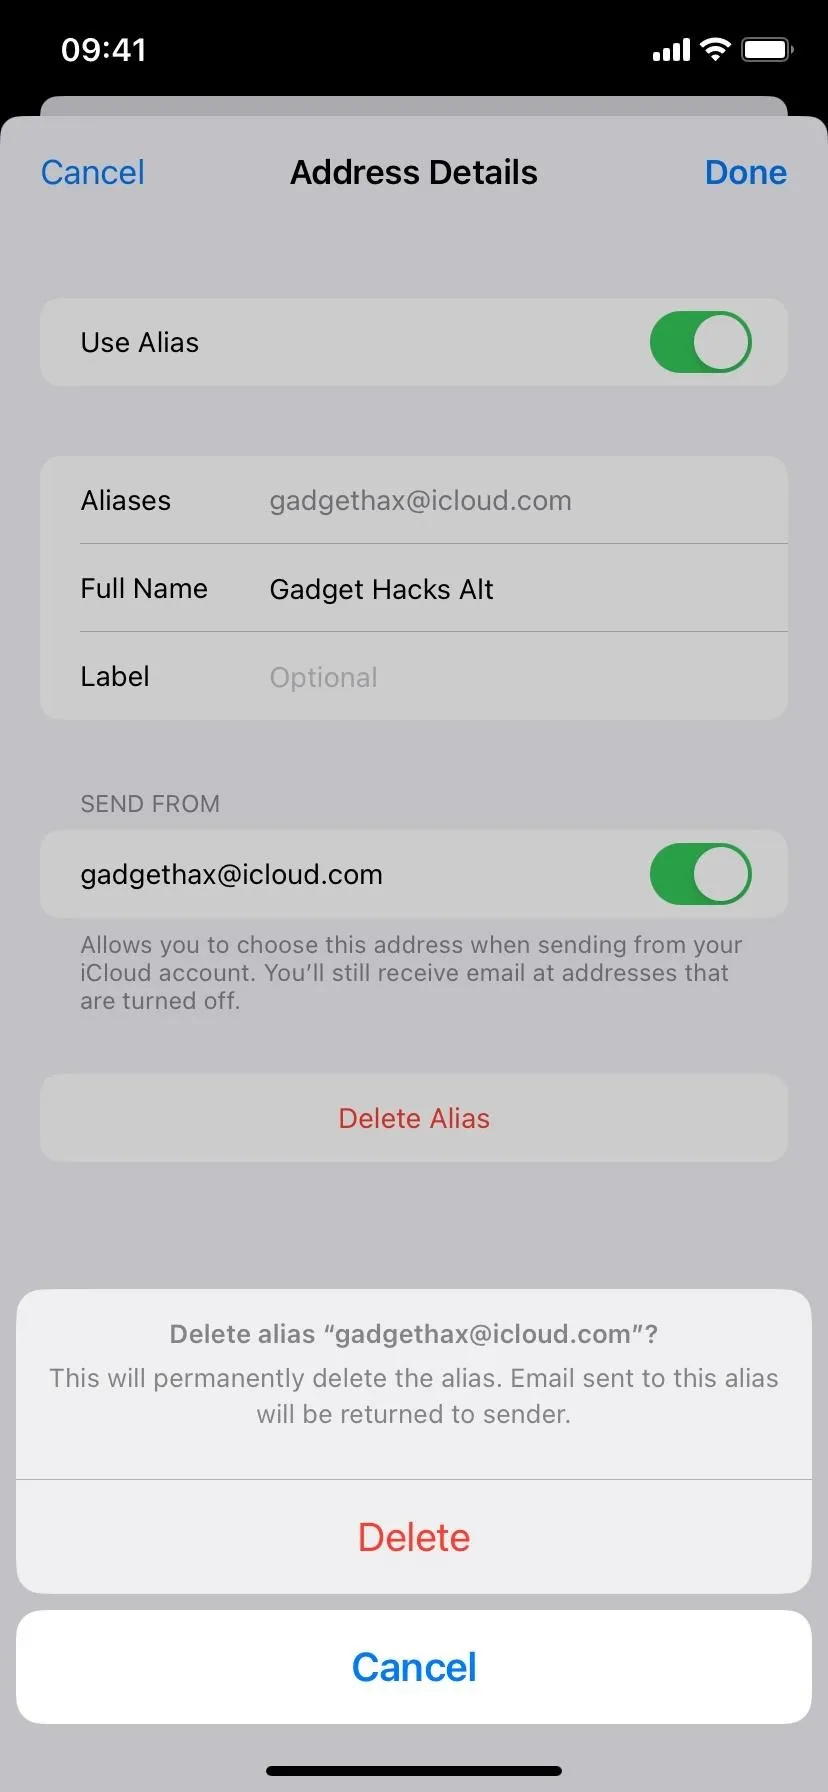
On iOS or iPadOS, open the Settings app, tap your name at the top, choose "iCloud," and then tap "iCloud Mail." Next, tap "Addresses" and select the alias in question. To pause or unpause the alias, toggle off or on the "Use Alias" box and hit the "Done" button. To delete it, hit the "Delete Alias" button, then the "Delete" button on the prompt to confirm you want to delete it permanently.
How to Send or Reply to Messages with Email Aliases
Many of us interact with our iCloud Mail account from macOS, iOS, iPadOS, iCloud.com, or a combination of the platforms. Fortunately, iCloud Mail aliases work with the Mail app on all these platforms to let you quickly reply to or send new messages.
First, ensure the iCloud Mail email addresses can be selected in the from: field. On iCloud.com, return to the Account settings and tap the option below Send From to show or hide aliases. On iOS or iPadOS, go back to the Addresses menu, select the alias, and toggle the switch below Send From on or off.
Now, you're ready to use the alias in full.
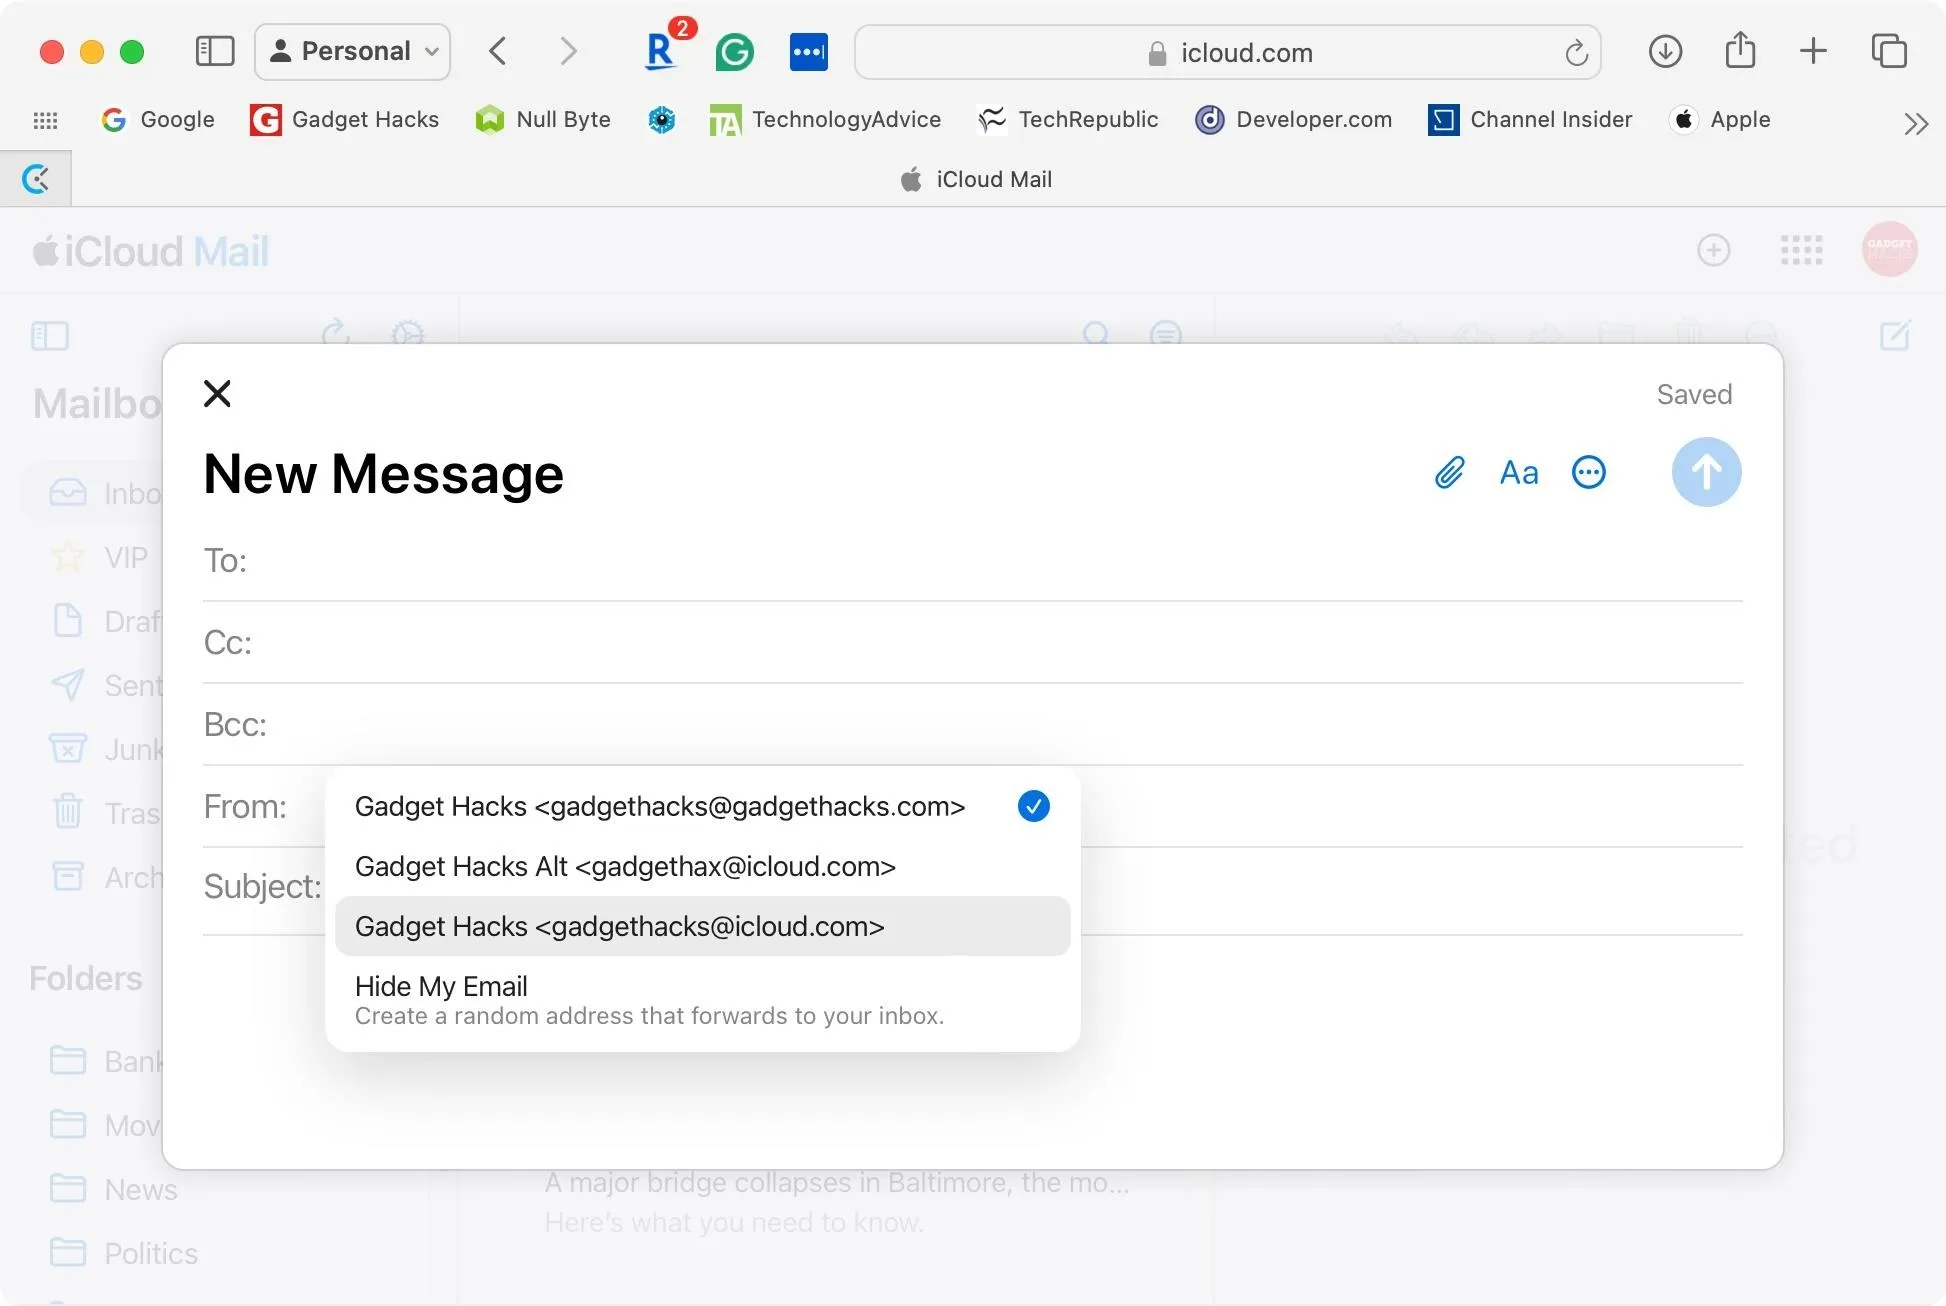
To create a new email message from an alias, start a new draft or reply to an email in the Mail app or on iCloud.com, select the from: field, then hit the current email address listed to open the drop-down menu to choose another email address. The alias will appear in this list, as well as any third-party email services you have connected to the Mail app. Choose your alias, then compose and send the message as you usually would.
How to Sort and Manage Your iCloud Mail Aliases
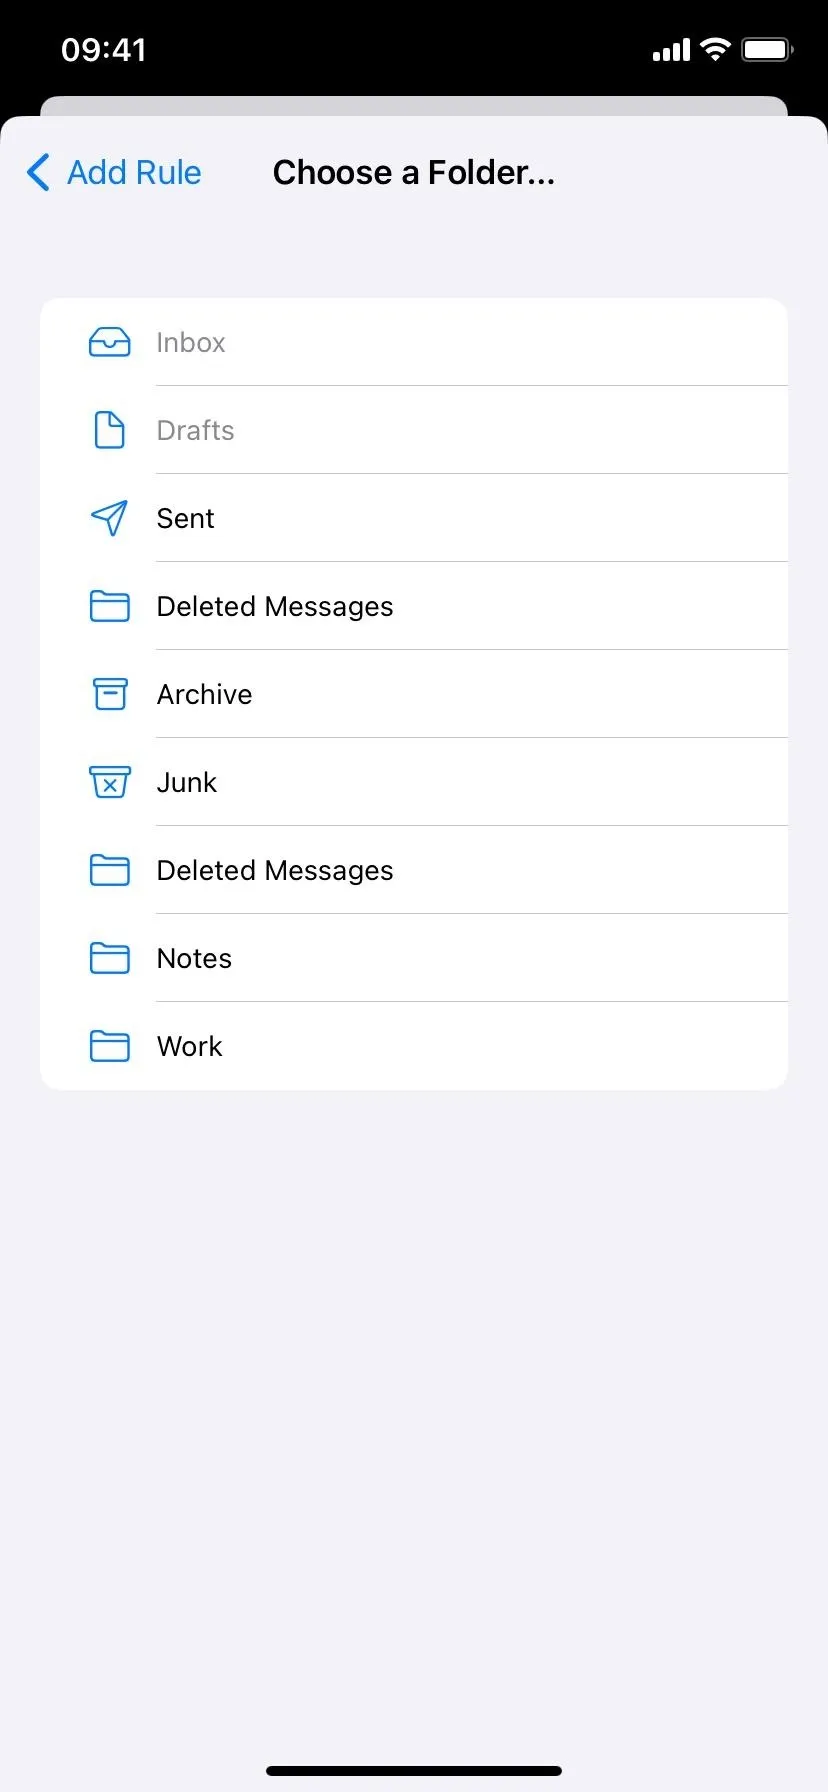
One cool feature of using an email alias is the ability to filter and sort your email by the alias address. All my iCloud Mail email aliases are set up to go straight to a subfolder, avoiding the inbox entirely. That way, they won't show up with all my personal emails, but they're still easy to find.
This feature can be handy for throwaway accounts, where you need to provide an email address to sign up for an account that you may use infrequently or once and wish to avoid spam. Simply create an alias, then set a rule to forward emails coming into it into the trash. But you're better off using iCloud Mail subaddresses or Hide My Email as disposable email addresses because you can make hundreds of them as necessary.
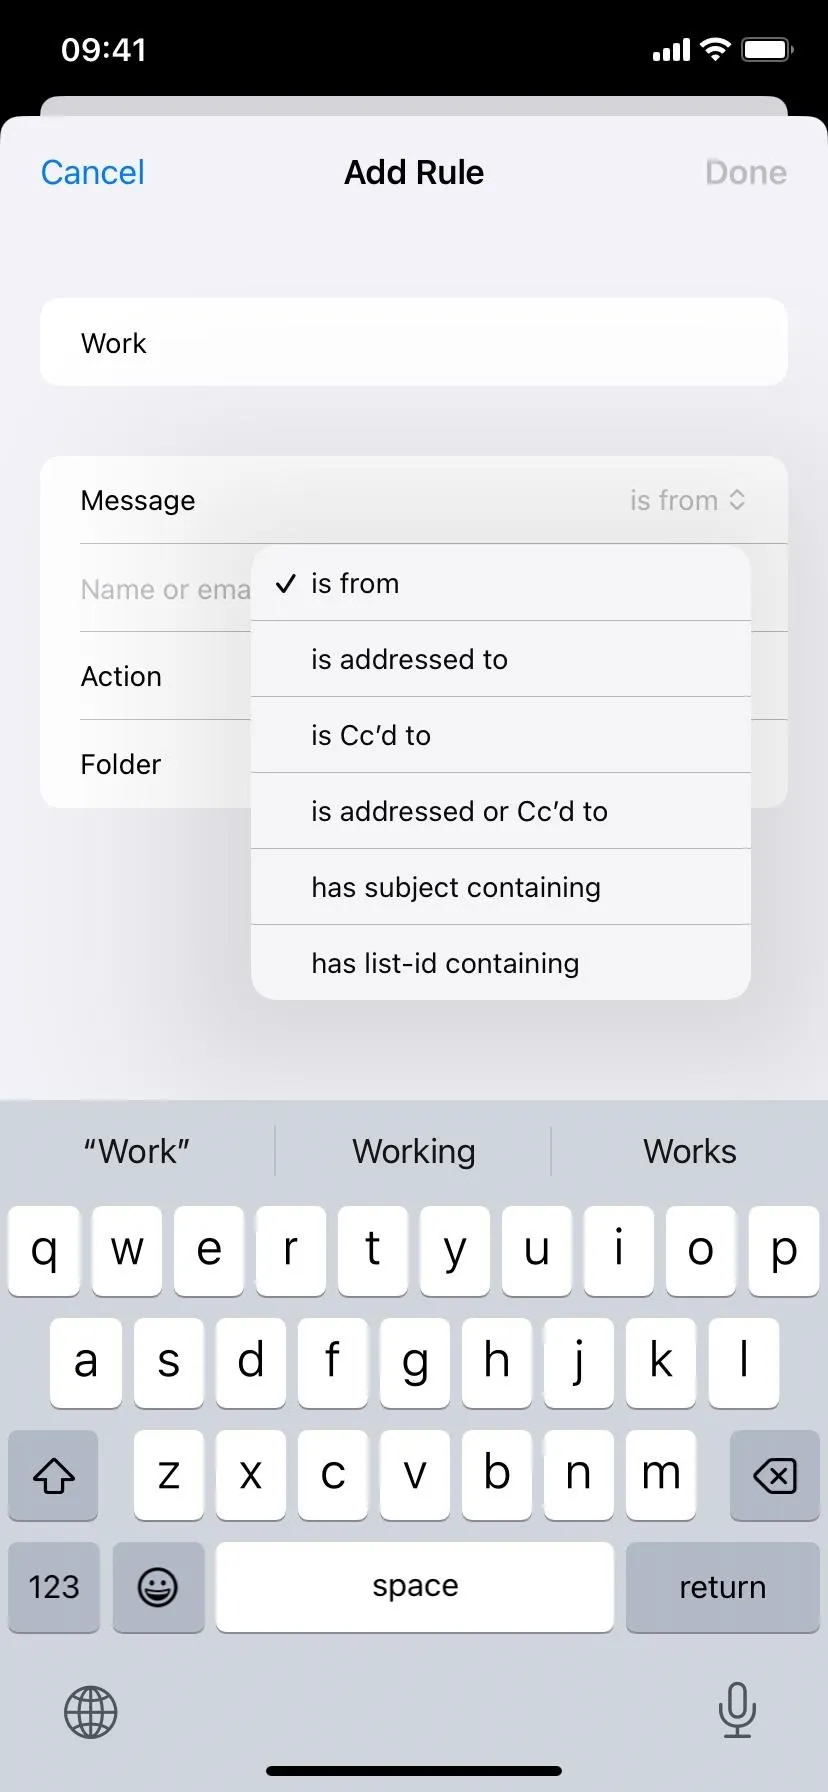
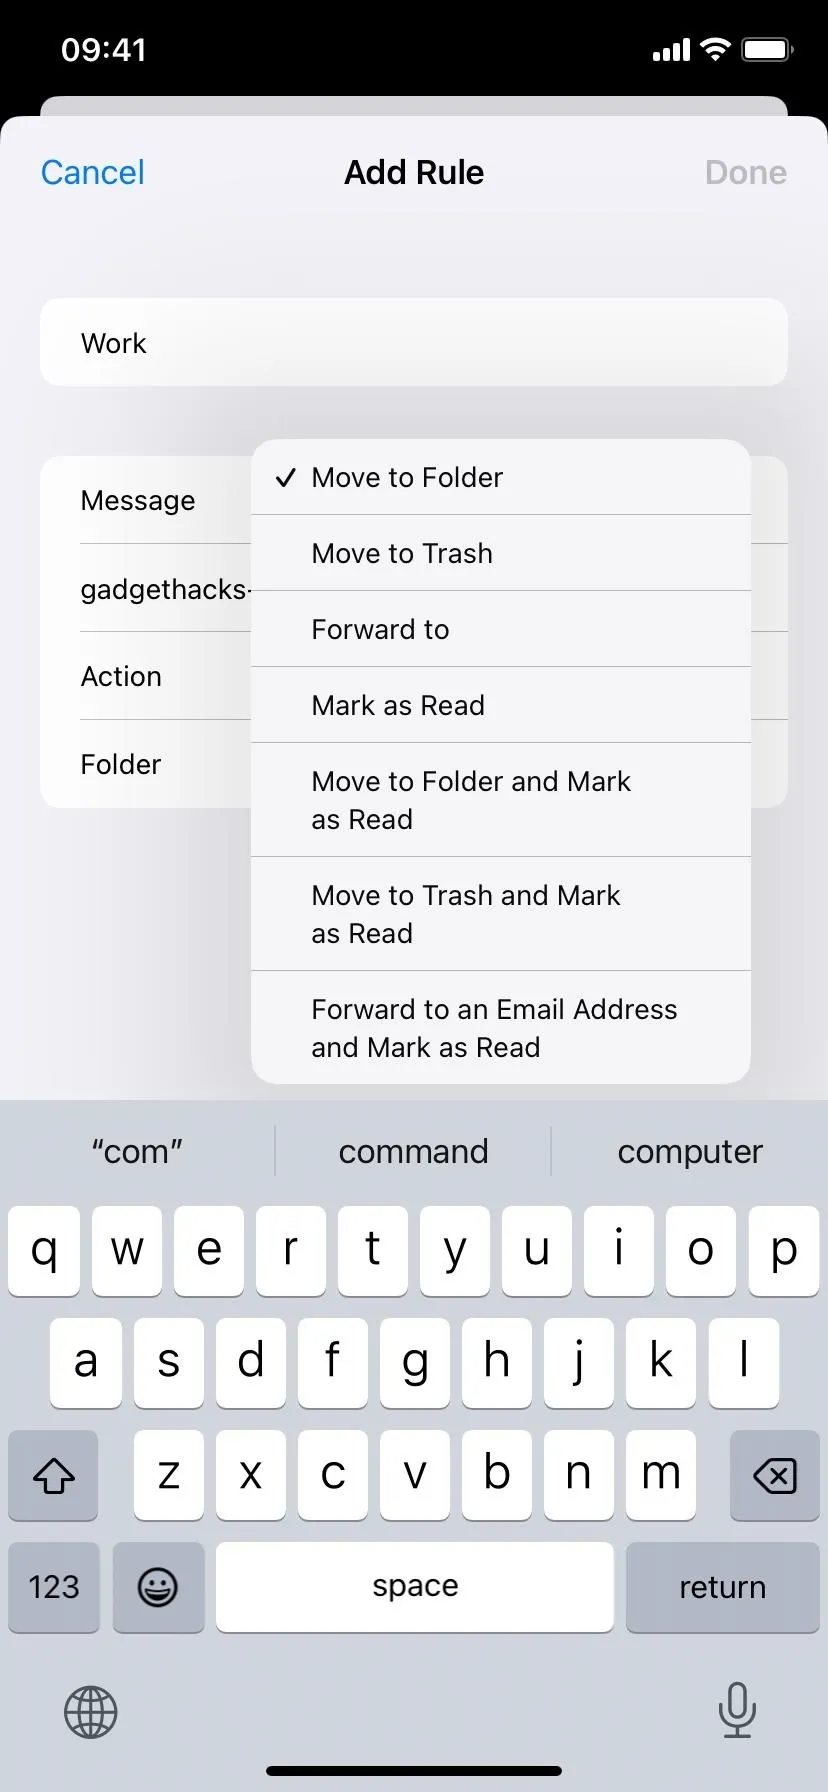
To see how to set up rules for your aliases, visit our guide on creating rules to filter iCloud Mail subaddresses, which follows the same process and works on iOS, iPadOS, and iCloud.com. Note that these rules are not to be confused with those you can set up directly in the Mail app on macOS, which only sync across Macs. You'll need to create rules from iOS, iPadOS, or iCloud.com to sync across all your iCloud-connected accounts.
Cover photo and screenshots by Justin Meyers/Gadget Hacks


Comments
Be the first, drop a comment!